E-commerce App 1
The Goals for this Example
Here we intend to create a web app that displays in a drop-down list the names of available products as
read in from a database. When the user clicks on a product name in the list, a new page of information
on that product is shown. The other main feature is that a consistent user interface is provided, with
the same header, footer, and navigation buttons on each page.
The Overall Design
- Look at the following picture and comments to get an overall view of the design.
Notice that this e-commerce app is for a fictitious software company called Br. David's Software.
The products are thus programs. You can, of course, substitute your own company with a different
line of products. Be sure that your proposed company can fit the simplifying
assumptions shown below. Also, each product needs to have a name, a brief description, a
price (which can be zero), a URL for where to download the product, and an optional URL for a
small image file of the product.
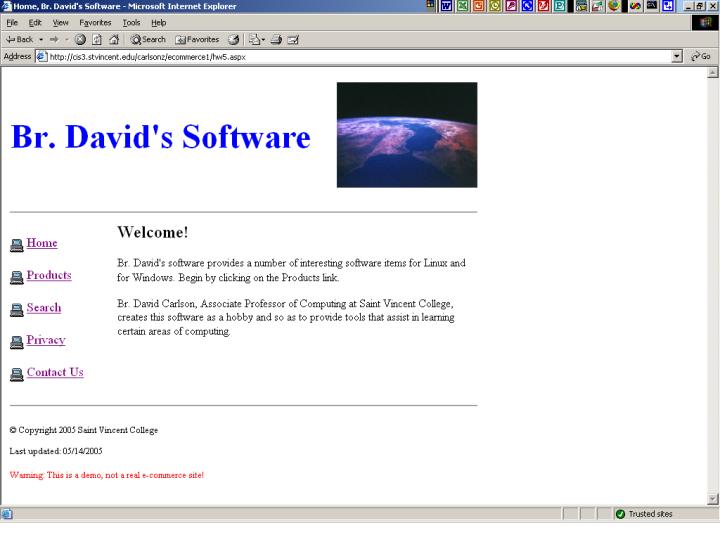
- Home page
- The home page gives a quick overview of the company and web site.
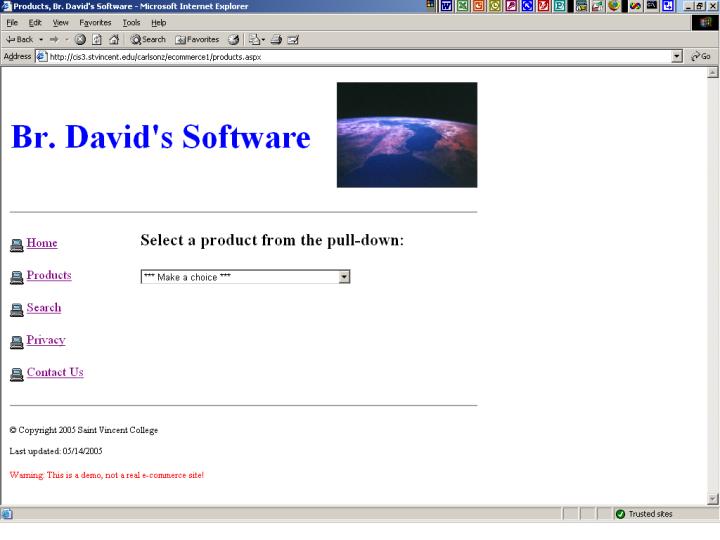
- Products page
- The user selects a product
by clicking on it in the drop-down list.
- This brings up a results page showing
the information on this product as retrieved from the database.
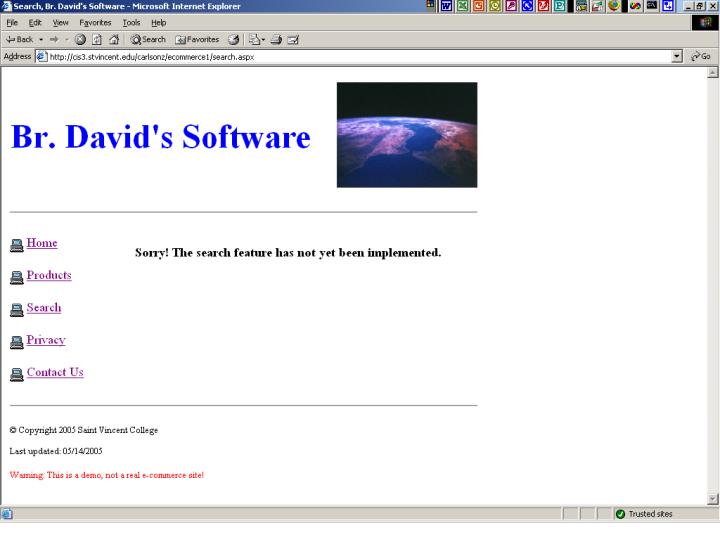
- Search page
- This page is just a place-holder. We will implement the search functionality
in a later example.
- Privacy page
- The company's privacy policy is provided here. For this simple web app, there is
hardly a need for this, but if we should grow this into a more complicated app that
collects user data, a good privacy policy would be expected.
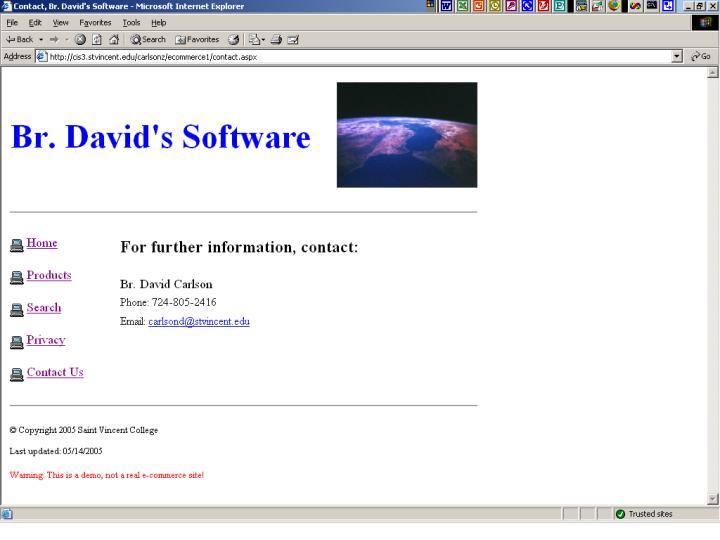
- Contact page
- This provides an email address and phone number.
- We make some simplifying assumptions to keep this web app relatively easy
to make. In later examples we will add some of the functionality that we omit at this point.
- Although prices may be listed for the products, no attempt will be made to arrange for payment.
- Users will obtain one product at a time so that no shopping cart is needed.
- Users will simply download each desired product. No mailing address or other user information
is thus needed.
- The number of products is small, and there is no need to group them by type, department, or
something similar. Also, the products have no variable attributes (such as size of a shirt,
color, etc.)
|
Creating the Web App
Make a New Web App
- For this web app, detailed directions will not be given for features covered in previous
examples. However, some links to these previous examples will be provided. New features
will be covered in greater detail.
- As usual, make a new project of type Visual Basic Project and having template
ASP.NET Web Application. In the location box put in a reasonable location such as
one of the following:
- https://cis3.stvincent.edu/studentc/ecommerce1
- http://cis2.stvincent.edu/studentc/ecommerce1
- We assume from here on that the folder name is ecommerce1.
- Change the name of the web form, WebForm1.aspx, to home.aspx or whatever you prefer.
- In this form's Properties, change the title to "Home, Br. David's Software".
- Save your work so far by using File, Save All.
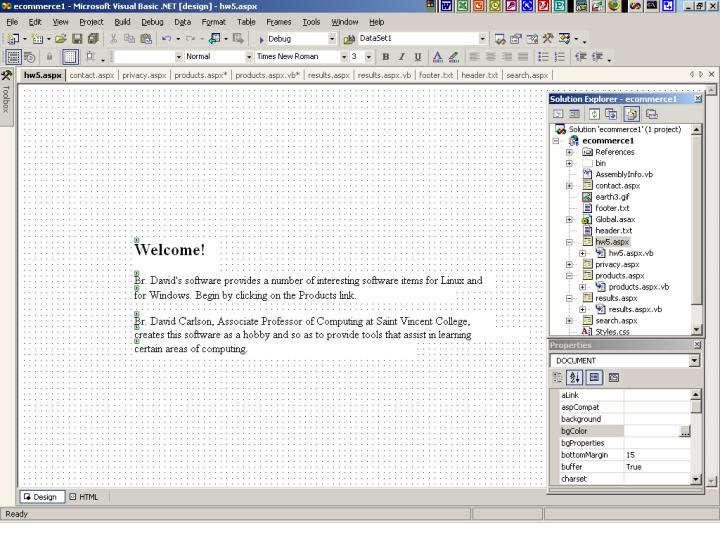
- As shown in this screen shot, all you put on this form are a few labels.
Note that they begin several inches from the top and a couple of inches from the left edge.
If you wish, you can copy the text for these labels from the following box:
|
Welcome!

Br. David's software provides a number  of interesting software items for Linux and
for Windows.  Begin by clicking on the Products link.

Br. David Carlson, Associate Professor of Computing at Saint Vincent College,
creates this software as a hobby and so as to provide tools that assist in learning
certain areas of computing.
|
- So where are the other items that appear on the home page? These are the items that all of the
pages have in common. These are put into separate files which are then included into each
web form. Here is how all of that is done:
- The main idea is to use a couple of tables to hold the common items to be displayed.
The table format helps to keep these items in a fixed spot on the screen.
- A simple table, created with HTML tags, can be set up as in this example:
<TABLE BORDER=1>

<TR>
<TH>Column Name</TH>
<TH>Data Type</TH>
<TH>Length</TH>
<TH>Allow Nulls</TH>
</TR>

<TR>
<TD>Username</TD>
<TD>char</TD>
<TD>8</TD>
<TD>no</TD>
</TR>

<TR>
<TD>Salary</TD>
<TD>money</TD>
<TD>8</TD>
<TD>no</TD>
</TR>

<TR>
<TD>Title</TD>
<TD>char</TD>
<TD>24</TD>
<TD>no</TD>
</TR>

</TABLE>
|
- When a browser renders this table, the result is a 2-dimensional grid that looks something like this:
| Column Name |
Data Type |
Length |
Allow Nulls |
| Username |
char |
8 |
no |
| Salary |
money |
8 |
no |
| Title |
char |
24 |
no |
- Even if you do not know HTML, you can easily figure out what the tags for a table mean.
TR is for a table row, TH is for a table header, and TD is for a table data item. Note
that closing tags begin with a /.
- Add a new file called header.txt to your project by right clicking your project name
(ecommerce1) in Solution Explorer, selecting Add and then Add New Item, and clicking on Text File.
Copy the following into your text file and save it:
<br>
<table width="680" border = "0">
<tr>
<td width="5"> </td> <!-- blank column for spacing purposes -->
<td><font size="7" color="blue"><b>Br. David's Software<b></font></td>
<td align="right" valign="center"><img src="earth3.gif"></td>
</tr>
<tr>
<td width="5"> </td> <!-- blank column for spacing purposes -->
<td colspan="2" width="675">
<br>
<hr>
<br>
</td>
</tr>
</table>
<table width="680" border="0">
<tr>
<td width="5"> </td> <!-- blank column for spacing purposes -->
<td width="130" valign="top"> <!-- column with navigation links -->
<a href="hw5.aspx">
<img src="http://cis.stvincent.edu/icons/comp.gray.gif" border="0" align="center"></a>
<font color="blue" size="4">
<a href="hw5.aspx">Home</a></font>
<br><br>
<a href="products.aspx">
<img src="http://cis.stvincent.edu/icons/comp.gray.gif" border="0" align="center"></a>
<font color="blue" size="4">
<a href="products.aspx">Products</a></font>
<br><br>
<a href="search.aspx">
<img src="http://cis.stvincent.edu/icons/comp.gray.gif" border="0" align="center"></a>
<font color="blue" size="4">
<a href="search.aspx">Search</a></font>
<br><br>
<a href="privacy.aspx">
<img src="http://cis.stvincent.edu/icons/comp.gray.gif" border="0" align="center"></a>
<font color="blue" size="4">
<a href="privacy.aspx">Privacy</a></font>
<br><br>
<a href="contact.aspx">
<img src="http://cis.stvincent.edu/icons/comp.gray.gif" border="0" align="center"></a>
<font color="blue" size="4">
<a href="contact.aspx">Contact Us</a></font>
<br><br>
</td>
<td width="10"> </td> <!-- blank column for spacing purposes -->
<td valign="top" width="535"> <!-- column for primary page content -->
|
- We will look at the overall effect of this HTML below. For the moment, let's look at
what some of the details of what the tags mean.
- You recognize some of the HTML tags used here. Others that we have not yet discussed include:
- <br> which is the break tag. This is used to go to skip to a new line.
- <hr> which is the horizontal rule tag. It puts a horizontal line across the web page.
- <img ...> tag. This is used to place an image on a web page. The image can be
specified by a filename or pathname on the server or by a URL to an image on another server.
The first of these is used like this
<img src="earth3.gif">
to display the picture of
the earth that you see on each page of this web app. (Feel free to choose your favorite
image, of course.) The second of these is used like this
<img src="http://cis.stvincent.edu/icons/comp.gray.gif" border="0" align="center">
to show an icon of a computer.
- <font ...> tag. This is used to specify properties of the font to use. One
example is
<font color="blue" size="4">
to specify blue and size 4 for the font to use up until the closing </font> tag.
- <a ...> anchor tag. There's more than one possible use for an anchor tag, but here
we use it to provide a clickable link to another web page (form) as in the example
<a href="hw5.aspx">Home</a>
where the text of the link is Home and the web page
the user is sent to is hw5.aspx.
- Also note that gives a space one pixel wide.
- Add a new file called footer.txt to your project by right clicking your project name
(ecommerce1) in Solution Explorer, selecting Add and then Add New Item, and clicking on Text File.
Copy the following into your text file and save it:
</td>
</tr>
<tr>
<td width="5"> </td> <!-- blank column for spacing purposes -->
<td colspan="3" width="675">
<hr>
<br>
<font size="2">
© Copyright 2005 Saint Vincent College
<br><br>
Last updated: 05/14/2005
</font>
<br><br>
<font color="red" size="2">
Warning: This is a demo, not a real e-commerce site!
</font>
</td>
</tr>
</table>
|
- There are no new HTML tags here.
- However, note the use of colspan="3" in the one td (table data) tag. This indicates that
this data item should span 3 columns. Contained in this data item are a horizontal rule,
the copyright notice, the date, and a warning note.
- The © produces the copyright symbol.
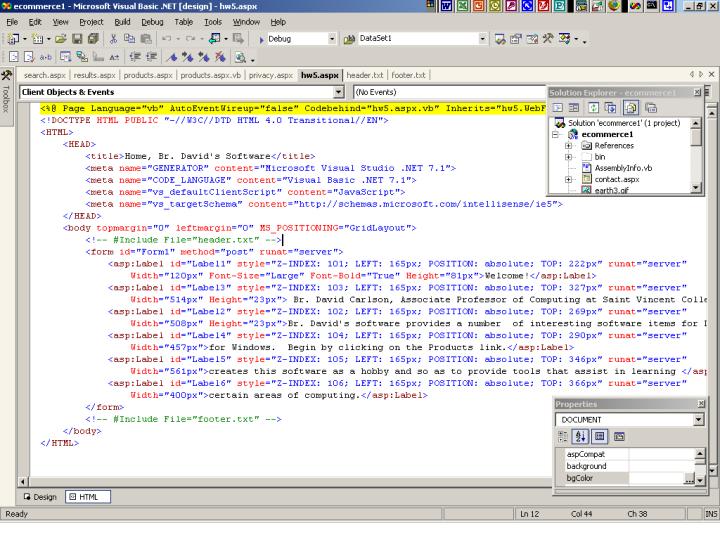
- Now we need to include the header and footer in the HTML for your web form.
- Begin by clicking the HTML button at the bottom of your home page web form.
- The header is included by changing the section of HTML from the body tag to the form tag
so that it looks like the following;
<body topmargin="0" leftmargin="0" MS_POSITIONING="GridLayout">
   <!-- #Include File="header.txt" -->
   <form id="Form1" method="post" runat="server">
|
- You can also check this picture.
- In a similar way, include your footer.txt file between the closing form tag and the closing
body tag like this:
   </form>
   <!-- #Include File="footer.txt" -->
</body>
|
- Save your work so far by using File, Save All.
- Build your application.
- Examine your application in a web browser to check that the home page displays properly.
- What is the overall plan that these include files have given us?
- If you look at the HTML for the home page web form and the HTML in the 2 include files,
you will see that overall we get a web page enclosed in an opening <html> and
closing </html> tags.
- Near the top there is a section enclosed in <head> and </head> tags. This
contains the title and a few other items.
- Thanks to the header.txt include file, the body section of the web form starts
out with a table of width 680. The table is used to get items placed where we want
them on the page and to do so consistently across all of the pages of this web app -- just
by using the same 2 include files.
- This first table contains 2 rows. Each row begins with a table data item containing 5 spaces.
This is used so that the visible items do not begin crammed up against the left margin.
- The first row has 2 other table items: Br. David's Software and an image of the earth.
- The second row has the same table data item of 5 spaces. This is followed by one table data
item that spans 2 columns. It contains a horizontal line (rule).
- Thus the first table gives the layout for the top of each web page in the appliation.
- The second table has the same width and also has 2 rows.
- The first row begins with a table data item of 5 spaces. This is followed by a table
data item of width 130 pixels that contains the navigation buttons and links. That is,
this item contains the 5 images and links. The <br> tag is used several times to
skip to a new line so that these navigation items are separated by some vertical spacing.
- The next table data item in the first row contains 10 spaces. It is used to separate the
navigation items from the primary page content which is to follow.
- The next table data item is an empty one of width 535 pixels (the remaining amount for the
given table width). This is just a place holder. We put our page content in this location
by guessing the correct location on each web form. If we get it wrong, we just drag the
content items up, down, left, or right so that they fit in this location correctly.
- Note that this table item has its opening tag in header.txt, but its closing tag is
found in footer.txt.
- By looking at footer.txt, we see that the second (and last) row of the second table
starts with a table data item of 5 spaces and ends with a table data item that spans the
remaining 3 columns.
- This wide data item contains a horizontal line (rule) which begins the bottom of each web page.
- Following this are the copyright line, the "last updated" line, and the warning line that
says that this is not a real e-commerce site.
- As we see in the HTML view of the web form, after footer.txt we simply have the closing tags
for the body of the web page and for the web page itself.
- Using tables to get consistent spacing is a common technique.
SQL Server
- Next, let's set up the data for our e-commerce site.
- We assume that you still have a logon for SQL Server and have access to the database
you used in the previous examples.
In our example here the name used for the database is Summer2003.
- Start SQL Server Enterprise Manager and find your particular database within it.
- Create a new table called Prod5 (or whatever you wish).
- See how we did this in a previous web app
if you need a reminder of how this was done.
- Set up the new table's fields as in this screen shot and as
shown below.
|
| Column Name |
Data Type |
Length |
Allow Nulls |
| ProductNum |
smallInt |
2 |
no |
| ProductName |
varchar |
50 |
no |
| ProductDescription |
varchar |
280 |
no |
| ProductImageURL |
varchar |
80 |
yes |
| ProductPrice |
money |
8 |
no |
| ProductDownloadURL |
varchar |
80 |
yes |
- Right click at the front of the ProductNum field and then click on the key button
in order to set this to be the primary key field.
- As seen in the above screen shot, also change Identity to yes for the ProductNum field,
with seed 1 and increment 1. This is so that each time you add a new row of data,
the ProductNum value will automatically go up by 1.
- The meaning of each field is fairly obvious. The ProductImageURL is used to supply a link
to a small image of the product. The ProductDownloadURL is a link to the software to download
or to the page from which the software can be downloaded.
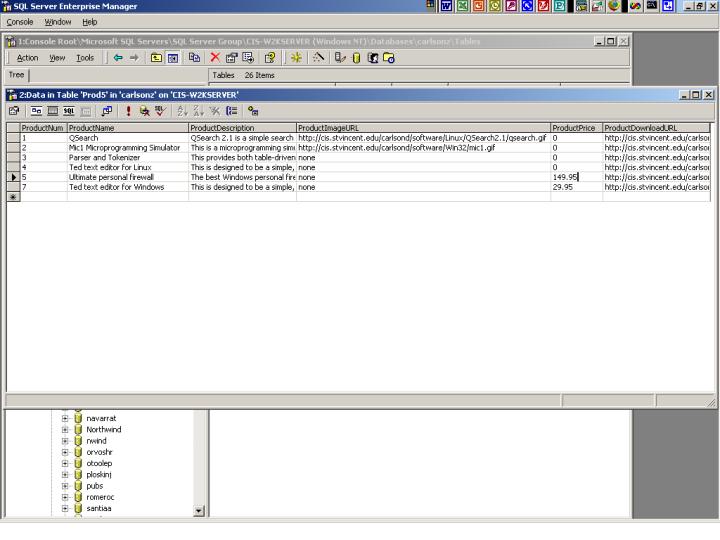
- Add the following data to this table. (Check this screen shot
to see this. You can also refer back to how we added data to a table in this
previous web app.)
You can, of course, use your own data instead of that shown here.
| ProductNum |
ProductName |
| 1 |
QSearch |
| 2 |
Mic1 Microprogramming Simulator |
| 3 |
Parser and Tokenizer |
| 4 |
Ted text editor for Linux |
| 5 |
Ultimate personal firewall |
| 7 |
Ted text editor for Windows |
|
| ProductDescription |
ProductImageURL |
| QSearch 2.1 is a simple search engine for web pages, consisting of a shell script, C++ code for a search program, a small C program, and a couple of html files. It is intended for use on Linux/Unix systems that allow CGI scripts and that have the uncgi program installed. |
http://cis.stvincent.edu/carlsond/software/Linux/QSearch2.1/qsearch.gif |
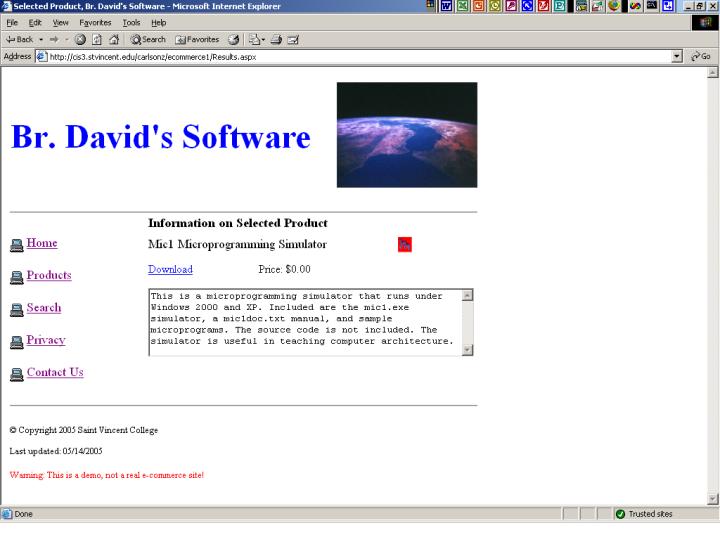
| This is a microprogramming simulator that runs under Windows 2000 and XP. Included are the mic1.exe simulator, a mic1doc.txt manual, and sample microprograms. The source code is not included. The simulator is useful in teaching computer architecture. |
http://cis.stvincent.edu/carlsond/software/Win32/mic1.gif |
| This provides both table-driven parser and tokenizer programs that run under at the Windows command prompt (DOS box). These are suitable for an introductory course dealing with programming languages, finite state machines, etc. |
none |
| This is designed to be a simple, easy-to-use editor for Linux, with most operations available at the press of a function key. Both the executable and C source code are included. |
none |
| The best Windows personal firewall. However, this is vaporware; the product does not exist. Still, feel free to send in your money! You won't get anything for it! |
none |
| This is designed to be a simple, easy-to-use editor for Windows, with most operations available at the press of a function key. It existed at one time but exists no more. If you send your money, you will get nothing in return! |
none |
|
| ProductPrice |
ProductDownloadURL |
| 0 |
http://cis.stvincent.edu/carlsond/software/Linux/QSearch2.1/search.tar.gz |
| 0 |
http://cis.stvincent.edu/carlsond/software/Win32/mic1.zip |
| 0 |
http://cis.stvincent.edu/carlsond/software/dos/parser.zip |
| 0 |
http://cis.stvincent.edu/carlsond/software/Linux/ted.tar.gz |
| 149.95 |
http://cis.stvincent.edu/carlsond/software/software.html |
| 29.95 |
http://cis.stvincent.edu/carlsond/software/software.html |
- Note that we use "none" for the ProductImageURL if we have no image.
- You may also have noticed that there is no ProductNum 6. This probably happened because
a product was deleted from the table when this example data was being developed.
Easy Pages
- Let's do the 3 easy web pages next.
- Add a web form called search.aspx to your web project.
- In this form's Properties, change the title to "Search, Br. David's Software".
- Place a single label on it containing the text
"Sorry! The search feature has not yet been implemented."
- Position this label so that it will appear in the page content region as defined by
the tables in our include files header.txt and footer.txt.
- Go to HTML view for this web form and include the header.txt and footer.txt in the exact
same locations we used before for the home page.
- Next, add a web form called privacy.aspx to your web project.
- In this form's Properties, change the title to "Privacy, Br. David's Software".
- Place 2 labels on this form. The first should contain the text "Privacy Policy" in medium, bold.
- The other label should be placed below the first and contain the text (in small, bold)
"Our policy is never to sell or give to others data that you provide."
- Position these labels so that it will appear in the page content region.
- Go to HTML view for this web form and include the header.txt and footer.txt in the exact
same locations we used for the last 2 web forms.
- Now add a web form called contact.aspx to your web project.
- In this form's Properties, change the title to "Contact, Br. David's Software".
- Place 4 labels on this form in our usual page content region.
- We want the results to look like this.
- The first label contains the text "For further information, contact:" in large, bold.
- The next label contains "Br. David Carlson" in medium font.
- The third label contains "Phone: 724-805-2416" in small font.
- The last label contains
"Email: <A HREF="mailto:carlsond@stvincent.edu">carlsond@stvincent.edu</A>
in small font.
- Go to HTML view for this web form and include the header.txt and footer.txt in the exact
same locations we used for the other web forms.
- In Visual Studio do File, Save All.
- Build your web app.
- Then test it in a browser to see that the pages created thus far work reasonably.
|
Products Page
- Add a web form called products.aspx.
- Change its title to "Products, Br. David's Software".
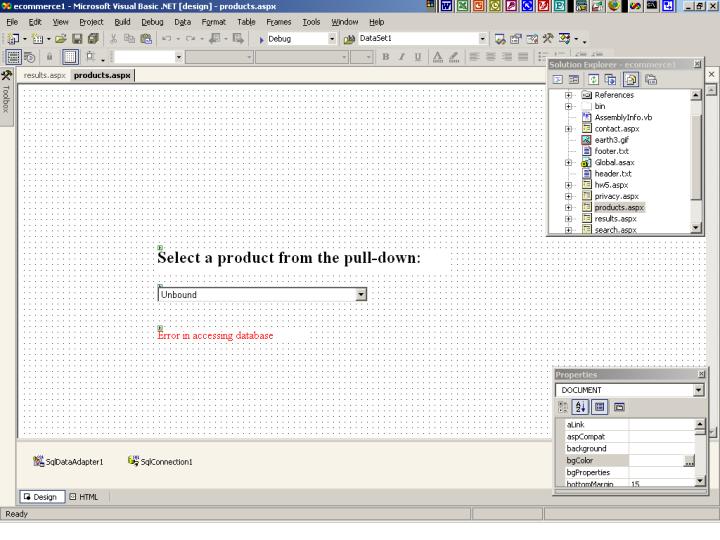
- We want to set up this form as shown in this screen shot of the
products page or in this view of the form in Visual Studio.
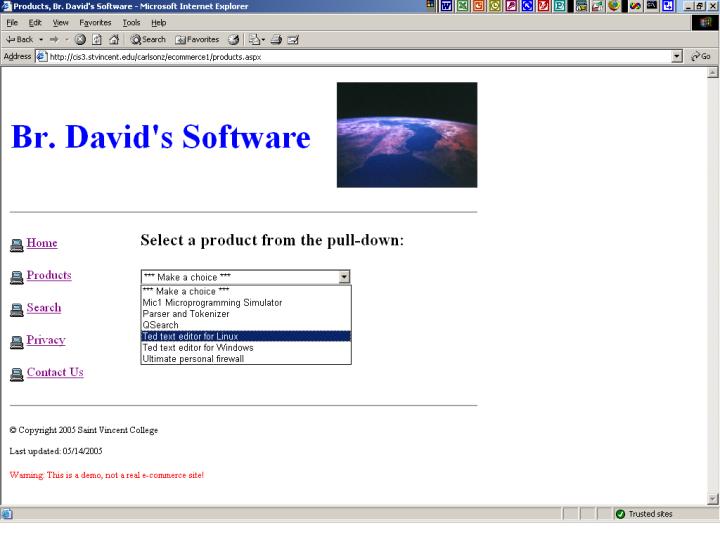
- The content area begins with a label showing "Select a product from the pull-down:" in large and bold.
- Below this add a drop-down list and change its ID to ProductList.
- Set the AutoPostBack property of ProductList to True so that a postback will happen when the user
selects an item from the list.
- Below this place a label that says "Error in accessing database" in red and small.
- Change the ID of this label to ErrorLabel and set the Visible property to False.
- Go to HTML view for this web form and include the header.txt and footer.txt in the exact
same locations we used for the other web forms.
|
The DataAdapter and Stored Procedure
- Add an SQLDataAdapter to the products.aspx web form.
- We will use this data adapter and its stored procedure to obtain from the database
the list of products to display in the drop-down list.
- Since you have created similar stored procedures before, we do not give detailed directions
here. Refer to the DataReader example if you need help.
- Set up your stored procedure so that it is named SelectProductName and so that it
selects the ProductName column of the Prod5 table that we created above. Also put the
data in ascending order by ProductName.
- Do NOT generate insert, delete, or update stored procedures to go along with this one.
- When finished, your stored procedure should look like the following:
|
CREATE PROCEDURE studentc.SelectProductName
AS
    SET NOCOUNT ON;
SELECT ProductName FROM dbo.Prod5 ORDER BY ProductName
GO
|
- Remember to go to SQL Server Enterprise Manager and give the SQL or IWAM account Exec access
to this stored procedure. (Use whatever fits your server configuration.)
- In the Properties window for your new data adapter, expand the SelectCommand field.
Replace what is in the CommandText field with yourid.SelectProductName.
(Of course, fill in your user ID in place of yourid.) Say Yes and Yes to the questions asked.
- In the Properties window for the data adapter, try out the Preview Data link to see if your
stored procedure is working.
- In Visual Studio do File, Save All.
The products.aspx.vb Code-Behind File
- Click on the + to show the code inside of the "Web Form Designer Generated Code" region.
- Find the section of code that sets up the various protected fields.
- Add the following line so that we have a data reader available:
Protected dReader As System.Data.SqlClient.SqlDataReader
- Adjust the Page_Load procedure so that it looks as follows:
Private Sub Page_Load(ByVal sender As System.Object, ByVal e As System.EventArgs) _
    Handles MyBase.Load

    'Put user code to initialize the page here
    If Not IsPostBack Then
        Try
            ProductList.Items.Add("*** Make a choice ***")
            SqlConnection1.Open()
            dReader = SqlDataAdapter1.SelectCommand.ExecuteReader
            While (dReader.Read())
                ProductList.Items.Add(dReader.GetString(0))
            End While
        Catch exception As System.Data.SqlClient.SqlException
            ErrorLabel.Visible = True
        Catch exception As Exception
            ErrorLabel.Visible = True
        Finally
            SqlConnection1.Close()
        End Try
    Else   ' Postback case:
        Session.Add("ProductSelected", ProductList.SelectedItem.Text)
        Response.Redirect("results.aspx")
    End If
End Sub
|
- As you can see, the above code uses a DataReader to populate the drop-down list with the
names of the products read (by our stored procedure) from the database.
- If a user clicks on a product in the drop-down list, a postback happens. In this case
we use session state to keep track of the name of the product and redirect to another page,
the results.aspx form.
- Save all of your files before going on.
The Results Page
- Add a new web form to your project and name it results.aspx.
- Change its title to "Selected Product, Br. David's Software".
- We want to set up this form as shown in this screen shot of the
results page or in this view of the form in Visual Studio.
- There should be a label containing "Information on Selected Product" in medium and bold.
- Underneath this put a label in medium, but no bold, with nothing in its Text field. We will
fill this in with the name of a product in the code-behind file.
- Also set its Visible property to False and its ID to ProductNameLabel.
- Underneath this put a hyperlink, which you copy from the WebForms section of the Toolbox.
- Change the ID of this hyperlink to DownloadHyperLink, font small, Text "Download", and
Visible set to False.
- To the right of this put a label with ID PriceLabel. Use font small and set Visible to False.
- To the right of this drag an image control from the WebForms section of the Toolbox. Be sure
to get an Image and not an ImageButton.
- Change the ID of this Image to ProductImage and make it big enough to hold a small icon or image.
Also set the Visible property to False. The code-behind file will fill in the ImageURL if we
have an image for the given product.
- Below all of these items put a TextBox and change its ID to ProductDescriptionBox.
You can change the ReadOnly property to True if you want to prevent the user from trying
to change what appears in this box.
- Also change the Visible property for this box to False and the TextMode property to Multiline (so
that the description will not show up as one long line).
- Finally, put a label below this containing the text "Error in accessing database" in small and red.
Change the ID to ErrorLabel and set the Visible property to False.
- Go to HTML view for this web form and include the header.txt and footer.txt in the exact
same locations we used for the other web forms.
- Save all of your files before proceeding further.
|
Another DataAdapter and Stored Procedure
- Add an SQLDataAdapter to the results.aspx web form.
- We will use this data adapter and an associated stored procedure to look up the data for the selected
product.
- Since you have created similar stored procedures before, we do not give detailed directions
here. Refer to the user input example if you need help.
- Set up your stored procedure so that it is named SelectByName and so that it
selects all of the fields except ProductNum from the Prod5 table's row that has the ProductName
matching that sent in as parameter TargetName.
- Do NOT generate insert, delete, or update stored procedures to go along with this one.
- When finished, your stored procedure should look like the following:
|
CREATE PROCEDURE studentc.SelectByName
(
    @TargetName varchar(50)
)
AS
    SET NOCOUNT ON;
SELECT ProductName, ProductDescription, ProductImageURL, ProductPrice, ProductDownloadURL
FROM dbo.Prod5 WHERE (ProductName = @TargetName)
GO
|
- Remember to go to SQL Server Enterprise Manager and give the SQL or IWAM account Exec access
to this stored procedure. (Use whatever fits your server configuration.)
- In the Properties window for your new data adapter, expand the SelectCommand field.
Replace what is in the CommandText field with yourid.SelectByName.
(Of course, fill in your user ID in place of yourid.) Say Yes and Yes to the questions asked.
- In the Properties window for the data adapter, try out the Preview Data link to see if your
stored procedure is working.
- In Visual Studio do File, Save All.
The results.aspx.vb Code-Behind File
- Look at the code inside of the "Web Form Designer Generated Code" region.
- Add the following line in the usual location:
Protected dTable As New DataTable
- Adjust the Page_Load procedure so that it looks as follows:
|
Private Sub Page_Load(ByVal sender As System.Object, ByVal e As System.EventArgs) _
    Handles MyBase.Load

    'Put user code to initialize the page here
    Dim Temp As String
    Dim Price As Decimal

    ProductNameLabel.Visible = False
    ErrorLabel.Visible = False
    ProductImage.Visible = False
    DownloadHyperLink.Visible = False
    PriceLabel.Visible = False
    ProductDescriptionBox.Visible = False

    If Not IsPostBack Then
        If Session.Count = 0 Then   ' No session items were supplied.
            ErrorLabel.Visible = True
        Else
            Try
                SqlConnection1.Open()
                SqlDataAdapter1.SelectCommand.Parameters("@TargetName").Value = _
                    Session("ProductSelected")
                SqlDataAdapter1.Fill(dTable)

                If dTable.Rows.Count = 0 Then
                    ErrorLabel.Visible = True
                Else
                    ProductNameLabel.Text = dTable.Rows.Item(0).Item(0)
                    ProductNameLabel.Visible = True
                    ProductDescriptionBox.Text = dTable.Rows.Item(0).Item(1)
                    ProductDescriptionBox.Visible = True
                    Temp = dTable.Rows.Item(0).Item(2)
                    If Not Equals(Temp, "none") Then
                        ProductImage.ImageUrl = Temp
                        ProductImage.Visible = True
                    End If
                    Price = dTable.Rows.Item(0).Item(3)
                    PriceLabel.Text = "Price:  " & String.Format("{0:C}", Price)
                    PriceLabel.Visible = True
                    DownloadHyperLink.NavigateUrl = dTable.Rows.Item(0).Item(4)
                    DownloadHyperLink.Visible = True
                End If
            Catch exception As System.Data.SqlClient.SqlException
                ErrorLabel.Visible = True
            Catch exception As Exception
                ErrorLabel.Visible = True
            Finally
                SqlConnection1.Close()
            End Try
        End If
    End If
End Sub
|
- The main goal of this code is to use the data adapter and stored procedure just created above
so as to get the data on the selected product. This data is put into a DataTable. Then, instead
of displaying this data in a data grid as usual, we display it in the various labels, the text
box, image, etc. on the results.aspx web form.
- This section of code starts off by making sure that various labels, the description box,
the image, etc. are not visible. The code will turn the Visible property when we know that
we have something we want to display in them.
- The code only tries to get data from the database if there is no postback and if something
(hopefully the product name) is available in the session state.
- The product name is retrieved from the session state and plugged in as the value of the
@TargetName parameter to the stored procedure.
- The results of the stored procedure's query are placed into the DataTable named dTable.
- If the number of rows in dTable is 0, then an error label is displayed.
- To see how we get at the data in dTable, let's look at ProductDescription as an example.
We use
dTable.Rows.Item(0).Item(1).
- dTable.Rows.Item(0) gives the first (and, we hope, only) row that got placed into dTable.
- Then by using
dTable.Rows.Item(0).Item(1) we get column 1 of that row.
Since the indexing for rows and columns begins at 0, column 1 is really the second column.
The main point is to get the correct column for ProductDescription. This is determined
by the order to the columns in the SELECT inside of your stored procedure.
- In a similar fashion
dTable.Rows.Item(0).Item(2) looks at column 2 of row 0 in the
DataTable. This should be the ProductImageURL value, since it was the third field listed in
our stored procedure's SELECT.
- Notice how an IF is used to skip filling in the ImageUrl field of ProductImage when the
ProductImageURL value returned by the stored procedure is the string "none". Recall that
we placed this string in the database when we had no image for a given product.
- The PriceLabel is used to display the string "Price: " with the appropriate number concatenated onto
it. This number is formatted using String.Format, and the {0:C} indicates that parameter 0 (the only
parameter) will be formatted using currency format.
- Save all of your files again.
Testing Your Web Application
- Build your project.
- View your new web app in a browser and check that all pages display correctly
and that the database-related code works on the products and results pages.
- You have your first (simple) e-commerce app!
|
Back to the main page for ASP .NET Web Apps
|
|

 Search CIS Site
Tutorials
Search CIS Site
Tutorials