Cars App 2
Overview
What do we want to create here? The idea is to add functionality to the previous web app,
larger e-commerce web app 1.
In particular, we add the following features: First, we add product attributes. For example,
the customer might select the attribute red in the color category for a particular product (car).
Or, the customer might select leather for the seat covering category.
We can have as many such categories as we wish.
Second, we add a shopping cart and the associated checkout process. What good is an e-commerce app
unless we can buy things?
Parts of the design and implementation of this web app are adapted from the book
.NET E-Commerce Programming by Mike Gunderloy and Noel Jerke, Sybex (2002).
Although this book appears to be out of print, get a copy if you can find one as it gives
several rather complete e-commerce apps as examples, including many features not shown here
(such as the separate management app mentioned below).
Let's start by taking a tour in pictures of the new web app.
- The home page is shown in this screen shot. It looks much the same
as before but notice the addition of a link for the shopping cart.
- The brands link takes us to a screen for choosing the brand (model) of car
from a drop-down list. This is the same as in the previous app.
- Thus the next step is obviously to select a particular brand.
- This brings us to the cars page
where we select a particular model of car.
- Doing so brings us to the selected product page where we can
see the details about this product, things such as the price and description.
- In addition, this page has us choose the attributes
in each available category so as to customize the car to our wishes. We can even
specify that we want more than one of this particular car by using
the quantity drop-down list. (If we would choose a quantity of 3, for example, all 3
cars would have the same color and other customizable features. If we want 3 of the same model,
but with different colors and other features, then we should select a quantity of 1, add that car
to the shopping cart, then go to the brands and cars pages to choose the same car. This time
we would customize it to a different color, etc.)
- Once we have customized each available feature, the Add to Cart
button appears. Note that the chosen attributes are added to the description box so that
we can easily see what we have chosen.
- If we decide to do so, the next step is to click on the "Add to Cart" button. This brings us to the
cart page. Here we can see many of the details about
every item that we have addded to the shopping cart, including brand, model, quantity, price,
total cost, and the attributes that we selected for the customizable features. The description
is not shown because of limited space. This screen also gives you the total number of items in
the cart as well as the subtotal (without tax and shipping).
- On this page we can click on the Remove button for any particular item.
This removes that row from the cart. The result is as shown in
this picture which shows the results after the Laser car
is removed from the cart.
- There is also an "Empty the Cart" button which is used to remove all of the items in the
shopping cart. The result is an empty cart as seen in
this screen shot.
- Of course, the cart page also has a button labelled "Buy Items in Cart". Clicking this takes
you to the shipping page. As you can see in this image,
this page uses required field validators to force you to enter data for all required fields.
- The shipping page also uses a custom validator that forces you to select one of the states from
the pull-down as seen in this picture of the shipping page.
- Regular expression validators are also used on the text boxes so that you cannot enter
unusual characters into these.
- The next step is to click the submit button on the shipping page. This takes you to the
payment page where you enter your credit card data.
- After submitting your payment information, the
order confirmation page is shown and this particular
shopping trip is over.
- The other pages in the new web app look and function much like they did in the previous web app. Here
are some images of a few of these pages.
- The search page lets you look up cars based on a target
search string.
- The search results page shows the matching items
in a data grid with paging (in case all of the items don't fit on one page).
Clicking on the View button in a row of this grid takes you to the
selected product page that was described above.
- You might wonder how orders are processed. The assumption here is that there is a
separate management application used by those who run the web site.
This management app allows a manager to see the shipping and payment information,
perhaps provides the capability to verify the credit card information, and lets the manager
clear out the credit card information once the order is processed. (It is not good to keep
credit card information longer than necessary since attackers love to steal this!)
- An alternative design would be to have some sort of automatic processing of orders so that
human intervention is not normally required.
|
Database Work
Product Table
- The Product table from the previous web app should work fine.
- You can add additional car data to it if you desire.
|
Category Table
- This table, too, should work unchanged.
|
CategoryProduct Table
- This table will work unchanged unless you added new car data to the Product table.
- If you did add new data to the Product table, then add rows to this table to indicate which
of the new cars belong in which categories. (Since each category is a car manufacturer, a given model
of car should only belong to one category. With products other than the cars you might want a
particular product to belong to more than one category.)
|
AttributeCategory Table
- This table is used to specify an ID number and a name for each category of attributes
for our products (cars).
- We use just 2 categories: color and seat covering. Then the user might choose the red
attribute for color and the leather attribute for seat covering.
- Design the table as shown below:
|
| Column Name |
Data Type |
Length |
Allow Nulls |
| AttributeCategoryNum |
Int |
4 |
no |
| AttributeCategoryName |
varchar |
16 |
no |
- Make AttributeCategoryNum to be the key field.
- Also set the properties shown at the bottom when in design view to make this
an identity field so that the first value starts at 1, the next is 2, etc.
- Then add the following data on our 2 categories:
|
| AttributeCategoryNum |
AttributeCategoryName |
| 1 |
Color |
| 2 |
Seat Covering |
Attribute Table
- This table contains the ID numbers and names for each attribute
(such as red, silver, purple, leather, cloth, etc.)
as well as the AttributeCategoryNum identifying which category each of these attributes belong to.
(It may be obvious to us that red, silver, and purple belong to the Color category while
leather and cloth belong to the Seat Covering category, but we have to lay this out in our database.)
- Design the table like this:
|
| Column Name |
Data Type |
Length |
Allow Nulls |
| AttributeNum |
Int |
4 |
no |
| AttributeName |
varchar |
16 |
no |
| AttributeCategoryNum |
int |
4 |
no |
- Make AttributeNum to be the key field.
- Also set the properties shown at the bottom when in design view to make this an identity field.
- Then add the following data:
|
| AttributeNum |
AttributeName |
AttributeCategoryNum |
| 1 |
Cinnamon |
1 |
| 2 |
Silver |
1 |
| 3 |
Jet Black |
1 |
| 4 |
Cream |
1 |
| 5 |
Aqua |
1 |
| 6 |
Red |
1 |
| 7 |
Sky Blue |
1 |
| 8 |
Purple |
1 |
| 9 |
Leather |
2 |
| 10 |
Plastic |
2 |
| 11 |
Cloth |
2 |
ProductAttribute Table
- This table is used to link the Attribute and Product tables.
- This table only uses 2 fields, ProdNum and AttributeNum, which together form the
(combination) primary key.
- If, for example, the table contains a row of data 2, 6 this indicates that product 2
(the Tornado model of car) can have attribute 6 (Red). Of course, the Attribute table
tells us that attribute 6 has name Red and is in the category with ID number 1. The
AttributeCategory table then tells us that category 1 has name Color.
- Design the table this way:
|
| Column Name |
Data Type |
Length |
Allow Nulls |
| ProdNum |
Int |
4 |
no |
| AttributeNum |
int |
4 |
no |
- CTRL click on both fields and make them to be the combination primary key.
- Then add the following data:
|
| ProdNum |
AttributeNum |
| 1 |
1 |
| 1 |
2 |
| 1 |
3 |
| 1 |
4 |
| 1 |
7 |
| 1 |
9 |
| 1 |
11 |
| 2 |
1 |
| 2 |
3 |
| 2 |
4 |
| 2 |
6 |
| 2 |
8 |
| 2 |
9 |
| 2 |
11 |
| 3 |
2 |
3 |
3 |
| 3 |
4 |
| 3 |
5 |
| 3 |
6 |
| 3 |
7 |
| 3 |
10 |
| 3 |
11 |
| 4 |
4 |
| 4 |
5 |
| 4 |
7 |
| 6 |
1 |
| 6 |
2 |
| 6 |
3 |
| 6 |
4 |
| 6 |
6 |
| 6 |
8 |
| 6 |
9 |
| 6 |
11 |
| 7 |
2 |
| 7 |
3 |
| 7 |
4 |
| 7 |
5 |
| 7 |
7 |
| 8 |
2 |
| 8 |
3 |
| 8 |
4 |
| 8 |
5 |
| 8 |
7 |
| 9 |
2 |
| 9 |
3 |
| 9 |
4 |
| 9 |
6 |
| 9 |
8 |
| 9 |
9 |
| 9 |
11 |
| 10 |
4 |
| 10 |
6 |
| 10 |
8 |
| 11 |
4 |
| 11 |
5 |
| 11 |
6 |
| 11 |
7 |
| 11 |
9 |
| 11 |
10 |
| 11 |
11 |
| 12 |
4 |
| 12 |
5 |
| 12 |
6 |
| 12 |
7 |
| 12 |
9 |
| 12 |
10 |
| 12 |
11 |
| 13 |
4 |
| 13 |
5 |
| 13 |
6 |
| 13 |
7 |
| 13 |
10 |
| 13 |
11 |
| 14 |
1 |
| 14 |
4 |
| 14 |
6 |
| 14 |
10 |
| 14 |
11 |
| 15 |
2 |
| 15 |
4 |
| 15 |
5 |
| 15 |
6 |
| 15 |
7 |
| 15 |
9 |
| 15 |
10 |
| 15 |
11 |
- Note that not all color attributes are available for all cars. For example, from the above
table we can see that car 2 (the Tornado) has available colors 1, 3, 4, 6, an 8 out of
possible colors 1 through 8. (The names of these colors, of course, can be found in the
Attribute table.)
- The same car, the Tornado, has available attributes 9 and 11 for the type of seat
covering out of possible values of 9, 10, and 11.
- In fact, some products may have no attributes available for a particular category. For example, car 4
(the Famtastic) has possible attributes of 4, 5, and 7 only. These are colors since the
AttributeCategoryNum is 1 for each of these. Thus there are no choices of attributes for
the seat covering category. Apparently this car comes with some standard seat covering that
cannot be changed.
|
Basket Table
- This table is used to hold general information about the shopping basket.
- A separate BasketItem table will hold information about each item in the shopping basket.
- Design the table as shown below.
|
| Column Name |
Data Type |
Length |
Allow Nulls |
| BasketNum |
int |
4 |
no |
| ShopperNum |
int |
4 |
no |
| BasketNumItems |
int |
4 |
no |
| BasketOrderPlaced |
int |
4 |
no |
| BasketSubtotal |
money |
8 |
no |
| BasketTotal |
money |
8 |
no |
| BasketShipping |
money |
8 |
no |
| BasketTax |
money |
8 |
no |
- Make BasketNum the primary key.
- Also make it an identity field.
- Note that the BasketOrderPlaced field value indicates whether the order has been placed (value 1)
or not (value 0).
- Set up all fields except the first 2 to have a default value of 0.
- No data is added to the Basket table ahead of time. Our e-commerce app will add data when users create
shopping baskets.
|
BasketItem Table
- This table is used to hold information about an individual product in the shopping basket.
- Design the table as shown below.
|
| Column Name |
Data Type |
Length |
Allow Nulls |
| BasketItemNum |
int |
4 |
no |
| BasketNum |
int |
4 |
no |
| ProdNum |
int |
4 |
no |
| BasketItemPrice |
money |
8 |
no |
| BasketItemProdName |
char |
24 |
no |
| BasketItemQuantity |
int |
4 |
no |
| BasketItemAttributes |
varchar |
64 |
yes |
- Make BasketItemNum the primary key.
- Also make it an identity field.
- Give a default value of 0 to the BasketItemPrice and BasketItemQuantity fields.
- No data is added to the BasketItem table ahead of time. Our e-commerce app will add data
when users add products to their shopping baskets.
- To give a better idea of what this data will look like, the following is a sample of typical
data stored in this table. Remember, do not add this data to your table manually.
All data is added to this table automatically by the e-commerce app.
|
| BasketItemNum |
BasketNum |
ProdNum |
BasketItemPrice |
| 1 |
1 |
8 |
39999 |
| 2 |
2 |
9 |
38400 |
| 3 |
2 |
4 |
22555 |
| 4 |
3 |
9 |
38400 |
| 5 |
3 |
13 |
29000 |
| 6 |
4 |
10 |
37600 |
| 7 |
4 |
2 |
32999 |
| 8 |
5 |
1 |
35255 |
| 9 |
5 |
8 |
39999 |
| 10 |
6 |
6 |
33000 |
|
| BasketItemProdName |
BasketItemQuantity |
BasketItemAttributes |
| Thunder |
4 |
Color,1,Purple,8;Seat Covering,2,Leather,9 |
| Rocket |
1 |
Color,1,Jet Black,3;Seat Covering,2,Cloth,11 |
| Famtastic |
1 |
Color,1,Red,6 |
| Rocket |
1 |
Color,1,Sky Blue,7;Seat Covering,2,Cloth,11 |
| M-star |
2 |
Color,1,Jet Black,3;Seat Covering,2,Plastic,10 |
| Laser |
1 |
Color,1,Red,6 |
| Tornado |
3 |
Color,1,Jet Black,3;Seat Covering,2,Leather,9 |
| Hurricane |
1 |
Color,1,Purple,8;Seat Covering,2,Cloth,11 |
| Thunder |
1 |
Color,1,Silver,2;Seat Covering,2,Leather,9 |
| Lightning |
1 |
Color,1,Cream,4;Seat Covering,2,Plastic,10 |
- In this sample data we can see, for example, that basket 4 has basket items 6 and 7, which hold
1 Laser and 3 Tornados, respectively.
- Pay careful attention to how the attributes are stored. The Laser in basket item 6 has an attributes
field value of "Color,1,Red,6". This indictates category 1 (Color) and attribute 6 (Red) for this car.
The attributes field value for the 3 identical Tornados is
"Color,1,Jet Black,3;Seat Covering,2,Leather,9".
This indicates that these have been customized to have Jet Black color
(category 1 is color and color 3 is Jet Black) and Leather for the seat covering.
- Although your browser may show the attributes string (in the table above) on more than one line, it is
really just one continuous string.
- Note how the groups are separated by semicolons, while the 4 items in a group are separated by commas.
We will need to process this attributes string in the VB code for our e-commerce app.
|
Shopper Table
- This table is used to hold the name and contact information on each shopper.
- We might keep this data long term since it would allow us to send email or paper mail advertising
products to our customers. Keeping this data would also enable us to implement user profiles (so that
a user could submit a password and have the user's name, address, etc. automatically available).
We skip user profiles here so as to keep this app from being overly long to present.
- Design the table as follows:
|
| Column Name |
Data Type |
Length |
Allow Nulls |
| ShopperNum |
int |
4 |
no |
| ShopperFirstName |
varchar |
24 |
yes |
| ShopperLastName |
varchar |
32 |
no |
| ShopperStreet |
varchar |
32 |
yes |
| ShopperCity |
varchar |
32 |
yes |
| ShopperState |
varchar |
2 |
yes |
| ShopperZipCode |
varchar |
15 |
yes |
| ShopperPhone |
varchar |
30 |
yes |
| ShopperEmail |
varchar |
48 |
yes |
- Make ShopperNum the primary key.
- Also make it an identity field.
- No data is added to this table ahead of time. Our e-commerce app will add data
when a shopper checks out.
|
Order Table
- This table is used to hold the name and contact information on the shopper who is placing an order
along with the date the order is placed and the basket ID number.
- Design the table as follows:
|
| Column Name |
Data Type |
Length |
Allow Nulls |
| OrderNum |
int |
4 |
no |
| ShopperNum |
int |
4 |
no |
| BasketNum |
int |
4 |
no |
| OrderFirstName |
varchar |
24 |
yes |
| OrderLastName |
varchar |
32 |
yes |
| OrderStreet |
varchar |
32 |
yes |
| OrderCity |
varchar |
32 |
yes |
| OrderState |
varchar |
2 |
yes |
| OrderZipCode |
varchar |
15 |
yes |
| OrderPhone |
varchar |
30 |
yes |
| OrderEmail |
varchar |
48 |
yes |
| OrderDateOrdered |
datetime |
8 |
no |
- Make OrderNum the primary key.
- Also make it an identity field.
- Add a "unique constraint" for the BasketNum field.
This is to prevent the possibility of having two or more
orders for the same basket. Here are the steps to follow in creating this unique constraint:
- In the Table Designer, right click and select Properties.
- Select the Indexes/Keys tab.
- Select New.
- Under Column Name select the BasketNum column.
- Check the Create UNIQUE box.
- Select the Constraint option.
- No data is added to this table ahead of time. Our e-commerce app will add data when
a shopper checks out.
- Although the address data is the same as that stored in the Shopper table, we might
periodically purge old data from the Order table, whereas the Shopper table data is likely
to be kept around for a longer time (so that we can send promotions to our customers and so
that the customers might have user profiles).
|
Payment Table
- This table is used to hold a customer's credit card information as well as the order number so as to
link the credit card information to a particular order.
- We plan to keep the information in this table only as long as necessary in order to verify
the credit card information and process the order. This is to reduce our exposure to
thieves interested in stealing credit card information.
- Design the table as follows:
|
| Column Name |
Data Type |
Length |
Allow Nulls |
| PaymentNum |
int |
4 |
no |
| OrderNum |
int |
4 |
no |
| PaymentCardType |
varchar |
16 |
no |
| PaymentCardNumber |
varchar |
30 |
no |
| PaymentExpirationDate |
varchar |
24 |
no |
| PaymentCardOwnerName |
varchar |
64 |
no |
- Make PaymentNum the primary key.
- Also make it an identity field.
- Add a "unique constraint" for the OrderNum field much like above.
This is to prevent the possibility of having two or more
sets of payment information for the same order.
- No data is added to this table ahead of time. Our e-commerce app will add data when
a shopper checks out.
|
Relationships Between Tables
- We should set up the appropriate relationships between tables based on where we
have foreign keys present.
- We already did this in the previous web app for the Product, CategoryProduct, and Category tables.
- For a reminder on how to set up this type of relationship, look at the directions
in the survey app.
- Set up relations for each of the following:
- The BasketItem table contains BasketNum as a foreign key since BasketNum is the primary key
in the Basket table. Check this screen shot
showing this relationship.
- The BasketItem table also contains foreign key ProdNum since ProdNum is the primary key
in the Product table. Check this screen shot
showing this relationship.
- The Basket table contains foreign key ShopperNum since ShopperNum is the primary key in the
Shopper table.
- The Order table contains ShopperNum as a foreign key since ShopperNum is the primary key in the
Shopper table.
- The Order table also contains BasketNum as a foreign key since BasketNum is the primary key
in the Basket table.
- The Payment table contains foreign key OrderNum since OrderNum is the primary key
in the Order table.
- The ProductAttribute table contains foreign key ProdNum, which is the primary key in the
Product table.
- The ProductAttribute table also contains foreign key AttributeNum since AttributeNum is the
primary key in the Attribute table.
- The Attribute table contains AttributeCategoryNum as a foreign key since AttributeCategoryNum
is the primary key in the AttributeCategory table.
|
Work in Visual Studio
Copying the Old Project
- Begin by making a copy of the previous e-commerce web app.
- Name the new project cars2.
- Close the old solution and open the new cars2 project.
- Save all of your files.
|
Adjusting header.txt and footer.txt
- In header.txt add the link labelled Cart so that it takes the user to the Cart.aspx form
(to be added to the project below).
- Also make the tables to be wider: 800 pixels wide (120 more than it was before). We will
need more room across the page in order to fit the shopping cart information.
- Adjust the last column in each table so that it is 120 pixels wider than it was previously.
- In footer.txt move the warning so that it comes before the copyright notice and date of last update.
This might be a more sensible order.
- If you wish, you can copy the contents of the revised header.txt file.
If your browser shows it as a web page, use View Source to see the actual contents of the file.
- Similarly, here is the revised footer.txt file.
|
GlobalProcedures.vb
- When a user first reaches our e-commerce site (probably at the home page, though possibly
at some other page if the person has a bookmark to it) we wish to assign the user a shopper number.
- We thus want to run the same code at the start of most of our pages. This code should check to
see if the user has a shopper number. If not, a new shopper number should be assigned.
- To insert a new row into the shopper table and return the new shopper number, we use the
following stored procedure. Use SQL Server's Enterprise Manager to create a new stored procedure
and manually type in this code. (Right click on Stored Procedures and select New Stored Procedure.)
Of course, fill in your ID instead of studentc.
|
CREATE PROCEDURE studentc.NewShopper AS
INSERT INTO Shopper(ShopperLastName) VALUES('')
SELECT @@IDENTITY
GO
|
- Notice that the NewShopper stored procedure simply inserts a row with an empty string as the last
name. (The other fields will be NULLS.) NewShopper then returns @@IDENTITY, the value from
the identity field, which is ShopperNum for this table. Thus the new shopper number (1 more than
the last one in this table) is returned.
- On all of our web forms place a label with ID ShopperErrorLabel and text (in red) "Error on page".
Have the label's Visible property start off as False. We will make this label visible if we are
somehow not able to handle the shopper number on a given page.
- Next we need the to add a GlobalProcedures.vb file to our project. We will put a procedure in
it that calls our NewShopper stored procedure. Right click on your project in Solution Explorer.
Select Add, Add New Item, Code File. Then fill in GlobalProcedures.vb as the name for this file.
- Place the following procedure into your new file. Fill in your PC's ID in the "workstation id="
section, your ID in the "CommandText" section, and
your starting database location in the "catalog=" section.
If it is easier, you can copy the needed connection string from the autogenerated code section
for one of your web forms that used a data adapter.
|
Imports System.Web
Imports System.Web.SessionState
Imports System.Data
Imports System.Data.SqlClient

Module GlobalProcedures

Friend Sub CheckShopperNum(ByVal Session As HttpSessionState, ByRef ErrorFlag As Integer)
    Dim SessionShopperNum As String
    Dim MyConnection As SqlConnection

    ErrorFlag = 0

    Try
        SessionShopperNum = Session("ShopperNum")
        If (SessionShopperNum Is Nothing) OrElse (SessionShopperNum = "0") Then
            MyConnection = New SqlClient.SqlConnection("workstation id=CISPC19;" & _
               "packet size=4096;integrated security=SSPI;data source=""CIS-W2KSERVER"";" & _
               "persist security info=False;initial catalog=studentc")
            Dim Command As New SqlCommand
            Command.Connection = MyConnection
            Command.CommandText = "studentc.NewShopper"
            Command.CommandType = CommandType.StoredProcedure
            MyConnection.Open()
            Session("ShopperNum") = CType(Command.ExecuteScalar, String)
            MyConnection.Close()
        End If
    Catch ex As Exception
        ErrorFlag = 1
    End Try
End Sub

End Module
|
- We are manually writing the code to call the stored procedure because Visual Studio's Query
Builder won't give us what we want. Query Builder is great if we need a simple SELECT command,
but here we also insert into the table. Query Builder can produce standard SELECT, INSERT,
DELETE, and UPDATE commands, but it gives all 4 at once and may not match our specialized needs.
- The above code first checks to see if ShopperNum is stored in the session state. If so it does
nothing further as the user already has a shopper number. If not, the code manually connects
to the database and runs out NewShopper stored procedure. The returned new shopper number is stored
in the session state. If the code raises an exception the ErrorFlag parameter is set to 1.
The calling procedure can then use this to make the ErrorLabel visible.
- Adjust the Page_Load procedures for all of our existing web forms so that they start out by
calling CheckShopperNum as follows. The only web forms that we will not add this code to are
the shipping and payment pages to be created later. This is because they have their own checks
which will cause the user to be redirected to the shopping cart page if things are not
reasonably initialized. Once on the cart page, the user will get a shopper number if need be.
|
Dim ErrorFlag As String

ShopperErrorLabel.Visible = False
CheckShopperNum(Session, ErrorFlag)
If ErrorFlag = 1 Then
    ShopperErrorLabel.Visible = True
End If
|
Changes to the Results Form
- This page is already partially done.
It shows the details about a particular product, such as its description and price.
- Now we want to add to it so that the user can
customize certain features of the product (such as the color).
- Once the customizing is complete, we present an Add to Cart
button to the user.
- Here is an image of the results form in Visual Studio.
- Add the drop-down lists and button to this form as seen in the above images.
- Change the ID of the button to AddToCartButton and make it not visible initially.
- Change the ID of the leftmost drop-down list to QuantityDropDownList and let it be
visible initially. Under Properties, click on the Items field and then click on the 3 dots to
bring up the collection editor where you can enter data for this list. Fill in 1, 2, 3, 4, and 5
as the possible items and have 1 be selected by default. Have both the text and value for
each item be the same (for example 2 and 2). Here is a
picture of item 1 in the collection editor.
- Place a label just above this drop-down list and have it display the text "Quantity:".
- Change the ID of the next drop-down list to CategoryDropDownList and have it not be
visible initially. Set autopostback to be true for this drop-down list so that as soon
as the user selects a new item, we can have some code executed to process the selection.
- Place a label just above this drop-down list and change its ID to Category Label.
Have it not be initially visible and set it to display the text "Customizable feature:".
- Change the ID of the next drop-down list to ValueDropDownList and have it not be visible
initially. Set autopostback to be true for this drop-down list so that as soon as the
user selects a new item, we can have some code executed to process the selection.
- Place a label right above this drop-down list and change its ID to ValueLabel.
Have it not be initially visible and set it to display the text "Customize feature to:".
- The items which are not initially visible will be made visible at the appropriate points
in the VB code.
- Move the label with ID ErrorLabel (and text "Error in accessing database") to a position
just above the text box.
- Also put the label with ID ShopperErrorLabel next to ErrorLabel.
- Both labels should have their Visible property set to False under the Properties window.
|
Code-Behind File for the Results Form
- We need to change the code in results.aspx.vb so that it implements the desired new
functionality.
- Thus it should allow the user to select the quantity and to customize the various
features. The attributes drop-down list should only appear after the user selects a
category of customizable feature. The Add to Cart button should only appear after all
of the features have been customized.
- Add the following code to the usual spot in the automatically-generated code:
|
Protected dTable As New DataTable
Protected dReader As System.Data.SqlClient.SqlDataReader
|
- We use both this data table and data reader in the Page_Load procedure.
- Change the Page_Load procedure to match the following:
|
Private Sub Page_Load(ByVal sender As System.Object, ByVal e As System.EventArgs) _
    Handles MyBase.Load

    Dim Price As Decimal
    Dim Model As String
    Dim Brand As String
    Dim Description As String
    Dim Attributes As String
    Dim ErrorFlag As String
    Dim ProdNum, NumAttributes As Integer
    Dim Item As New ListItem

    CheckShopperNum(Session, ErrorFlag)
    If ErrorFlag = 1 Then
        ShopperErrorLabel.Visible = True
    End If

    AddToCartButton.Visible = False   ' until we are sure we should enable it

    If Not IsPostBack Then
        Attributes = ""
        If Session.Count = 0 Then   ' No session items were supplied.
            ErrorLabel.Visible = True
        Else
            Try
                BrandLabel.Visible = False
                ErrorLabel.Visible = False
                ModelLabel.Visible = False
                PriceLabel.Visible = False
                ProductDescriptionBox.Visible = False
                ShopperErrorLabel.Visible = False
                Model = Session("ModelSelected")
                Brand = Session("BrandSelected")
                SqlConnection1.Open()
                SqlDataAdapter1.SelectCommand.Parameters("@TargetModel").Value = Model
                SqlDataAdapter1.SelectCommand.Parameters("@TargetBrand").Value = Brand
                SqlDataAdapter1.Fill(dTable)

                If dTable.Rows.Count = 0 Then
                    ErrorLabel.Visible = True
                Else
                    Description = dTable.Rows.Item(0).Item(0)
                    ProductDescriptionBox.Text = Description
                    ProductDescriptionBox.Visible = True
                    Session.Add("Description", Description)
                    Price = dTable.Rows.Item(0).Item(1)
                    PriceLabel.Text = "Price:  " & String.Format("{0:C}", Price)
                    PriceLabel.Visible = True
                    Session.Add("Price", Price)
                    BrandLabel.Text = "Selected Brand: " & Brand
                    BrandLabel.Visible = True
                    ModelLabel.Text = "Selected Model: " & Model
                    ModelLabel.Visible = True
                    ProdNum = dTable.Rows.Item(0).Item(2)
                    Session.Add("ProdNum", ProdNum)
                End If
            Catch exception As System.Data.SqlClient.SqlException
                ErrorLabel.Visible = True
            Catch exception As Exception
                ErrorLabel.Visible = True
            Finally
                SqlConnection1.Close()
            End Try
        End If

        Try
            Item.Text = "*** Make a choice ***"
            Item.Value = 0
            Item.Selected = True
            CategoryDropDownList.Items.Add(Item)
            SqlConnection1.Open()
            SqlDataAdapter2.SelectCommand.Parameters("@TargetProdNum").Value = ProdNum
            dReader = SqlDataAdapter2.SelectCommand.ExecuteReader
            While (dReader.Read())
                Item = New ListItem
                Item.Text = dReader.GetString(0)  'AttributeCategoryName
                Item.Value = dReader.GetValue(1)  'AttributeCategoryNum
                Item.Selected = False
                CategoryDropDownList.Items.Add(Item)
            End While
            dReader.Close()
            NumAttributes = CategoryDropDownList.Items.Count - 1
            Session.Add("NumAttributes", NumAttributes)
            If NumAttributes > 0 Then
                CategoryLabel.Visible = True
                CategoryDropDownList.Visible = True
            Else
                CategoryLabel.Visible = False
                CategoryDropDownList.Visible = False
                AddToCartButton.Visible = True
            End If
        Catch exception As Exception
            ErrorLabel.Visible = True
            CategoryLabel.Visible = False
            CategoryDropDownList.Visible = False
            AddToCartButton.Visible = False
        Finally
            SqlConnection1.Close()
        End Try
    End If
End Sub
|
- One of the first things that the above procedure does is to retrieve the brand and model selected
from the session state.
- It then uses these as parameters to pass to a stored procedure, SelectModelBrand, which is used
to look up the details on this car. In particular, we get back the description, price, and product
number. We display all but the product number on the results page and place all 3 values in
the session state so that they will be available when we again need them.
- This is almost the same stored procedure and mostly the same code so far that was used in the
previous web app's result page. The one change to the stored
procedure is that it must also select the product number as shown here:
|
CREATE PROCEDURE studentc.SelectModelBrand
    @TargetModel char(24),
    @TargetBrand char(24)
AS
    SET NOCOUNT ON;
SELECT dbo.Product.ProdDescription, dbo.Product.ProdPrice, dbo.Product.ProdNum
FROM dbo.Product INNER JOIN dbo.CategoryProduct
ON dbo.Product.ProdNum = dbo.CategoryProduct.ProdNum
INNER JOIN dbo.Category ON dbo.CategoryProduct.CategoryNum = dbo.Category.CategoryNum
WHERE (dbo.Product.ProdName = @TargetModel) AND (dbo.Category.CategoryName = @TargetBrand)
GO
|
- One way to revise this stored procedure is to use "Configure data adapter"
on your data adapter for this stored procedure and use Query Builder to recreate the
stored procedure.
- Another way would be to paste the above stored procedure code into SelectModelBrand
in Enterprise Manager.
- Next, the above VB code has a second, new Try...Catch block.
It's job is to populate the drop-down list for the categories of customizable features.
- The code runs a stored procedure to get the needed category names for the drop-down list.
This stored procedure is a straightforward selection and can be created in Visual Studio with
Query Builder. Drag a new SqlDataAdapter to the results form and tell the wizard to create a
new stored procedure. Also tell it to skip Insert, Update, and Delete procedures.
See this picture of Query Builder to see how
the query was designed. Save your stored procedure under the name SelectCategories.
- Remember to give the appropriate user exec access to this stored procedure via Enterprise Manager.
- Also remember to regenerate the parameters that the data adapter sends to this stored procedure.
Recall that you look under the SelectCommand in the data adapter's properties. Find the
CommandText property and change it to studentc.SelectCategories. (Use your ID, of course.)
- In the rest of this description we will not repeat the last 2 reminders. You will need to
remember to do these if they apply.
- Although you do not have to hand-code this stored procedure, here is the code so that you
can easily compare it with what Query Builder creates for you:
|
CREATE PROCEDURE studentc.SelectCategories
    @TargetProdNum int
AS
    SET NOCOUNT ON;
SELECT DISTINCT dbo.AttributeCategory.AttributeCategoryName,
dbo.AttributeCategory.AttributeCategoryNum
FROM dbo.Attribute
INNER JOIN dbo.AttributeCategory
ON dbo.Attribute.AttributeCategoryNum = dbo.AttributeCategory.AttributeCategoryNum
INNER JOIN dbo.ProductAttribute
ON dbo.Attribute.AttributeNum = dbo.ProductAttribute.AttributeNum
WHERE (dbo.ProductAttribute.ProdNum = @TargetProdNum)
ORDER BY dbo.AttributeCategory.AttributeCategoryName
GO
|
- Notice how the VB code uses variable Item of type ListItem to add one-by-one the items to the
drop-down list, starting with the hard-coded "*** Make a choice ***".
- The rest of the items are the category names retrieved from the database by the above
stored procedure. Note that the stored procedure uses as an input parameter the ProdNum
looked up by the previous stored procedure.
- NumAttributes is assigned 1 less than the number of items in the drop-down list. This is
because the first item in the list is not an attribute. Rather, it is "*** Make a choice ***".
This value is saved in the session state so that it will be available later.
- If there are no attributes, then we don't make the drop-down list visible. Instead, we
just make the Add to Cart button visible as there are no customizable features for this product.
- The next step is to add a procedure to handle things when the user selects a category from
this drop-down list. Here is the code to add:
|
Private Sub CategoryDropDownList_SelectedIndexChanged(ByVal sender As System.Object, _
    ByVal e As System.EventArgs) Handles CategoryDropDownList.SelectedIndexChanged

    Dim Item As New ListItem
    Dim AttributeName As String
    Dim AttributeNum As Integer

    AddToCartButton.Visible = False
    AttributeName = CategoryDropDownList.SelectedItem.Text
    AttributeNum = CType(CategoryDropDownList.SelectedItem.Value, Integer)

    If Not Equals(AttributeName, "*** Make a choice ***") Then
        Session.Add("AttributeName", AttributeName)
        Session.Add("AttributeNum", AttributeNum)
        ValueDropDownList.Items.Clear()   'Make sure nothing remains in this list.
        ValueDropDownList.Visible = True
        ValueLabel.Visible = True

        Try
            Item.Text = "*** Make a choice ***"
            Item.Value = 0
            Item.Selected = True
            ValueDropDownList.Items.Add(Item)
            SqlConnection1.Open()
            SqlDataAdapter3.SelectCommand.Parameters("@TargetCategoryNum").Value = AttributeNum
            SqlDataAdapter3.SelectCommand.Parameters("@TargetProdNum").Value = Session("ProdNum")
            dReader = SqlDataAdapter3.SelectCommand.ExecuteReader
            While (dReader.Read())
                Item = New ListItem
                Item.Text = dReader.GetString(0)
                Item.Value = dReader.GetValue(1)
                Item.Selected = False
                ValueDropDownList.Items.Add(Item)
            End While
            dReader.Close()

            If ValueDropDownList.Items.Count > 1 Then
                ValueLabel.Visible = True
                ValueDropDownList.Visible = True
            Else   ' This case should not occur.
                ValueLabel.Visible = False
                ValueDropDownList.Visible = False
            End If
        Catch exception As Exception
            ErrorLabel.Visible = True
            ValueLabel.Visible = False
            ValueDropDownList.Visible = False
            AddToCartButton.Visible = False
        Finally
            SqlConnection1.Close()
        End Try
    Else
        ValueDropDownList.Visible = False
        ValueLabel.Visible = False
    End If
End Sub
|
- The first thing that the above procedure does is to get the AttributeName and AttributeNum
from CategoryDropDownList.
- As long as the user selected an actual category (instead of "*** Make a choice ***"), we
proceed.
- The AttributeName and AttributeNum values are saved in session state so that they will
be available after a postback. (See the ValueDropDownList_SelectedIndexChanged procedure below.)
- The code next runs a stored procedure to obtain from the database the names of the attribute
values for the selected attribute category and product.
- This stored procedure can be set up by dragging an SqlDataAdapter to the results form and telling
the wizard to create a new stored procedure. Also tell it to skip Insert, Update, and Delete
procedures. See this picture of Query Builder to see how
the query was designed. Save your stored procedure under the name SelectCategoryValues.
- Here is the code for the stored procedure itself so that you can better check what
Query Builder produces for you:
|
CREATE PROCEDURE studentc.SelectCategoryValues
    @TargetCategoryNum int,
    @TargetProdNum int
AS
	SET NOCOUNT ON;
SELECT DISTINCT dbo.Attribute.AttributeName, dbo.Attribute.AttributeNum FROM dbo.Attribute
INNER JOIN dbo.ProductAttribute ON dbo.Attribute.AttributeNum = dbo.ProductAttribute.AttributeNum
WHERE (dbo.Attribute.AttributeCategoryNum = @TargetCategoryNum)
AND (dbo.ProductAttribute.ProdNum = @TargetProdNum)
ORDER BY dbo.Attribute.AttributeName
GO
|
- Note that this stored procedure returns the name and ID number for each attribute for the desired
product and category of attribute.
- The VB code uses our data reader to add the name of each applicable attribute to
ValueDropDownList.
- If there are no items in this list other than "*** Make a choice ***", we do not make it visible.
Because of the way we generated the list of categories, this case should not occur. However,
it is handled here just in case we missed something!
- Next, we add code to handle things when the user selects a particular attribute value.
Use the following:
|
Private Sub ValueDropDownList_SelectedIndexChanged(ByVal sender As System.Object, _
    ByVal e As System.EventArgs) Handles ValueDropDownList.SelectedIndexChanged

    Dim AttrNum, ValNum As Integer
    Dim Top, k, AttributeNum, ValueNum As Integer
    Dim Found As Boolean
    Dim AttrName, AttributeName, ValName, ValueName As String
    Dim TempStr, NewStr, ItemsStr, NewDescription, Attributes, Description As String
    Dim AttributesArray As String() = Nothing
    Dim ItemsArray As String() = Nothing
    Dim delimStr As String = ";"
    Dim DelimStr2 As String = ","
    Dim delimiter As Char() = delimStr.ToCharArray()
    Dim delimiter2 As Char() = DelimStr2.ToCharArray()

    ValueName = ValueDropDownList.SelectedItem.Text
    ValueNum = CType(ValueDropDownList.SelectedItem.Value, Integer)

    If Not Equals(ValueName, "*** Make a choice ***") Then
        Found = False
        TempStr = ""
        Description = Session.Item("Description")
        Attributes = Session.Item("Attributes")
        AttributeName = Session.Item("AttributeName")
        AttributeNum = Session.Item("AttributeNum")

        'Adjust the Attributes string:
        If Not Attributes = "" Then
            AttributesArray = Attributes.Split(delimiter)
            Top = AttributesArray.GetUpperBound(0)
            For k = 0 To Top
                ItemsArray = AttributesArray(k).Split(delimiter2)
                If ItemsArray(0) = AttributeName Then  ' record new value here
                    ItemsArray(2) = ValueName
                    ItemsArray(3) = ValueNum
                    Found = True
                    ItemsStr = String.Join(",", ItemsArray)
                    If Not TempStr = "" Then
                        TempStr &= ";"
                    End If
                    TempStr &= ItemsStr
                ElseIf (Not Found) And (ItemsArray(0) > AttributeName) Then
                    NewStr = AttributeName & "," & AttributeNum & "," _
                        & ValueName & "," & ValueNum
                    If Not TempStr = "" Then
                        TempStr &= ";"
                    End If
                    TempStr &= NewStr
                    TempStr = TempStr & ";" & AttributesArray(k)
                    Found = True
                Else
                    If Not TempStr = "" Then
                        TempStr &= ";"
                    End If
                    TempStr &= AttributesArray(k)
                End If
            Next
        End If
        If Not Found Then   ' record new value at end of string
            If Not TempStr = "" Then
                TempStr &= ";"
            End If
            TempStr = TempStr & AttributeName & "," & AttributeNum & "," _
                & ValueName & "," & ValueNum
        End If

        Attributes = TempStr
        Session.Add("Attributes", Attributes)

        ' Loop through the entries in Attributes to set up NewDescription:
        AttributesArray = Attributes.Split(delimiter)
        Top = AttributesArray.GetUpperBound(0)
        NewDescription = Description
        For k = 0 To Top
            ItemsArray = AttributesArray(k).Split(delimiter2)
            NewDescription &= vbCrLf
            NewDescription &= ItemsArray(0)
            NewDescription &= ": "
            NewDescription &= ItemsArray(2)
        Next
        Session.Add("NumAttributesCustomized", Top + 1)
        ProductDescriptionBox.Text = NewDescription
    End If

    ' If the user has customized all of the features, show the "Add to Cart" button.
    If Session("NumAttributesCustomized") = Session("NumAttributes") Then
        AddToCartButton.Visible = True
    Else
        AddToCartButton.Visible = False
    End If
End Sub
|
- The purpose of the above code is to save all of the attribute information in the session state,
to show this attribute information in the product description box, and to make the Add to Cart
button visible if the user has customized all of the attribute categories for this product.
- The attribute information is kept in a string such as this example:
|
Color,1,Purple,8;Seat Covering,2,Cloth,11
|
- Note that each set of 4 items is separated from the next set by a semicolon.
- The items inside of each set are separated by commas.
- The ordering of the 4 items is always the same: category name, category number,
attribute name, attribute number.
- This format makes it relatively easy to pick out the pieces of data that we need, plus it is
flexible in that it allows us to handle a variable number of categories and attributes.
- Our VB code above begins by extracting the attribute name (ValueName) from ValueDropDownList as
well as the corresponding attribute nuber (ValueNum) from this list.
- If the selected value is "*** Make a choice ***", then we skip most of the code and proceed
to the end to check if all available categories have been customized. (If so, we make the
Add to Cart button visible.)
- Otherwise, we need to process the selected attribute value.
- We look up in session state the recorded product description, attributes string (in the above format),
selected attribute name, and the corresponding attribute number.
- The purpose of the next section of code is to add the new attribute name and number (along with
the selected category name and number) to the attribute string. The new attribute string is built up
in TempStr and copied to the Attributes variable and session state once it is finished.
- TempStr starts off as an empty string.
- We use the Split method to put into AttributesArray the sets of items we get by splitting the
Attributes string apart at the semicolons.
- We then loop through this array to see if it already contains an entry for the selected category.
If so, the user is trying to revise the attribute selected for this category (perhaps by changing
the color of the car, for example). We set the Found flag to be true if we find such an entry
and record the new attribute name and number at the same location in the AttributesArray.
- Note that each time around this loop we do a second split, this time to break one set of
items apart at the commas. This allows us to examine the 4 individual items:
the category name, category number, attribute name, attribute number.
- If we find the desired attribute name present, we record the new values in the appropriate 2
of the 4 items and then use a Join to paste the 4 pieces together into one string with commas
between the pieces. This string is then appended to TempStr, with a semicolon preceding it
if TempStr already has anything in it. Thus we gradually build up our revised attributes
information in TempStr.
- The ElseIf section inside of our loop is used to handle the case where we don't find
the desired attribute name, but we have just reached at attribute name that is alphabetically
larger than the attribute name for the data that we wish to add. In this case we manually
concatenate the 4 pieces of data and append it to TempStr. Then we tack on the set of data
for the alphabetically larger attribute name.
- The Else section of this same loop is used in all other cases to simply append the same set of
data taken from the AttributesArray to TempStr.
- After the loop ends, if the Found flag is not true, then the new attribute data has not yet been
added and needs to be concatenated to the end of TempStr. This could be either because we started
with an empty Attributes string or because the selected category name (called AttributeName in the code)
comes alphabetically after all of the category names already in the AttributesArray.
In either case, we just manually concatenate the desired set of 4 items to the end of TempStr.
- We then copy TempStr into the Attributes string and record the same data in the session state
for later use.
- We next loop through the Attributes data to extract the attributes information and append
it in readable form to the product description.
- This begins by splitting the Attributes string apart at the semicolons.
- We loop through the resulting array and split each entry apart at the commmas.
- For each entry we append the category and attribute names, in readable form, to the
NewDescription string (which was initialized to contain the product description).
- Thus by the end of the loop NewDescription contains the intial product description plus one or
more lines of attribute information (such as "Color: Purple").
- We then save in session state the number of categories that have been customized. This is 1 more
than the top index used in the array (since indexing starts at 0).
- NewDescription is copied into the product description text box.
- If the number of categories customized then matches the number of categories (here somewhat
misnamed as NumAttributes) then it is time to make the Add to Cart button visible; otherwise not.
- The final procedure to add to the results.aspx.vb file is one to handle the event of
clicking on the Add to Cart button. You can generate the outline of this procedure by double
clicking on the button on the web form while in Design view. Then adjust it to match
the following:
|
Private Sub AddToCartButton_Click(ByVal sender As System.Object, ByVal e As System.EventArgs) _
    Handles AddToCartButton.Click

    Try
        Session.Add("Quantity", CType(QuantityDropDownList.SelectedItem.Value, Integer))
        If CType(Session("BasketNum"), String) = "" Then   ' need to make a new basket
            cmdCreateBasket.Parameters("@ShopperNum").Value = Session("ShopperNum")
            SqlConnection1.Open()
            cmdCreateBasket.ExecuteNonQuery()
            Session.Add("BasketNum", cmdCreateBasket.Parameters("@BasketNum").Value)
            SqlConnection1.Close()
        End If

        'Now we have a basket, either new or old.
        cmdInsertBasketItem.Parameters("@BasketNum").Value = Session("BasketNum")
        cmdInsertBasketItem.Parameters("@ProdNum").Value = Session("ProdNum")
        cmdInsertBasketItem.Parameters("@Price").Value = Session("Price")
        cmdInsertBasketItem.Parameters("@ProdName").Value = Session("ModelSelected")
        cmdInsertBasketItem.Parameters("@Quantity").Value = Session("Quantity")
        cmdInsertBasketItem.Parameters("@Attributes").Value = Session("Attributes")
        SqlConnection1.Open()
        cmdInsertBasketItem.ExecuteNonQuery()
    Catch exception As Exception
        ErrorLabel.Visible = True
    Finally
        SqlConnection1.Close()
    End Try

    If ErrorLabel.Visible = False Then
        Response.Redirect("cart.aspx")
    End If
End Sub
|
- This code starts by getting the quantity desired of this product and recording it in
the session state.
- Then we check to see if a basket number exists in session state. If not, we have to
create one for this shopper.
- For this purpose we use a stored procedure named NewBasket.
Create this stored procedure manually in Enterprise Manager. Make it match the following:
|
CREATE PROCEDURE studentc.NewBasket
    @ShopperNum int,
    @BasketNum int OUTPUT
AS
INSERT INTO Basket(ShopperNum) VALUES(@ShopperNum)
SELECT @BasketNum = @@IDENTITY
GO
|
- This stored procedure inserts into the Basket table the shopper number passed in as a parameter.
Then it returns the new basket number from the identity field.
- Our above VB code fills in the current shopper number as the parameter to pass to this stored
procedure.
- It then manually executes the stored procedure and places
the returned basket number into the session state.
- At this point we have a basket number (either old or new).
- Our code then manually calls another stored procedure named InsertBasketItem to insert the
product information into the BasketItem table (or to update the appropriate entry in BasketItem
if this exact product is already present for the current basket (shopping cart).
- Create this stored procedure directly in Enterprise Manager so that it matches the following:
|
CREATE PROCEDURE studentc.InsertBasketItem
    @BasketNum int,
    @ProdNum int,
    @Price money,
    @ProdName char(24),
    @Quantity int,
    @Attributes varchar(64)
AS
    DECLARE @Current int
    SELECT @Current = COUNT(*) FROM BasketItem
        WHERE BasketNum = @BasketNum AND ProdNum = @ProdNum _
		   AND BasketItemAttributes = @Attributes
    IF @Current = 0   /* this product is not already in the basket */
        INSERT INTO BasketItem(BasketNum, ProdNum, BasketItemPrice, BasketItemProdName,
		BasketItemQuantity, BasketItemAttributes)
        VALUES(@BasketNum, @ProdNum, @Price, @ProdName, @Quantity, @Attributes)
    ELSE   /* this exact product is already in the basket, so just update the quantity */
        UPDATE BasketItem SET BasketItemQuantity = BasketItemQuantity + @Quantity
        WHERE  BasketNum = @BasketNum AND ProdNum = @ProdNum _
		   AND BasketItemAttributes = @Attributes
GO
|
- All of the parameters to this stored procedure are input parameters.
- Note how @Current is set up to count the number of rows in the BasketItem table that
match the basket number, product number, and attributes string. This count should be 0 or 1.
Either we already have this exact product (including the same choices for all of the customizable
features) in this basket or we do not.
- If this exact product is already present, we just update the quantity by adding on the new
number to be purchased to the already existing quantity to be purchased.
- Once our VB code executes this stored procedure, it redirects to the cart.aspx page, which
we create below.
- Since we are manually executed 2 stored procedures here, we need to add some items to the
top of the results.aspx.vb file. Place the following items in the obvious spot near the top
of this file:
|
Me.cmdCreateBasket = New System.Data.SqlClient.SqlCommand
Me.cmdInsertBasketItem = New System.Data.SqlClient.SqlCommand

'cmdCreateBasket
'
Me.cmdCreateBasket.CommandText = "studentc.[NewBasket]"
Me.cmdCreateBasket.CommandType = System.Data.CommandType.StoredProcedure
Me.cmdCreateBasket.Connection = Me.SqlConnection1
Me.cmdCreateBasket.Parameters.Add(New System.Data.SqlClient.SqlParameter("@RETURN_VALUE", _
    System.Data.SqlDbType.Int, 4, System.Data.ParameterDirection.ReturnValue, False, _
    CType(10, Byte), CType(0, Byte), "", System.Data.DataRowVersion.Current, Nothing))
Me.cmdCreateBasket.Parameters.Add(New System.Data.SqlClient.SqlParameter("@ShopperNum", _
    System.Data.SqlDbType.Int, 4, System.Data.ParameterDirection.Input, False, _
    CType(10, Byte), CType(0, Byte), "", System.Data.DataRowVersion.Current, Nothing))
Me.cmdCreateBasket.Parameters.Add(New System.Data.SqlClient.SqlParameter("@BasketNum", _
    System.Data.SqlDbType.Int, 4, System.Data.ParameterDirection.Output, False, _
    CType(10, Byte), CType(0, Byte), "", System.Data.DataRowVersion.Current, Nothing))
'
'cmdInsertBasketItem
'
Me.cmdInsertBasketItem.CommandText = "studentc.[InsertBasketItem]"
Me.cmdInsertBasketItem.CommandType = System.Data.CommandType.StoredProcedure
Me.cmdInsertBasketItem.Connection = Me.SqlConnection1
Me.cmdInsertBasketItem.Parameters.Add(New System.Data.SqlClient.SqlParameter("@RETURN_VALUE", _
    System.Data.SqlDbType.Int, 4, System.Data.ParameterDirection.ReturnValue, False, _
    CType(10, Byte), CType(0, Byte), "", System.Data.DataRowVersion.Current, Nothing))
Me.cmdInsertBasketItem.Parameters.Add(New System.Data.SqlClient.SqlParameter("@BasketNum", _
    System.Data.SqlDbType.Int, 4, System.Data.ParameterDirection.Input, False, _
    CType(10, Byte), CType(0, Byte), "", System.Data.DataRowVersion.Current, Nothing))
Me.cmdInsertBasketItem.Parameters.Add(New System.Data.SqlClient.SqlParameter("@ProdNum", _
    System.Data.SqlDbType.Int, 4, System.Data.ParameterDirection.Input, False, _
    CType(10, Byte), CType(0, Byte), "", System.Data.DataRowVersion.Current, Nothing))
Me.cmdInsertBasketItem.Parameters.Add(New System.Data.SqlClient.SqlParameter("@Price", _
    System.Data.SqlDbType.Money, 8, System.Data.ParameterDirection.Input, False, _
    CType(19, Byte), CType(0, Byte), "", System.Data.DataRowVersion.Current, Nothing))
Me.cmdInsertBasketItem.Parameters.Add(New System.Data.SqlClient.SqlParameter("@ProdName", _
    System.Data.SqlDbType.Char, 24))
Me.cmdInsertBasketItem.Parameters.Add(New System.Data.SqlClient.SqlParameter("@Quantity", _
    System.Data.SqlDbType.Int, 4, System.Data.ParameterDirection.Input, False, _
    CType(10, Byte), CType(0, Byte), "", System.Data.DataRowVersion.Current, Nothing))
Me.cmdInsertBasketItem.Parameters.Add(New System.Data.SqlClient.SqlParameter("@Attributes", _
    System.Data.SqlDbType.VarChar, 64))

Protected WithEvents cmdCreateBasket As System.Data.SqlClient.SqlCommand
Protected WithEvents cmdInsertBasketItem As System.Data.SqlClient.SqlCommand
|
The Code-Behind File for the Cars Form
- Look at your cars.aspx.vb file.
- As already mentioned, we have to call CheckShopperNum at the start of the Page_Load procedure.
- Now that we have added the code to results.aspx.vb for the Attributes string, we need to clear
out that information in the code-behind file for the Cars form just before it redirects to the
Results page.
- The entire revised code for Page_Load is shown below. Note how before redirecting to the
Results page it puts the empty string into Attributes in session state and completely removes
NumAttributes and NumAttributesCustomized from session state.
|
Private Sub Page_Load(ByVal sender As System.Object, _
    ByVal e As System.EventArgs) Handles MyBase.Load

    'Put user code to initialize the page here
    Dim TargetModel As String
    Dim ErrorFlag As String

    ShopperErrorLabel.Visible = False
    CheckShopperNum(Session, ErrorFlag)
    If ErrorFlag = 1 Then
        ShopperErrorLabel.Visible = True
    End If

    If Not IsPostBack Then
        Try
            BrandLabel.Text = "Brand (manufacturer): " & Session("BrandSelected")
            CarsList.Items.Add("*** Make a choice ***")
            SqlConnection1.Open()
            SqlDataAdapter1.SelectCommand.Parameters("@TargetBrand").Value = _
			    Session("BrandSelected")
            dReader = SqlDataAdapter1.SelectCommand.ExecuteReader
            While (dReader.Read())
                CarsList.Items.Add(dReader.GetString(0))
            End While
        Catch exception As System.Data.SqlClient.SqlException
            ErrorLabel.Visible = True
        Catch exception As Exception
            ErrorLabel.Visible = True
        Finally
            SqlConnection1.Close()
        End Try
    Else   ' Postback case:
        TargetModel = CarsList.SelectedItem.Text
        If Not Equals(TargetModel, "*** Make a choice ***") Then
            Session.Add("ModelSelected", TargetModel)
            Session.Add("Attributes", "")  _
			    ' To be sure that attributes for another product are cleared
            Session.Remove("NumAttributes")
            Session.Remove("NumAttributesCustomized")
            Response.Redirect("results.aspx")
        End If
    End If
End Sub
|
The Code-Behind File for the SearchResults Form
- In the same way, the code behind file searchresults.aspx.vb must be modified just before
it redirects to the Results page.
- Here is the modified procedure:
|
Private Sub DataGrid1_ItemCommand(ByVal Source As Object, _
    ByVal e As DataGridCommandEventArgs) Handles DataGrid1.ItemCommand

    'Note that e.Item is the row where the user clicked a View button
    If e.CommandName = "View" Then
        Session.Add("ModelSelected", e.Item.Cells(1).Text)
        Session.Add("BrandSelected", e.Item.Cells(2).Text)
        Session.Add("Attributes", "")  'To be sure that attributes from an old product are cleared
        Session.Remove("NumAttributes")
        Session.Remove("NumAttributesCustomized")
        Response.Redirect("results.aspx")
    End If
End Sub
|
The Shopping Cart Form
- Here is an image of the completed page
as displayed by a browser.
- Also check this image of the form in Visual Studio.
- As always, adjust this form (in HTML view) to include our header.txt and footer.txt files.
- Set the title of the page to be "Cart, CarCrazyUsa.com".
- The main item on this page is a data grid. Place one on the form, then resize it and locate
it as shown in the images above. The default ID of DataGrid1 is fine. Set its Visible property
to False.
- Drag a data view to the form. Leave it with the default ID of DataView1.
- Click on the data grid. Then use Auto Format under Properties to select "Colorful 1" as the
desired format.
- Click on the data grid. Then click on Property Builder under Properties.
Then customize the following:
- Under the Columns tab, uncheck "Create columns automatically at run time".
Then add the following columns, in the order listed, in each case by clicking
on Data Field and then clicking the > button to add the item.
- Brand (as name and Header text), CategoryName (as Data Field), and check the boxes for
Visible and Read only. Check this image
to see how this looks in Property Builder.
- Model (as name and Header text), BasketItemProdName (as Data Field), and
check the boxes for Visible and Read only.
- Features (as name and Header text), BasketItemAttributes (as Data Field),
and check the boxes for Visible and Read only.
- Quantity (as name and Header text), BasketItemQuantity (as Data Field),
and check the boxes for Visible and Read only.
- Price (as name and Header text), BasketItemPrice (as Data Field), {0:C} as Data formatting
expression (for currency format), and check the boxes for Visible and Read only.
- Total (as name and Header text), BasketItemTotal (as Data Field), {0:C} as Data formatting
expression, and check the boxes for Visible and Read only.
- BasketItemNum (as name and Header text), but do not check visible
for this one. The only other item that has to be filled in on this screen is
BasketItemNum for Data Field. We use this invisible column to hold the basket item
number so that we can get at it when we need it, even though it cannot be seen
on the screen.
As the last column in the list, add a button column. Do this by clicking on
Button Column and then the > button. Name the column Remove with Remove also
as the Header text. Also use Remove for Text and Command. For Button type select
PushButton. Check Visible.
See this picture to see how this looks.
- Under the Paging tab, check the Allow paging and Show navigation button boxes.
Set the page size to 2 since we won't have enough room to display much more than 2
rows of data at once on the shopping cart page. Use Bottom for the Position of the
navigation buttons, use "Next, Previous buttons" for the Mode and use Next and Previous for
the text on the 2 buttons.
- Under the General tab, set the data source to be DataView1. Also set it to show the
header but not the footer to the table. Don't set the data source until
the previous steps have been completed. (It seems to interfere with adding a
new bound column.)
- Add to the cart.aspx form the various labels seen in the pictures above. These are:
- A label with text "To add items to your cart, use Brands or Search. Do not use
your browser's back button." Make Visible to be True. It does not matter what ID this
label has. We tell users to avoid the back button as it is difficult when using the back
button to guarantee that the right portions of the old session state information get
properly cleared and replaced by new information.
- A label with ID ItemsLabel, no text, and Visible set to True. We will use this label
to display the number of items (cars) in the shopping cart.
- A label with ID SubTotalLabel, no text, and Visible set to True. We will use this label
to display the subtotal for all items in the shopping cart.
- A label with ID Database error, text in red of "Database error", and Visible set to False.
- A label with ID ShopperErrorLabel, red text of "Error on page", and Visible set to False.
- A label with ID ErrorLabel, text in red of "An error happened", and Visible set to False.
- Add to the form a button with ID BuyButton, text "Buy Items in Cart", and Visible set to True.
- Add another button with ID EmptyButton, text "Empty the Cart", and Visible set to True.
- Double click on each button to create the outline of a click handler for each. We will fill in
the code for these shortly.
|
The Code-Behind File for the Shopping Cart Form
- In the cart.aspx.vb file, expand the "Web Form Designer Generated Code" region.
- Add the following in the usual spot.
|
Protected dTable As New DataTable
Protected WithEvents cmdCreateBasket As System.Data.SqlClient.SqlCommand
Protected WithEvents cmdBasketQuantitySubTotal As System.Data.SqlClient.SqlCommand
Protected WithEvents cmdRemoveBasketItem As System.Data.SqlClient.SqlCommand
Protected WithEvents cmdEmptyBasket As System.Data.SqlClient.SqlCommand
|
- These set up a data table and four SqlCommand objects that we will use to manually
call four stored procedures. We do this manually because Query Builder won't give us
what we want.
- Next, add the following to the InitializeComponent procedure.
Change the user ID from studentc to your own, of course.
|
Me.cmdCreateBasket = New System.Data.SqlClient.SqlCommand
Me.cmdBasketQuantitySubTotal = New System.Data.SqlClient.SqlCommand
Me.cmdRemoveBasketItem = New System.Data.SqlClient.SqlCommand
Me.cmdEmptyBasket = New System.Data.SqlClient.SqlCommand
'
'cmdCreateBasket
'
Me.cmdCreateBasket.CommandText = "studentc.[NewBasket]"
Me.cmdCreateBasket.CommandType = System.Data.CommandType.StoredProcedure
Me.cmdCreateBasket.Connection = Me.SqlConnection1
Me.cmdCreateBasket.Parameters.Add(New System.Data.SqlClient.SqlParameter("@RETURN_VALUE", _
    System.Data.SqlDbType.Int, 4, System.Data.ParameterDirection.ReturnValue, False, _
    CType(10, Byte), CType(0, Byte), "", System.Data.DataRowVersion.Current, Nothing))
Me.cmdCreateBasket.Parameters.Add(New System.Data.SqlClient.SqlParameter("@ShopperNum", _
    System.Data.SqlDbType.Int, 4, System.Data.ParameterDirection.Input, False, _
    CType(10, Byte), CType(0, Byte), "", System.Data.DataRowVersion.Current, Nothing))
Me.cmdCreateBasket.Parameters.Add(New System.Data.SqlClient.SqlParameter("@BasketNum", _
    System.Data.SqlDbType.Int, 4, System.Data.ParameterDirection.Output, False, _
    CType(10, Byte), CType(0, Byte), "", System.Data.DataRowVersion.Current, Nothing))
'
'cmdBasketQuantitySubTotal
'
Me.cmdBasketQuantitySubTotal.CommandText = "studentc.[BasketQuantitySubTotal]"
Me.cmdBasketQuantitySubTotal.CommandType = System.Data.CommandType.StoredProcedure
Me.cmdBasketQuantitySubTotal.Connection = Me.SqlConnection1
Me.cmdBasketQuantitySubTotal.Parameters.Add(New System.Data.SqlClient.SqlParameter( _
    "@RETURN_VALUE", System.Data.SqlDbType.Int, 4, _
    System.Data.ParameterDirection.ReturnValue, False, CType(10, Byte), _
    CType(0, Byte), "", System.Data.DataRowVersion.Current, Nothing))
Me.cmdBasketQuantitySubTotal.Parameters.Add(New System.Data.SqlClient.SqlParameter( _
    "@TargetBasketNum", System.Data.SqlDbType.Int, 4, _
    System.Data.ParameterDirection.Input, False, CType(10, Byte), _
    CType(0, Byte), "", System.Data.DataRowVersion.Current, Nothing))
Me.cmdBasketQuantitySubTotal.Parameters.Add(New System.Data.SqlClient.SqlParameter( _
    "@Quantity", System.Data.SqlDbType.Int, 4, _
    System.Data.ParameterDirection.Output, False, CType(10, Byte), CType(0, Byte), _
    "", System.Data.DataRowVersion.Current, Nothing))
Me.cmdBasketQuantitySubTotal.Parameters.Add(New System.Data.SqlClient.SqlParameter( _
    "@SubTotal", System.Data.SqlDbType.Money, 8, _
    System.Data.ParameterDirection.Output, False, CType(19, Byte), CType(0, Byte), _
    "", System.Data.DataRowVersion.Current, Nothing))
'
'cmdRemoveBasketItem
'
Me.cmdRemoveBasketItem.CommandText = "studentc.[RemoveBasketItem]"
Me.cmdRemoveBasketItem.CommandType = System.Data.CommandType.StoredProcedure
Me.cmdRemoveBasketItem.Connection = Me.SqlConnection1
Me.cmdRemoveBasketItem.Parameters.Add(New System.Data.SqlClient.SqlParameter( _
    "@RETURN_VALUE", System.Data.SqlDbType.Int, 4, _
    System.Data.ParameterDirection.ReturnValue, False, CType(10, Byte), _
    CType(0, Byte), "", System.Data.DataRowVersion.Current, Nothing))
Me.cmdRemoveBasketItem.Parameters.Add(New System.Data.SqlClient.SqlParameter( _
    "@TargetBasketNum", System.Data.SqlDbType.Int, 4, _
    System.Data.ParameterDirection.Input, False, CType(10, Byte), _
    CType(0, Byte), "", System.Data.DataRowVersion.Current, Nothing))
Me.cmdRemoveBasketItem.Parameters.Add(New System.Data.SqlClient.SqlParameter( _
    "@TargetBasketItemNum", System.Data.SqlDbType.Int, 4, _
    System.Data.ParameterDirection.Input, False, CType(10, Byte), _
    CType(0, Byte), "", System.Data.DataRowVersion.Current, Nothing))
'
'cmdEmptyBasket
'
Me.cmdEmptyBasket.CommandText = "studentc.[EmptyBasket]"
Me.cmdEmptyBasket.CommandType = System.Data.CommandType.StoredProcedure
Me.cmdEmptyBasket.Connection = Me.SqlConnection1
Me.cmdEmptyBasket.Parameters.Add(New System.Data.SqlClient.SqlParameter( _
    "@RETURN_VALUE", System.Data.SqlDbType.Int, 4, _
    System.Data.ParameterDirection.ReturnValue, False, CType(10, Byte), _
    CType(0, Byte), "", System.Data.DataRowVersion.Current, Nothing))
Me.cmdEmptyBasket.Parameters.Add(New System.Data.SqlClient.SqlParameter( _
    "@TargetBasketNum", System.Data.SqlDbType.Int, 4, _
    System.Data.ParameterDirection.Input, False, CType(10, Byte), _
    CType(0, Byte), "", System.Data.DataRowVersion.Current, Nothing))
|
- Next, set up the Page_Load procedure for the shopping cart page to look like this:
|
Private Sub Page_Load(ByVal sender As System.Object, _
    ByVal e As System.EventArgs) Handles MyBase.Load

    Dim ErrorFlag As Integer
    Dim Quantity As Integer

    If Not IsPostBack Then
        ShopperErrorLabel.Visible = False
        CheckShopperNum(Session, ErrorFlag)
        If ErrorFlag = 1 Then
            ShopperErrorLabel.Visible = True
        End If

        Try
            If CType(Session("BasketNum"), String) = "" Then   ' need to make a new basket
                cmdCreateBasket.Parameters("@ShopperNum").Value = Session("ShopperNum")
                SqlConnection1.Open()
                cmdCreateBasket.ExecuteNonQuery()
                Session.Add("BasketNum", cmdCreateBasket.Parameters("@BasketNum").Value)
            End If
        Catch exception As Exception
            ErrorLabel.Visible = True
        Finally
            SqlConnection1.Close()
        End Try

        UpdatePage()
    End If
End Sub
|
- The above procedure does our usual CheckShopperNum so as to generate a new shopper number
if the user doesn't already have one.
- The next section checks to see if there is a shopping basket number. If not, it runs our
NewBasket stored procedure to create a basket number. This is the same code that we used
above on the results page when the user clicked the Add to Cart button. So, the user
should already have a basket number, but we want to be sure that there is a basket number
no matter how the user reached the shopping cart page.
- Finally, the above code calls an UpdatePage procedure (which we write below) to place
the appropriate information about the basket items on the shopping cart page.
- In fact, the following is the code for this UpdatePage procedure. Go ahead and add it.
|
Private Sub UpdatePage()
    Dim BasketNum, Quantity As Integer

    If Session.Count = 0 Then   ' No session items were supplied.
        ErrorLabel.Visible = True
    Else
        Try
            'Get the basket data:
            BasketNum = Session("BasketNum")
            SqlConnection1.Open()
            SqlDataAdapter1.SelectCommand.Parameters("@TargetBasketNum").Value = BasketNum
            SqlDataAdapter1.Fill(dTable)
            If dTable.Rows.Count = 0 Then
                ItemsLabel.Text = "0 items in cart"
                DataGrid1.Visible = False
                SubTotalLabel.Visible = False
                BuyButton.Visible = False
                EmptyButton.Visible = False
            Else
                AdjustAttributes(dTable)
                DataView1 = New DataView(dTable)
                DataGrid1.DataBind()
                DataGrid1.Visible = True
                SubTotalLabel.Visible = True
                BuyButton.Visible = True
                EmptyButton.Visible = True
                ' Get the subtotal and the quantity of items in the cart (basket):
                cmdBasketQuantitySubTotal.Parameters("@TargetBasketNum").Value = BasketNum
                cmdBasketQuantitySubTotal.ExecuteNonQuery()
                SubTotalLabel.Text = "Subtotal (before tax & shipping): " & _
                    Format(cmdBasketQuantitySubTotal.Parameters("@SubTotal").Value, "Currency")
                Quantity = cmdBasketQuantitySubTotal.Parameters("@Quantity").Value
                If Quantity = 1 Then
                    ItemsLabel.Text = "1 item in cart"
                Else
                    ItemsLabel.Text = Quantity.ToString & " items in cart"
                End If
            End If
        Catch exception As System.Data.SqlClient.SqlException
            DatabaseErrorLabel.Visible = True
        Catch exception As Exception
            ErrorLabel.Visible = True
        Finally
            SqlConnection1.Close()
        End Try
    End If
End Sub
|
- This UpdatePage procedure first checks if there is any session state information.
If not, it simply displays an error message in a label.
- Otherwise, it goes on to try to look up and display the contents for the shopping cart.
If this does not work, an exception is raised and an error label is made visible.
- To retrieve the shopping cart data we use a selection type of stored procedure. This
stored procedure can be created with Query Builder. So, drag an SqlDataAdapter to your
form and set it up to create a new stored procedure. Skip Insert, Update, and Delete.
See this picture of Query Builder to see how this
stored procedure was designed. To make it easier to see if you have the right code for
your stored procedure, here is the code. Change studentc to your own ID, as usual.
|
CREATE PROCEDURE studentc.GetBasket
(
    @TargetBasketNum int
)
AS
    SET NOCOUNT ON;
SELECT dbo.BasketItem.ProdNum, dbo.BasketItem.BasketItemProdName, _
    dbo.BasketItem.BasketItemAttributes, dbo.BasketItem.BasketItemPrice, _
    dbo.BasketItem.BasketItemQuantity, dbo.BasketItem.BasketItemNum, _
	dbo.Category.CategoryName, dbo.BasketItem.BasketItemQuantity * _
    dbo.BasketItem.BasketItemPrice AS BasketItemTotal
FROM dbo.CategoryProduct
INNER JOIN dbo.Category ON dbo.CategoryProduct.CategoryNum = dbo.Category.CategoryNum
INNER JOIN dbo.Product ON dbo.CategoryProduct.ProdNum = dbo.Product.ProdNum
INNER JOIN dbo.BasketItem ON dbo.Product.ProdNum = dbo.BasketItem.ProdNum
WHERE (dbo.BasketItem.BasketNum = @TargetBasketNum)
GO
|
- By placing the 4 needed tables into Query Builder, it will produce the join operations for you.
- Note the one computed value with alias BasketItemTotal. It is computed as the quantity times
the price.
- The stored procedure returns the desired data for all rows in the joined table
that have the target basket ID number. Thus we get rows of data for all of the items
in the shopping basket.
- Back in the VB code that calls this stored procedure, note how it looks up the basket number
from the session state and fills this in as the parameter to the GetBasket stored procedure.
- If the stored procedure returns no data, we display a "0 items in cart" message on a label.
- Otherwise, we display the shopping cart data in the data grid in the usual way, although
with some alteration to the attribute information (carried out by the AdjustAttributes procedure)
so that it is more readable.
- To get the subtotal and number (quantity) of items in the shopping cart, we manually call
another stored procedure. This one is named BasketQuantitySubTotal and is passed the
basket ID number by our VB code. The subtotal is, of course, formatted as currency
for display on the appropriate label.
- The BasketQuantitySubTotal stored procedure needs to be created manually
in Enterprise Manager. Check this image showing the stored procedure code
or the following listing:
|
CREATE PROCEDURE studentc.BasketQuantitySubTotal
    @TargetBasketNum int,
    @Quantity int OUTPUT,
    @SubTotal money OUTPUT
AS
    SELECT @SubTotal = SUM(BasketItemQuantity * BasketItemPrice)
        FROM BasketItem WHERE BasketNum = @TargetBasketNum
    SELECT @Quantity = SUM(BasketItemQuantity)
        FROM BasketItem WHERE BasketNum = @TargetBasketNum
GO
|
- This stored procedure sums up the quantity times price for each row of data in the BasketItem
table having the target basket number. This then is the subtotal for this basket.
- Similarly, it sums up the quantity for each row in the same table that has the desired
basket number. This is the total number of items in the shopping basket.
- Next we add the AdjustAttributes procedure that we used above:
|
' Adjusts the Attributes column in dTable so that the data there is more readable.
Private Sub AdjustAttributes(ByRef dTable As DataTable)
    Dim Row As DataRow
    Dim AttrString As String
    Dim AttributesArray As String() = Nothing
    Dim ItemsArray As String() = Nothing
    Dim delimStr As String = ";"
    Dim DelimStr2 As String = ","
    Dim delimiter As Char() = delimStr.ToCharArray()
    Dim delimiter2 As Char() = DelimStr2.ToCharArray()
    Dim k, Top As Integer

    For Each Row In dTable.Rows
        AttrString = Row.Item("BasketItemAttributes")
        AttributesArray = AttrString.Split(delimiter)
        Top = AttributesArray.GetUpperBound(0)
        AttrString = ""
        For k = 0 To Top
            If k <> 0 Then
                AttrString &= ", "
            End If
            ItemsArray = AttributesArray(k).Split(delimiter2)
            AttrString &= ItemsArray(0)
            AttrString &= ": "
            AttrString &= ItemsArray(2)
        Next
        Row.Item("BasketItemAttributes") = AttrString
    Next
End Sub
|
- AdjustAttibutes changes the data in the BasketItemAttributes column of the data table
dTable passed in as a parameter.
- Since a data table is just an in-memory copy of an data from our database, this does not
alter anything in the database.
- A "For Each" loop is used to loop through all of the rows in dTable.
- With each row we look up the BasketItemAttributes field value and place it in the AttrString
variable. This is the field that contains a string such as this example that we looked at before:
|
Color,1,Purple,8;Seat Covering,2,Cloth,11
|
- Our code splits this string apart at the semicolons, putting the pieces into AttributesArray.
- We then loop through all of the pieces in AttributesArray using a "For" loop.
- For each such piece we split it apart at the commas.
- We use items 0 and 2 from the results, as they are the category name and attribute name
(such as Color and Purple from the first piece of data in the above example). These two names
are concatenated to a growing string of readable attribute information named AttrString.
(Note that we reused AttrString by assigning to it the empty string before this new use of it.)
- At the end of the inner loop, the nicely formatted AttrString contains something like
"Color: Red" and is assigned into the BasketItemAttributes field of the current row of dTable.
- Thanks to the outer loop, this updating of the BasketItemAttributes field is done for each
row in dTable.
- Next, add the following procedure to handle paging in the data grid when the user clicks
on Previous or Next to see a different page of data:
|
Private Sub DataGrid1_PageIndexChanged(ByVal sender As Object, _
ByVal e As DataGridPageChangedEventArgs) Handles DataGrid1.PageIndexChanged
    Dim BasketNum, Quantity As Integer

    If Session.Count = 0 Then   ' No session items were supplied.
        ErrorLabel.Visible = True
    Else
        Try
            'Get the basket data:
            BasketNum = Session("BasketNum")
            SqlConnection1.Open()
            SqlDataAdapter1.SelectCommand.Parameters("@TargetBasketNum").Value = BasketNum
            SqlDataAdapter1.Fill(dTable)
            If dTable.Rows.Count = 0 Then
                ItemsLabel.Text = "0 items in cart"
                DataGrid1.Visible = False
                SubTotalLabel.Visible = False
                BuyButton.Visible = False
                EmptyButton.Visible = False
            Else
                AdjustAttributes(dTable)
                DataView1 = New DataView(dTable)
                DataGrid1.CurrentPageIndex = e.NewPageIndex  'Show new page
                DataGrid1.DataBind()
                DataGrid1.Visible = True
                SubTotalLabel.Visible = True
                BuyButton.Visible = True
                EmptyButton.Visible = True
                'The info displayed on the labels should not need to be changed.
            End If
        Catch exception As System.Data.SqlClient.SqlException
            DatabaseErrorLabel.Visible = True
        Catch exception As Exception
            ErrorLabel.Visible = True
        Finally
            SqlConnection1.Close()
        End Try
    End If
End Sub
|
- The above code is almost the same as that used in the UpdatePage procedure that we already wrote.
- The only addition is the important line that sets the CurrentPageIndex.
- As indicated by the comment, the section of code that placed the subtotal and total number
of basket items into their respective labels has been removed. That information does not
change no matter what page of the data one looks at.
- Next, add the following procedure to handles a click on one of the Remove buttons that appears
in each row of shopping cart data.
|
Private Sub DataGrid1_ItemCommand(ByVal Source As Object, _
ByVal e As DataGridCommandEventArgs) Handles DataGrid1.ItemCommand
    Dim ItemNum As Integer
    'Note that e.Item is the row where the user clicked a button
    If e.CommandName = "Remove" Then
        Try
            ItemNum = CType(e.Item.Cells(6).Text, Integer)
            cmdRemoveBasketItem.Parameters("@TargetBasketNum").Value = Session("BasketNum")
            cmdRemoveBasketItem.Parameters("@TargetBasketItemNum").Value = ItemNum
            SqlConnection1.Open()
            cmdRemoveBasketItem.ExecuteNonQuery()
        Catch exception As System.Data.SqlClient.SqlException
            DatabaseErrorLabel.Visible = True
        Catch exception As Exception
            ErrorLabel.Visible = True
        Finally
            SqlConnection1.Close()
        End Try

        'Go back to first page as we may have removed last item on page already displayed.
        DataGrid1.CurrentPageIndex = 0
        UpdatePage()
    End If
End Sub
|
- This procedure gets the value from column 6 of the row where the user clicked the Remove button.
You may recall that the sixth column is the hidden column that contains the basket item number.
- This basket item number is passed as a parameter to a stored procedure, as is the basket number.
- The stored procedure RemoveBasketItem is then executed to remove this row of data from
the BasketItem table.
- We then set the CurrentPageIndex for the data grid to 0, which indicates the first page.
This is done in case the page we were on is now empty due to the removal of the only row
on that page.
- The UpdatePage procedure is then called to retrieve from BasketItems
the updated shopping cart content and display it on the shopping cart page.
- Manually create our RemoveBasketItem stored procedure so that it contains the following code:
|
CREATE PROCEDURE studentc.RemoveBasketItem
    @TargetBasketNum int,
    @TargetBasketItemNum int
AS
    DELETE FROM BasketItem WHERE BasketNum = @TargetBasketNum _
	   AND BasketItemNum = @TargetBasketItemNum
GO
|
- Next we fill in the code for the procedure that handles a click on the Empty button.
- The purpose of this procedure is to remove everything from the current shopping cart.
- Make your procedure look like this:
|
Private Sub EmptyButton_Click(ByVal sender As System.Object, ByVal e As System.EventArgs) _
Handles EmptyButton.Click
    Try
        cmdEmptyBasket.Parameters("@TargetBasketNum").Value = Session("BasketNum")
        SqlConnection1.Open()
        cmdEmptyBasket.ExecuteNonQuery()
    Catch exception As System.Data.SqlClient.SqlException
        DatabaseErrorLabel.Visible = True
    Catch exception As Exception
        ErrorLabel.Visible = True
    Finally
        SqlConnection1.Close()
    End Try
    UpdatePage()
End Sub
|
- The above procedure gets the basket number from the session state and passes it
as a parameter to a stored procedure.
- We then execute this stored procedure and update the data on the shopping cart page.
(It will, of course, now show zero items in the cart.)
- The needed stored procedure is called EmptyBasket and should be created in SQL Server's
Enterprise Manager to have the following code:
|
CREATE PROCEDURE studentc.EmptyBasket
    @TargetBasketNum int
AS
    DELETE FROM BasketItem WHERE BasketNum = @TargetBasketNum
GO
|
- Obviously this stored procedure deletes from the BasketItem table all rows that have
the desired basket number.
- Finally, fill in the one needed line of code to redirect the user to the shipping page
(which we create later) when the Buy Items in Cart button is clicked. Here is how this BuyButton_Click
procedure should look:
|
Private Sub BuyButton_Click(ByVal sender As System.Object, _
    ByVal e As System.EventArgs) Handles BuyButton.Click

    Response.Redirect("shipping.aspx")
End Sub
|
The Shipping Form
- Add a new web form named shipping.aspx to our project.
- We wish to obtain a page that will look like this screen shot
and this one.
- You can also refer to this image of the shipping form as
seen in Visual Studio.
- In HTML view, include our header.txt and footer.txt files as we did in all of the other web forms.
- Change the title to "Shipping, CarCrazyUsa.com".
- Add the label that says "Enter Shipping Information" and have it displayed in a large font.
- Under this add 4 text boxes with IDs FirstNameBox, LastNameBox, StreetBox, and CityBox.
Change the tab index for these to 1 through 4, respectively. (The purpose of this is to allow
the user to simply press the tab key to easily go from one box to the next.)
Leave Visible set to True for all 4.
- Under this add a drop-down list with ID StateList. Set its tab index to 5. Have Visible be True.
Click on the Items property and then on the ... button to get the Collection Editor.
Begin by adding an entry that has "Select a state" as the Text and 0 as the Value. Set Selected
to True. Then add in the names of the 50 states and District of Columbia, in alphabetical order,
for the Text entry and give each its usual 2-letter abbreviation as the Value entry.
Leave Selected at False for all of these. Check this image
to see what this looks like when the list is partially completed.
- Below this drop-down list add 3 more text boxes with IDs ZipcodeBox, EmailBox, and PhoneBox.
Change the tab index for these to 6 through 8, respectively. Visible should be True for all of these.
- To the left of the 7 text boxes and 1 drop-down list put labels that display these messages in
this order, top-to-bottom on the screen: * First Name, * Last Name, *Street Address, * City, * State,
* Zipcode, Email, Phone. All should be visible.
- Put a button below the last text box. Change its ID to SubmitButton and its text to Submit.
It, too, should be visible. Double click this button to add to the code-behind file the outline
of a click handler for this button.
- Put a label at the top right in extra small font size that displays this text:
"* indicates a required field".
- We also need to add data validators. For each one, make sure that the EnableClientScript property
is set to True. This is to give the user quick help if the person forgets to fill in a required
field or similar. The validator also runs code at the server to check the data. This is for
security purposes, to make sure that only reasonable data gets processed by our app.
- Add a required field validator to the right of each of the first 5 text boxes.
For each, the control to validate property should be set to the text box to the left of the
validator. Use "Required" as the error message for each.
- Add a regular expression validator to the right of each of the two validators for
the first name and last name text boxes. For each, the control to validate should be the text box
that it aligns with horizontally. Use "Illegal data" for the error message field.
Use [a-zA-Z.,'\ ]{1,64} for the validation expression, since it allows 1 through 64
instances of the listed characters, namely lower and upper case letters, period, command,
apostrophe, and space. Note that the \ is used to quote the space, so that the \ followed by
a space represents a single character, a space. This list of characters and maximum length
of 64 seem to be reasonable to handle people's names.
- Add a regular expression validator to the right of the required field validator for the
street address box. Have it validate this text box and use "Illegal data" for the error message.
Use [a-zA-Z0-9#.,'\ ]{1,64} for the validation expression. This is almost the same
as the previous regular expression, but it allows the additional characters 0 through 9 and #.
These are included here since they often occur in street addresses.
- Add a regular expression validator to the right of the required field validator for the
city box. Have it validate this text box and use "Illegal data" for the error message.
Use the same validation expression that we used above for the first and last name boxes.
- Add a regular expression validator to the right of the required field validator for the
zipcode box. Have it validate this text box and use "Illegal data" for the error message.
Click in the ValidationExpression field and then on the ... button to get the Regular
Expression Editor. Select the built-in regular expression labelled "U.S. ZIP Code".
- Add a regular expression validator to the right of the email address box.
Have it validate this text box and use "Illegal data" for the error message.
Click in the ValidationExpression field and then on the ... button to get the Regular
Expression Editor. Select the built-in regular expression labelled "Internet Email Address".
- Add a regular expression validator to the right of the phone number box.
Have it validate this text box and use "Illegal data" for the error message.
Select the built-in validation expression for "U.S. Phone Number".
- Note that we are assuming, to keep things simpler, that our web app will
only be used inside the U.S.
- Add a custom validator to the right of the state drop-down list. Set the ControlToValidate to
StateList. Use "Must select" as the error message. Leave the ID as the default
CustomValidator1. We will add code for this validator below.
|
The Code-Behind File for the Shipping Page
- In the shipping.aspx.vb file, adjust the Page_Load procedure to look like this:
|
Private Sub Page_Load(ByVal sender As System.Object, ByVal e As System.EventArgs) _
    Handles MyBase.Load

    If Not IsPostBack Then
        If CType(Session("BasketNum"), String) = "" Then   ' No shopping basket
            Response.Redirect("cart.aspx")
        End If
    End If
End Sub
|
- The above procedure simply checks to see if there is a basket number for this shopper.
If not, it redirects the person to the shopping cart page (where they will see an empty
shopping cart and hopefully realize that they need to add something to the cart before
trying to go through the checkout process).
- Then add the following procedure to handle the custom validator that we added above for
the state drop-down list:
|
Private Sub CustomValidator1_ServerValidate(ByVal source As System.Object, _
    ByVal args As System.Web.UI.WebControls.ServerValidateEventArgs) _
    Handles CustomValidator1.ServerValidate

    If StateList.SelectedItem.ToString = "Select a state" Then
        args.IsValid = False
    Else
        args.IsValid = True
    End If
End Sub
|
- As you can see, the above code only validates the data if the user has selected something
in the list other than "Select a state". In other words, the user is forced to select a
state (or D.C.).
- You probably already have the outline of the click handler for the submit button. Add the
code shown below:
|
Private Sub SubmitButton_Click(ByVal sender As System.Object, _
    ByVal e As System.EventArgs) Handles SubmitButton.Click
    If Page.IsValid Then
        Session("FirstName") = FirstNameBox.Text
        Session("LastName") = LastNameBox.Text
        Session("Street") = StreetBox.Text
        Session("City") = CityBox.Text
        Session("State") = StateList.SelectedItem.Value
        Session("Zipcode") = ZipcodeBox.Text
        Session("Email") = EmailBox.Text
        Session("Phone") = PhoneBox.Text
        Response.Redirect("payment.aspx")
    End If
End Sub
|
- The above procedure only does something if the page's data validates.
- If so, it saves the shipping information supplied by the user on this page. It does so
by saving it in the session state.
- Then it redirects to the payment page (to be added below).
|
The Payment Page
- Look at this image of the payment page to see how it
should appear. This image shows that a required field validator has indicated to the
user that the box for the credit card number must be filled in.
- Similary, this other image of the payment form shows a regular
expression validator complaining because a # symbol was included in the name field.
- Check this image of
the payment.aspx form as it appears in Visual Studio. It gives you the overall sense of what
goes where on this page.
- Thus, add a new web form called payment.aspx to your project.
- Change the title of this page to "Payment, CarCrazyUsa.com".
- In HTML view include our usual header.txt and footer.txt files.
- The 2 labels in a large font display the messages "Order Summary:" and "Payment Information:".
- The labels going down the middle of the page display the messages "Subtotal:", "Shipping:",
"Tax:", "Total:", "Name on credit card:", "Credit card number:", "Credit card type:",
"Expiration month:", and "Expiration year:".
- Just to the right of each of these labels place the following (in this order):
A label with ID SubtotalLabel and no text, a label with ID ShippingLabel and no text, a label
with ID TaxLabel and no text, a label with ID TotalLabel and no text, a text box with ID
NameOnCardBox and TabIndex 1, a text box with ID CardNumberBox and TabIndex 2,
a drop-down list with ID CardTypeList and TabIndex 3, a drop-down list with ID CardExpireMonthList
and TabIndex 4, and a drop-down list with ID CardExpireYearList and TabIndex 5.
All of these items should be visible. The TabIndex values are arranged so that the user can
start on the first text box and easily tab through the other items in order.
- For the first drop-down list, go to Properties, click on Items, and click on the ... button
to bring up the Collection Editor. Use the Collection
Editor to fill in Visa, MasterCard, and American Express (both for Text and Value).
- Similary, for the second drop-down list use the Collection
Editor to fill in the 12 months of the year. Use the name of the month for Text and the
numbers 1 through 12 for Value.
- For the third drop-down list use the Collection Editor
to fill in the years 2005 through perhaps 2014 (for both Text and Value).
- Below this last drop-down list put a button with ID SubmitButton and text "Submit".
Double click on it to place the outline for a click handler in the code-behind file.
- Above the first text box place a label with ID ErrorLabel and text (in red) "Error on page".
Set Visible to False for this label, though it won't really matter since the code-behind file
will set it to False and only turn it to True if an error occurs.
- Below the label that says "Payment Information:" place a required field validator. Set it to
validate the NameOnCardBox and set the error message to "Name on card is required".
- Below this place a regular expression validator. Have it also validate the NameOnCardBox and
set its error message to "Illegal data for name". For the validation expression use
[a-zA-Z.,'\ ]{1,64}, a regular expression that we have used before. It allows up to 64
characters in the list: lower case letters, upper case letters, period, comma, single quote
(apostrophe), and space.
- Below this put a required field validator. Have it validate the CardNumberBox and set its
error message to "Card number required".
- One last validator is needed. Below the last one put a regular expression validator and
have it validate the same CardNumberBox. We want to see that the user enters a reasonable
credit card number. Use "Illegal data for card number" for the error message and
[-0-9]{1,64} for the validation expression. This regular expression restricts the
user to digits 0 through 9 and the - symbol (which is often used between groups of digits
in credit card numbers). A maximum of 64 characters is more than we need, but the main point
is to limit the user so that a huge string cannot be entered here.
|
The Code-Behind File for the Payment Page
- Although we only need to write code for the Page_Load procedure, it does call five stored procedures.
- Furthermore, these stored procedures will all be written and called using hand-written code; we will
not use a data adapter, nor we will create the stored procedures with Query Builder.
- So that we will be able to call our stored procedures, we first add the following at the top of the
code-behind file, in the region for automatically-generated code. We do this so that we have an
SqlConnection and five SqlCommand variables available for our use.
|
Protected WithEvents SqlConnection1 As System.Data.SqlClient.SqlConnection ' added by hand
Protected WithEvents cmdBasketDetails As System.Data.SqlClient.SqlCommand ' added manually
Protected WithEvents cmdInsertOrder As System.Data.SqlClient.SqlCommand ' added manually
Protected WithEvents cmdInsertPayment As System.Data.SqlClient.SqlCommand ' added manually
Protected WithEvents cmdUpdateBasket As System.Data.SqlClient.SqlCommand ' added manually
Protected WithEvents cmdUpdateShopper As System.Data.SqlClient.SqlCommand ' added manually
|
- Then add the following to the InitializeComponent procedure so as to initialize these six items:
|
Me.SqlConnection1 = New System.Data.SqlClient.SqlConnection
Me.cmdBasketDetails = New System.Data.SqlClient.SqlCommand
Me.cmdInsertOrder = New System.Data.SqlClient.SqlCommand
Me.cmdInsertPayment = New System.Data.SqlClient.SqlCommand
Me.cmdUpdateBasket = New System.Data.SqlClient.SqlCommand
Me.cmdUpdateShopper = New System.Data.SqlClient.SqlCommand
|
- In the same procedure set up the connection string like the following.
- You may need to adjust your workstation id, data source (server where SQL Server is located, and
initial catalog (your starting location in SQL Server).
|
Me.SqlConnection1.ConnectionString = "workstation id=CISPC19;packet size=4096; _
    integrated security=SSPI;data source=""CIS" & "-W2KSERVER""; _
    persist security info=False;initial catalog=studentc"
|
- Next, in the same section we manually set up the fields for the five SqlCommand objects. We set up each to use a
stored proecedure, indicated by name in the CommandText line. We also specify the parameters for each stored
procedure. You have to be sure that the names, types, and sizes for these parameters match what you specify
in the stored procedures themselves.
- Replace studentc, of course, with your ID.
|
'
'cmdBasketDetails
'
Me.cmdBasketDetails.CommandText = "studentc.[BasketQuantitySubTotal]"
Me.cmdBasketDetails.CommandType = System.Data.CommandType.StoredProcedure
Me.cmdBasketDetails.Connection = Me.SqlConnection1
Me.cmdBasketDetails.Parameters.Add(New System.Data.SqlClient.SqlParameter("@RETURN_VALUE", _
    System.Data.SqlDbType.Int, 4, System.Data.ParameterDirection.ReturnValue, False, _
    CType(10, Byte), CType(0, Byte), "", System.Data.DataRowVersion.Current, Nothing))
Me.cmdBasketDetails.Parameters.Add(New System.Data.SqlClient.SqlParameter("@TargetBasketNum", _
    System.Data.SqlDbType.Int, 4, System.Data.ParameterDirection.Input, False, _
    CType(10, Byte), CType(0, Byte), "", System.Data.DataRowVersion.Current, Nothing))
Me.cmdBasketDetails.Parameters.Add(New System.Data.SqlClient.SqlParameter("@Quantity", _
    System.Data.SqlDbType.Int, 4, System.Data.ParameterDirection.Output, False, _
    CType(10, Byte), CType(0, Byte), "", System.Data.DataRowVersion.Current, Nothing))
Me.cmdBasketDetails.Parameters.Add(New System.Data.SqlClient.SqlParameter("@Subtotal", _
    System.Data.SqlDbType.Money, 8, System.Data.ParameterDirection.Output, False, _
    CType(19, Byte), CType(0, Byte), "", System.Data.DataRowVersion.Current, Nothing))
'
'cmdInsertOrder
'
Me.cmdInsertOrder.CommandText = "studentc.[InsertOrder]"
Me.cmdInsertOrder.CommandType = System.Data.CommandType.StoredProcedure
Me.cmdInsertOrder.Connection = Me.SqlConnection1
Me.cmdInsertOrder.Parameters.Add(New System.Data.SqlClient.SqlParameter("@RETURN_VALUE", _
    System.Data.SqlDbType.Int, 4, System.Data.ParameterDirection.ReturnValue, False, _
    CType(10, Byte), CType(0, Byte), "", System.Data.DataRowVersion.Current, Nothing))
Me.cmdInsertOrder.Parameters.Add(New System.Data.SqlClient.SqlParameter("@ShopperNum", _
    System.Data.SqlDbType.Int, 4, System.Data.ParameterDirection.Input, False, _
    CType(10, Byte), CType(0, Byte), "", System.Data.DataRowVersion.Current, Nothing))
Me.cmdInsertOrder.Parameters.Add(New System.Data.SqlClient.SqlParameter("@BasketNum", _
    System.Data.SqlDbType.Int, 4, System.Data.ParameterDirection.Input, False, _
    CType(10, Byte), CType(0, Byte), "", System.Data.DataRowVersion.Current, Nothing))
Me.cmdInsertOrder.Parameters.Add(New System.Data.SqlClient.SqlParameter("@FirstName", _
    System.Data.SqlDbType.VarChar, 24))
Me.cmdInsertOrder.Parameters.Add(New System.Data.SqlClient.SqlParameter("@LastName", _
    System.Data.SqlDbType.VarChar, 32))
Me.cmdInsertOrder.Parameters.Add(New System.Data.SqlClient.SqlParameter("@Street", _
    System.Data.SqlDbType.VarChar, 32))
Me.cmdInsertOrder.Parameters.Add(New System.Data.SqlClient.SqlParameter("@City", _
    System.Data.SqlDbType.VarChar, 32))
Me.cmdInsertOrder.Parameters.Add(New System.Data.SqlClient.SqlParameter("@State", _
    System.Data.SqlDbType.VarChar, 2))
Me.cmdInsertOrder.Parameters.Add(New System.Data.SqlClient.SqlParameter("@ZipCode", _
    System.Data.SqlDbType.VarChar, 15))
Me.cmdInsertOrder.Parameters.Add(New System.Data.SqlClient.SqlParameter("@Phone", _
    System.Data.SqlDbType.VarChar, 30))
Me.cmdInsertOrder.Parameters.Add(New System.Data.SqlClient.SqlParameter("@Email", _
    System.Data.SqlDbType.VarChar, 48))
'
'cmdInsertPayment
'
Me.cmdInsertPayment.CommandText = "studentc.[InsertPayment]"
Me.cmdInsertPayment.CommandType = System.Data.CommandType.StoredProcedure
Me.cmdInsertPayment.Connection = Me.SqlConnection1
Me.cmdInsertPayment.Parameters.Add(New System.Data.SqlClient.SqlParameter("@RETURN_VALUE", _
    System.Data.SqlDbType.Int, 4, System.Data.ParameterDirection.ReturnValue, False, _
    CType(10, Byte), CType(0, Byte), "", System.Data.DataRowVersion.Current, Nothing))
Me.cmdInsertPayment.Parameters.Add(New System.Data.SqlClient.SqlParameter("@OrderNum", _
    System.Data.SqlDbType.Int, 4, System.Data.ParameterDirection.Input, False, _
    CType(10, Byte), CType(0, Byte), "", System.Data.DataRowVersion.Current, Nothing))
Me.cmdInsertPayment.Parameters.Add(New System.Data.SqlClient.SqlParameter("@CardType", _
    System.Data.SqlDbType.VarChar, 16))
Me.cmdInsertPayment.Parameters.Add(New System.Data.SqlClient.SqlParameter("@CardNumber", _
    System.Data.SqlDbType.VarChar, 30))
Me.cmdInsertPayment.Parameters.Add(New System.Data.SqlClient.SqlParameter("@CardExpireDate", _
    System.Data.SqlDbType.VarChar, 24))
Me.cmdInsertPayment.Parameters.Add(New System.Data.SqlClient.SqlParameter("@NameOnCard", _
    System.Data.SqlDbType.VarChar, 64))
'
'cmdUpdateBasket
'
Me.cmdUpdateBasket.CommandText = "studentc.[UpdateBasket]"
Me.cmdUpdateBasket.CommandType = System.Data.CommandType.StoredProcedure
Me.cmdUpdateBasket.Connection = Me.SqlConnection1
Me.cmdUpdateBasket.Parameters.Add(New System.Data.SqlClient.SqlParameter("@RETURN_VALUE", _
    System.Data.SqlDbType.Int, 4, System.Data.ParameterDirection.ReturnValue, False, _
    CType(10, Byte), CType(0, Byte), "", System.Data.DataRowVersion.Current, Nothing))
Me.cmdUpdateBasket.Parameters.Add(New System.Data.SqlClient.SqlParameter("@BasketNum", _
    System.Data.SqlDbType.Int, 4, System.Data.ParameterDirection.Input, False, _
    CType(10, Byte), CType(0, Byte), "", System.Data.DataRowVersion.Current, Nothing))
Me.cmdUpdateBasket.Parameters.Add(New System.Data.SqlClient.SqlParameter("@BasketOrderPlaced", _
    System.Data.SqlDbType.Int, 4, System.Data.ParameterDirection.Input, False, _
    CType(10, Byte), CType(0, Byte), "", System.Data.DataRowVersion.Current, Nothing))
Me.cmdUpdateBasket.Parameters.Add(New System.Data.SqlClient.SqlParameter("@Quantity", _
    System.Data.SqlDbType.Int, 4, System.Data.ParameterDirection.Input, False, _
    CType(10, Byte), CType(0, Byte), "", System.Data.DataRowVersion.Current, Nothing))
Me.cmdUpdateBasket.Parameters.Add(New System.Data.SqlClient.SqlParameter("@Subtotal", _
    System.Data.SqlDbType.Money, 8, System.Data.ParameterDirection.Input, False, _
    CType(19, Byte), CType(0, Byte), "", System.Data.DataRowVersion.Current, Nothing))
Me.cmdUpdateBasket.Parameters.Add(New System.Data.SqlClient.SqlParameter("@Total", _
    System.Data.SqlDbType.Money, 8, System.Data.ParameterDirection.Input, False, _
    CType(19, Byte), CType(0, Byte), "", System.Data.DataRowVersion.Current, Nothing))
Me.cmdUpdateBasket.Parameters.Add(New System.Data.SqlClient.SqlParameter("@Shipping", _
    System.Data.SqlDbType.Money, 8, System.Data.ParameterDirection.Input, False, _
    CType(19, Byte), CType(0, Byte), "", System.Data.DataRowVersion.Current, Nothing))
Me.cmdUpdateBasket.Parameters.Add(New System.Data.SqlClient.SqlParameter("@Tax", _
    System.Data.SqlDbType.Money, 8, System.Data.ParameterDirection.Input, False, _
    CType(19, Byte), CType(0, Byte), "", System.Data.DataRowVersion.Current, Nothing))
'
'cmdUpdateShopper
'
Me.cmdUpdateShopper.CommandText = "studentc.[UpdateShopper]"
Me.cmdUpdateShopper.CommandType = System.Data.CommandType.StoredProcedure
Me.cmdUpdateShopper.Connection = Me.SqlConnection1
Me.cmdUpdateShopper.Parameters.Add(New System.Data.SqlClient.SqlParameter("@RETURN_VALUE", _
    System.Data.SqlDbType.Int, 4, System.Data.ParameterDirection.ReturnValue, False, _
    CType(10, Byte), CType(0, Byte), "", System.Data.DataRowVersion.Current, Nothing))
Me.cmdUpdateShopper.Parameters.Add(New System.Data.SqlClient.SqlParameter("@ShopperNum", _
    System.Data.SqlDbType.Int, 4, System.Data.ParameterDirection.Input, False, _
    CType(10, Byte), CType(0, Byte), "", System.Data.DataRowVersion.Current, Nothing))
Me.cmdUpdateShopper.Parameters.Add(New System.Data.SqlClient.SqlParameter("@FirstName", _
    System.Data.SqlDbType.VarChar, 24))
Me.cmdUpdateShopper.Parameters.Add(New System.Data.SqlClient.SqlParameter("@LastName", _
    System.Data.SqlDbType.VarChar, 32))
Me.cmdUpdateShopper.Parameters.Add(New System.Data.SqlClient.SqlParameter("@Street", _
    System.Data.SqlDbType.VarChar, 32))
Me.cmdUpdateShopper.Parameters.Add(New System.Data.SqlClient.SqlParameter("@City", _
    System.Data.SqlDbType.VarChar, 32))
Me.cmdUpdateShopper.Parameters.Add(New System.Data.SqlClient.SqlParameter("@State", _
    System.Data.SqlDbType.VarChar, 2))
Me.cmdUpdateShopper.Parameters.Add(New System.Data.SqlClient.SqlParameter("@ZipCode", _
    System.Data.SqlDbType.VarChar, 15))
Me.cmdUpdateShopper.Parameters.Add(New System.Data.SqlClient.SqlParameter("@Phone", _
    System.Data.SqlDbType.VarChar, 30))
Me.cmdUpdateShopper.Parameters.Add(New System.Data.SqlClient.SqlParameter("@Email", _
    System.Data.SqlDbType.VarChar, 48))
|
- Now we are ready to fill in the code for the Page_Load procedure. This one is fairly lengthy,
though there is more that we could add to it!
- Adjust your Page_Load procedure to look like this:
|
Private Sub Page_Load(ByVal sender As System.Object, ByVal e As System.EventArgs) _
    Handles MyBase.Load

    Dim Quantity As Integer
    Dim Subtotal, Total, Tax, Shipping As Decimal
    Dim Item As ListItem

    ErrorLabel.Visible = False

    If Not IsPostBack Then
        'Make sure the user got here from a refresh of this page or from the shipping page:
        Try
            If (LCase(Request.UrlReferrer.AbsoluteUri) <> _
                "http://cis3.stvincent.edu/carlsonz/cars2/shipping.aspx") _
                AndAlso (LCase(Request.UrlReferrer.AbsoluteUri) <> _
                "http://cis3.stvincent.edu/carlsonz/cars2/payment.aspx") Then
                Response.Redirect("cart.aspx")
            End If
        Catch exception As Exception
            Response.Redirect("cart.aspx")
        End Try

        Try
            cmdBasketDetails.Parameters("@TargetBasketNum").Value = Session("BasketNum")
            SqlConnection1.Open()
            cmdBasketDetails.ExecuteNonQuery()
            Subtotal = cmdBasketDetails.Parameters("@Subtotal").Value
            Quantity = cmdBasketDetails.Parameters("@Quantity").Value
            Session("Subtotal") = Subtotal
            Session("Quantity") = Quantity
        Catch exception As Exception
            ErrorLabel.Visible = True
        Finally
            SqlConnection1.Close()
        End Try

        If Quantity = 0 Then   ' There is nothing to purchase.
            Response.Redirect("cart.aspx")
        End If

        Shipping = Quantity * 125
        Tax = 0.06 * Subtotal
        Total = Subtotal + Tax + Shipping
        Session("Shipping") = Shipping
        Session("Tax") = Tax
        Session("Total") = Total

        SubtotalLabel.Text = Format(Subtotal, "Currency")
        ShippingLabel.Text = Format(Shipping, "Currency")
        TaxLabel.Text = Format(Tax, "Currency")
        TotalLabel.Text = Format(Total, "Currency")
    Else   ' Postback case
        'Single quotes (apostrophes) have to be doubled before storing the data in SQL Server:
        Session("FirstName") = Replace(Session("FirstName"), "'", "''")
        Session("LastName") = Replace(Session("LastName"), "'", "''")
        Session("Street") = Replace(Session("Street"), "'", "''")
        Session("City") = Replace(Session("City"), "'", "''")

        'Save the information that's on the page into session state.
        'Also double any single quotes in name and remove the - character from card number.
        Session("NameOnCard") = Replace(NameOnCardBox.Text, "'", "''")
        Session("CardNumber") = Replace(CardNumberBox.Text, "-", "")
        Session("CardType") = CardTypeList.SelectedItem.Value
        Session("CardExpireMonth") = CardExpireMonthList.SelectedItem.Value
        Session("CardExpireYear") = CardExpireYearList.SelectedItem.Value

        'Use InsertOrder stored procedure to insert relevant data as new row in Order table:
        Try
            cmdInsertOrder.Parameters("@ShopperNum").Value = Session("ShopperNum")
            cmdInsertOrder.Parameters("@BasketNum").Value = Session("BasketNum")
            cmdInsertOrder.Parameters("@FirstName").Value = Session("FirstName")
            cmdInsertOrder.Parameters("@LastName").Value = Session("LastName")
            cmdInsertOrder.Parameters("@Street").Value = Session("Street")
            cmdInsertOrder.Parameters("@City").Value = Session("City")
            cmdInsertOrder.Parameters("@State").Value = Session("State")
            cmdInsertOrder.Parameters("@ZipCode").Value = Session("Zipcode")
            cmdInsertOrder.Parameters("@Phone").Value = Session("Phone")
            cmdInsertOrder.Parameters("@Email").Value = Session("Email")
            SqlConnection1.Open()
            Session("OrderNum") = cmdInsertOrder.ExecuteScalar
        Catch exception As Exception
            ErrorLabel.Visible = True
        Finally
            SqlConnection1.Close()
        End Try

        'Use InsertPayment stored procedure to insert relevant data as new row in Payment table:
        Try
            cmdInsertPayment.Parameters("@OrderNum").Value = Session("OrderNum")
            cmdInsertPayment.Parameters("@CardType").Value = Session("CardType")
            cmdInsertPayment.Parameters("@CardNumber").Value = Session("CardNumber")
            cmdInsertPayment.Parameters("@CardExpireDate").Value = Session("CardExpireMonth") _
                & "/" & Session("CardExpireYear")
            cmdInsertPayment.Parameters("@NameOnCard").Value = Session("NameOnCard")
            SqlConnection1.Open()
            cmdInsertPayment.ExecuteNonQuery()
        Catch exception As Exception
            ErrorLabel.Visible = True
        Finally
            SqlConnection1.Close()
        End Try

        'Use UpdateBasket stored procedure to update relevant data in Basket table:
        Try
            cmdUpdateBasket.Parameters("@BasketNum").Value = Session("BasketNum")
            cmdUpdateBasket.Parameters("@BasketOrderPlaced").Value = 1  'meaning true
            cmdUpdateBasket.Parameters("@Quantity").Value = Session("Quantity")
            cmdUpdateBasket.Parameters("@Subtotal").Value = Session("Subtotal")
            cmdUpdateBasket.Parameters("@Total").Value = Session("Total")
            cmdUpdateBasket.Parameters("@Shipping").Value = Session("Shipping")
            cmdUpdateBasket.Parameters("@Tax").Value = Session("Tax")
            SqlConnection1.Open()
            cmdUpdateBasket.ExecuteNonQuery()
        Catch exception As Exception
            ErrorLabel.Visible = True
        Finally
            SqlConnection1.Close()
        End Try

        'Use UpdateShopper stored procedure to update relevant data in Shopper table.
        'We could later use this table in the management app to send promotions to customers.
        'We could also use it to implement customer profiles.
        Try
            cmdUpdateShopper.Parameters("@ShopperNum").Value = Session("ShopperNum")
            cmdUpdateShopper.Parameters("@FirstName").Value = Session("FirstName")
            cmdUpdateShopper.Parameters("@LastName").Value = Session("LastName")
            cmdUpdateShopper.Parameters("@Street").Value = Session("Street")
            cmdUpdateShopper.Parameters("@City").Value = Session("City")
            cmdUpdateShopper.Parameters("@State").Value = Session("State")
            cmdUpdateShopper.Parameters("@ZipCode").Value = Session("Zipcode")
            cmdUpdateShopper.Parameters("@Phone").Value = Session("Phone")
            cmdUpdateShopper.Parameters("@Email").Value = Session("Email")
            SqlConnection1.Open()
            cmdUpdateShopper.ExecuteNonQuery()
        Catch exception As Exception
            ErrorLabel.Visible = True
        Finally
            SqlConnection1.Close()
        End Try

        'The next step is typically to send an email confirmation to the customer.
        'We skip this in part to keep the example shorter.

        Response.Redirect("confirm.aspx")
    End If
End Sub
|
- The Page_Load procedure begins by handling the case when we do not have a postback, that is,
when the page first loads.
- The first Try...Catch compares Request.UrlReferrer.AbsoluteUri with the Uri for the shipment.aspx
and payment.aspx pages. If the referrer, the page that the user came from to get to the
payment page, is not the shipment page or the payment page (due to a refresh), then it does
not make sense for the user to be on this page. (Perhaps the user followed a bookmark
directly to the payment page.) Therefore, the user is redirected to the shopping cart page.
- If for some reason the code cannot evaluate Request.UrlReferrer.AbsoluteUri, the Catch
clause redirects the user to the shopping cart page.
- The next Try...Catch is used to call the BasketQuantitySubTotal stored procedure, a
stored procedure that we wrote previously, so as to
retrieve from the database the subtotal for this order and the number of items in the order.
- To call the BasketQuantitySubTotal stored procedure we pass it the basket number and it
returns the 2 values that we want in the parameters Subtotal and Quantity.
- We store these 2 values in the session state.
- If the Quanity value (number of items in the order) is zero, then there is nothing to
purchase, so we redirect the user to the shopping cart page.
- We next calculate the amount of tax and shipping with some simple calculations. For a
real e-commerce app these would be more complex, taking into account the tax laws of each
state. Also, since these calculations might need to be changed it might make sense to
call a web service to do the calculations. That way when the tax or shipping calculations
need to be changed, only the web service needs to be modified. The e-commerce app itself
would not have to be changed.
- The shipping, tax, and total amounts are stored in the session state.
- We also display the subtotal along with these 3 new monetary values in
the appropriate four labels.
- That takes care of what Page_Load does in the non-postback case. What the user sees on the
screen in the normal case is the four monetary values just discussed.
- Next, the Page_Load procedure handles the postback case. This would occur after the user
fills in the credit card information needed on this page and clicks the Submit button. Of
course, the user might fail to fill in some or all of the data and still click the submit
button. That is why we put required field validators on this page.
- The primary task in this section of code, then, is to call some stored procedures to write
the user's data, both from this page and previous ones, to the database. This is where the
user gives final assent to the order and the remaining data is committed to the database.
- Before writing any data to the database we should fix it up a bit. As the comment in the
code says, any single quote (probably used as an apostrophe in a name) needs to be replaced
by 2 single quotes before storing the data in SQL Server. Also, any - characters in the
the credit card number are removed so that all credit card numbers get stored as a string
of digits only. The modified data is saved in session state.
- Next, we use the InsertOrder stored procedure to write a row of data to the Order table.
The code for this stored procedure is shown in the next box below. We pass as parameters
the values that we want placed in this new row, namely the shopper number, basket number
for this order, first name and last name of the shopper, as well as the shopper's address
and other contact information. Since OrderNum is an indentity field in the table, the
order number is created automatically. Our stored procedure returns it when the stored
procedure is called by ExecuteScalar and our VB code saves it in the session state.
|
CREATE PROCEDURE InsertOrder
    @ShopperNum int,
    @BasketNum int,
    @FirstName varchar(24),
    @LastName varchar(32),
    @Street varchar(32),
    @City varchar(32),
    @State varchar(2),
    @ZipCode varchar(15),
    @Phone varchar(30),
    @Email varchar(48)
AS
INSERT INTO [Order]
    (ShopperNum, BasketNum, OrderFirstName, OrderLastName, OrderStreet, OrderCity,
OrderState, OrderZipCode, OrderPhone, OrderEmail, OrderDateOrdered)
VALUES
    (@ShopperNum, @BasketNum, @FirstName, @LastName, @Street, @City, @State, _
     @ZipCode, @Phone, @Email, GETDATE())
SELECT @@IDENTITY
GO
|
- The only other thing to note about this stored procedure is that it uses the GETDATE()
function in SQL Server to look up the system time and date. This value is put into the
OrderDateOrdered field by the stored procedure.
- Our code next uses the InsertPayment stored procedure to write the credit card information
and order number to the Payment table. The code for InsertPayment is shown below. Note how
our VB code appends the credit card's month of expiration with the expiration year (and a /
character in between). We then use this combined date as the value to pass in the
@CardExpireDate parameter.
|
CREATE PROCEDURE InsertPayment
    @OrderNum int,
    @CardType varchar(16),
    @CardNumber varchar(30),
    @CardExpireDate varchar(24),
    @NameOnCard varchar(64)
AS
INSERT INTO Payment (OrderNum, PaymentCardType, PaymentCardNumber, _
    PaymentExpirationDate, PaymentCardOwnerName)
VALUES (@OrderNum, @CardType, @CardNumber, @CardExpireDate, @NameOnCard)
GO
|
- Next we have the UpdateBasket stored procedure update the row of the Basket table for the
shopping basket being purchased (the one with BasketNum as its ID number).
- Remember that up until this point all we have in this row of data is the automatically-generated
basket number and the shopper number.
- Our stored procedure, shown below, thus finds the row with the desired basket number (as passed
in via the @BasketNum parameter). It then fills in the values from the other parameters: the
quantity (number of items in the basket), the subtotal, the shipping, the tax, and the total
amount of the order. Notice that 1 (true) is passed in as the value that gets put into
the BasketOrderPlaced field, thus indicating that the order has indeed now been placed.
|
CREATE PROCEDURE UpdateBasket
    @BasketNum int,
    @BasketOrderPlaced int,
    @Quantity int,
    @Subtotal money,
    @Total money,
    @Shipping money,
    @Tax money
AS
UPDATE Basket
SET BasketNumItems = @Quantity,
    BasketOrderPlaced = @BasketOrderPlaced,
    BasketSubtotal = @Subtotal,
    BasketTotal = @Total,
    BasketShipping = @Shipping,
    BasketTax = @Tax
    /* ShopperNum does not change */
WHERE
    BasketNum = @BasketNum
GO
|
- Page_Load then calls its last stored procedure, UpdateShopper.
- You may recall that up until this point there is little else in the Shopper table's
row of data about the current shopper than the shopper number.
- This stored procedure, as seen below, fills in the shopper's first and last name,
address, phone, and email address.
|
CREATE PROCEDURE UpdateShopper
    @ShopperNum int,
    @FirstName varchar(24),
    @LastName varchar(32),
    @Street varchar(32),
    @City varchar(32),
    @State varchar(2),
    @ZipCode varchar(15),
    @Phone varchar(30),
    @Email varchar(48)
AS
UPDATE Shopper
    SET ShopperFirstName = @FirstName,
    ShopperLastName = @LastName,
    ShopperStreet = @Street,
    ShopperCity = @City,
    ShopperState = @State,
    ShopperZipCode = @ZipCode,
    ShopperPhone = @Phone,
    ShopperEmail = @Email
WHERE
    ShopperNum = @ShopperNum
GO
|
- As mentioned before, we intent to keep this shopper information long-term, both
to send promotional information (advertisements) to the shoppers and to enable us
to implement shopper profiles if we wish. (The latter would, when the correct
password is given, supply to a previous shopper his or her old shopper number
and contact information.
- In contrast, the Payment table of credit card information is purged quickly so that
such sensitive information does not easily fall prey to thieves. Similarly, the
Order table of data about particular order is probably cleared periodically of old data.
- As noted in the comment in the code, it is very common at this point to have our web
app send an email confirmation of this order to the shopper. We skip this here to
keep our example shorter.
- Our Page_Load procedure simply ends by redirecting to an order confirmation page.
|
The Confirmation Page
- Add a web form named confirm.aspx to your project.
- Change its title to "Confirm, CarCrazyUsa.com".
- In HTML view, include the usual header.txt and footer.txt files.
- We want the confirmation page to display an
order confirmation message so that the shopper knows
that the order has been placed and can record the order number (in case the need
arises to contact the company about this order).
- Also refer to this screen shot of the confirm.aspx form
in Visual Studio.
- The text shown in the labels is pretty simple. The large one says "Order Confirmation".
- The ones in small font contain the following:
- Your order has been received.
- It will be processed when your credit card payment clears.
- Order number:
- Save your order number and refer to it if you need to contact us with questions.
- Thank you for shopping with us!
- The "Order number:" label is followed by another label with ID OrderNumLabel and no
inital text. The correct order number will be filled in as the text by our VB code.
|
The Code-Behind File for the Confirmation Page
- There is little that needs to be done in the confirm.aspx.vb code-behind file.
- We only need a few lines of code in the Page_Load procedure. This code is shown below.
|
Private Sub Page_Load(ByVal sender As System.Object, ByVal e As System.EventArgs) _
    Handles MyBase.Load

    Dim OrderNum As String

    OrderNum = CType(Session("OrderNum"), String)
    If OrderNum = "" Then   'No order number, so makes no sense to be on this page.
        Response.Redirect("cart.aspx")
    End If

    OrderNumLabel.Text = OrderNum
    Session.Abandon() 'Clear out all session information.
End Sub
|
- As you can see, this Page_Load procedure looks up the order number in session state.
- If no order number is found, the user is redirected to the shopping cart page
as the person does not belong on the confirmation page if no order has been placed.
- If there is an order number, it is displayed on the confirmation page along with
the usual static text.
- Lastly, we clear out all of the session state information. That ends this shopping
session. There is no sense in keeping this information in session state as it might
confuse things if the shopper goes to the brands or search page and starts to try to
start a new shopping attempt.
|
Finishing Off the Web App
Checking the Tables
- Once you have your web app completed, try it out by submitting orders for a few shopping
carts in the name of various people. (Just make up the data. For sure, don't use real
credit card numbers at this point.)
- Below is some sample data from the Basket table:
|
| BasketNum |
ShopperNum |
BasketNumItems |
BasketOrderPlaced |
| 113 |
220 |
3 |
1 |
| 114 |
221 |
1 |
1 |
| |
| BasketSubtotal |
BasketTotal |
BasketShipping |
BasketTax |
| 102500 |
109025 |
375 |
6150 |
| 36500 |
38815 |
125 |
2190 |
- From the above data you can tell that shopper number 220 ordered 3 items, while shopper 221
orered just one.
- Next, let's look at the relevant rows of the BasketItem table to see what items
the above 2 shoppers ordered.
|
| BasketItemNum |
BasketNum |
ProdNum |
BasketItemPrice |
| 186 |
113 |
7 |
36500 |
| 187 |
113 |
6 |
33000 |
| 188 |
114 |
7 |
36500 |
| |
| BasketItemProdName |
BasketItemQuantity |
BasketItemAttributes |
| Bolt |
1 |
Color,1,Silver,2 |
| Lightning |
2 |
Color,1,Purple,8;Seat Covering,2,Cloth,11 |
| Bolt |
1 |
Color,1,Cream,4 |
- By combining information from the 2 tables examined so far, we can tell that shopper
number 220 purchased basket number 113 for $109,025 and that this basket contained 1 silver
Bolt and 2 identical purple Lightnings with cloth seat covers.
- In addition, shopper number 221 purchased basket number 114 for $38,815 with just one car
in it: a cream-colored Bolt.
- Next, we look at a few rows of the Order table:
|
| OrderNum |
ShopperNum |
BasketNum |
OrderFirstName |
OrderLastName |
OrderStreet |
| 8 |
220 |
113 |
Sally |
Wiggins |
234 E. Main St. |
| 9 |
221 |
114 |
David |
Carlson |
1234 Main St. |
|
| OrderCity |
OrderState |
OrderZipCode |
OrderPhone |
OrderEmail |
OrderDateOrdered |
| Greensburg |
PA |
15601 |
412-345-6789 |
sw@msn.com |
4/14/2005 8:36:16 PM |
| Henry |
AR |
34566 |
345-9876 |
dc@msn.com |
4/14/2005 8:40:56 PM |
- From the above, we now know that shopper number 220, the one who purchased basket number 113,
is named Sally Wiggins. We also have her contact information, order number (8), and the
date the order was placed.
- We also see that shopper number 221, the one who purchased basket number 114, is named
David Carlson. We again have the contact information for the shopper and the order date.
- Next, we look at a portion of the Shopper table:
|
| ShopperNum |
ShopperFirstName |
ShopperLastName |
ShopperStreet |
ShopperCity |
| 220 |
Sally |
Wiggins |
234 E. Main St. |
Greensburg |
| 221 |
David |
Carlson |
1234 Main St. |
Henry |
|
| ShopperState |
ShopperZipCode |
ShopperPhone |
ShopperEmail |
| PA |
15601 |
412-345-6789 |
sw@msn.com |
| AR |
34566 |
345-9876 |
dc@msn.com |
- The shopper table is the one we said that we could keep long-term so as to implement
shopper profiles and to enable us to send promotions to our customers.
- Finally we look at a few rows of data from the Payment table:
|
| PaymentNum |
OrderNum |
PaymentCardType |
| 8 |
8 |
AmericanExpress |
| 9 |
9 |
Visa |
| |
| PaymentCardNumber |
PaymentExpirationDate |
PaymentCardOwnerName |
| 5555888866662222 |
10/2009 |
Sally T. Wiggins |
| 1234123412341234 |
1/2006 |
David E. Carlson |
- Here we can read the credit card informtion for order number 8, which we know from the
other tables is for shopper number 220, who bought 3 cars, etc.
- Similarly, we see the credit card informtion for order number 9, which we know from the
other tables is for shopper number 221, who bought the one cream-colored Bolt, etc.
- As noted earlier we would keep each row of data of the Payment table no longer than
necessary to verify payment for the order.
- Before going on, make sure that the data in your tables from a few shopping attempts
makes sense like the above sample data.
|
The Web Configuration File
- Once you are sure that your e-commerce app is working correctly, you can make some final
changes to your web.config file.
- Set
debug="false" as that will leave out debugging symbols, thus producing
a smaller, faster app.
- As usual, use
customErrors mode="RemoteOnly" since that will prevent would-be
attackers from getting detailed error messages should they find a way to crash your app.
- Also check that you have
trace enabled="false". We don't want trace logging
in a completed app.
|
Concluding Remarks
- You have now completed a functional e-commerce app.
- However, we did not write the separate management app that would allow a manager to check
credit-card information, fulfill orders, make changes to the database (because orders were
fulfilled, new products were added to the store, etc.)
- There are also a number of desirable features that we did not include in our e-commerce
app, including having separate shipping and billing addresses, implementing user
profiles, and sending an email confirmation message to each shopper. No doubt you can
think of other improvements as well.
|
|

 Search CIS Site
Tutorials
Search CIS Site
Tutorials
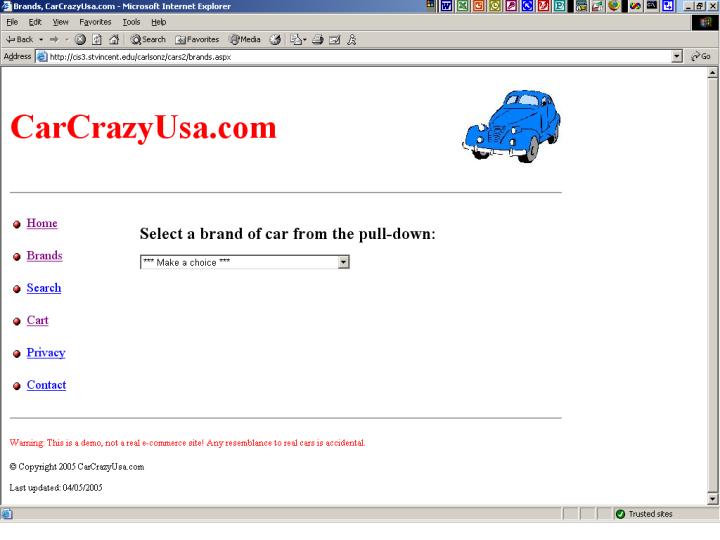
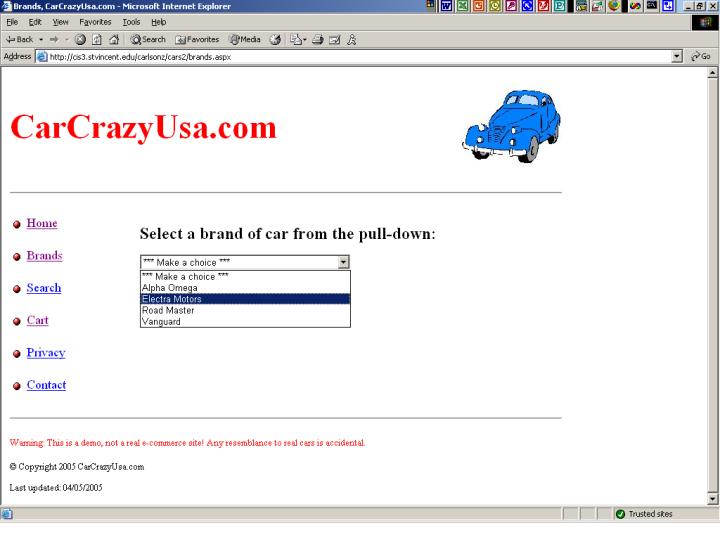
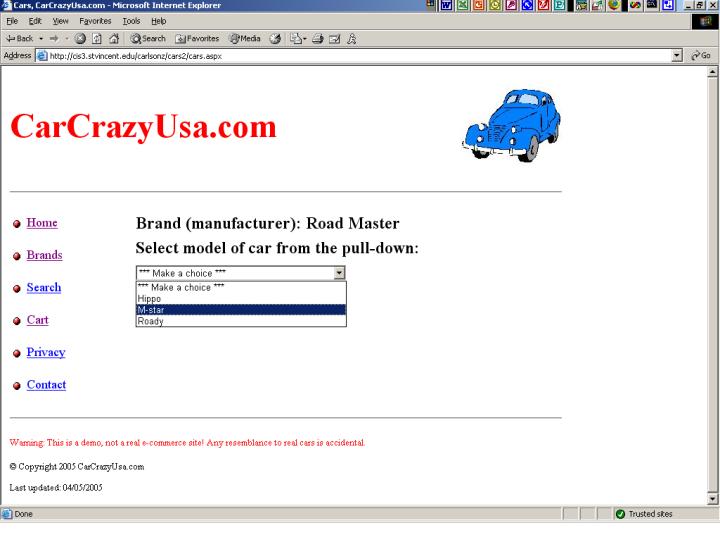
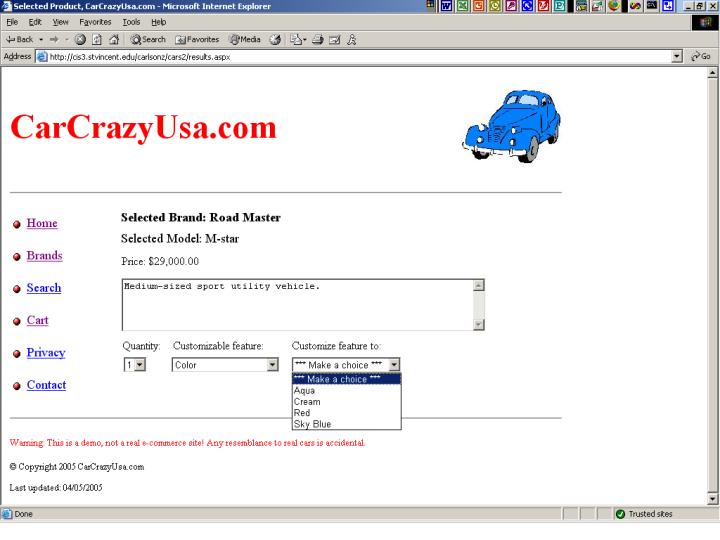
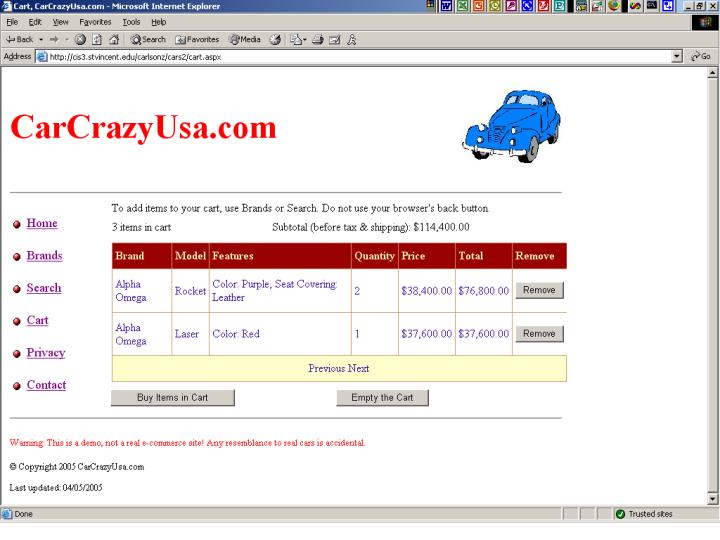
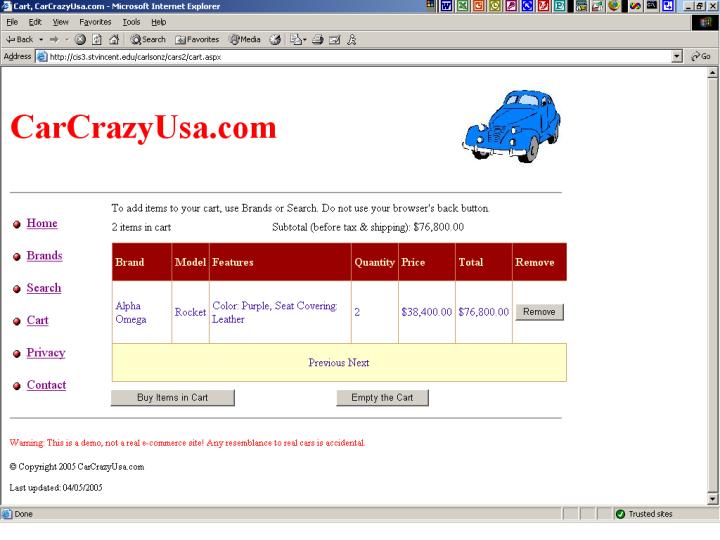
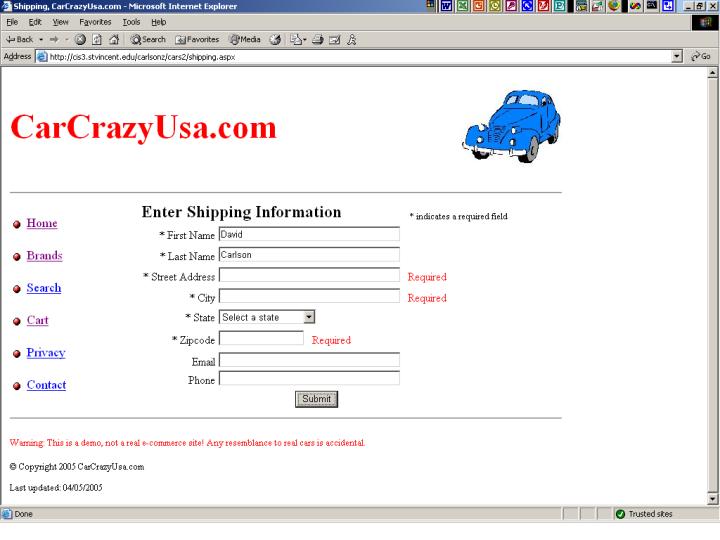
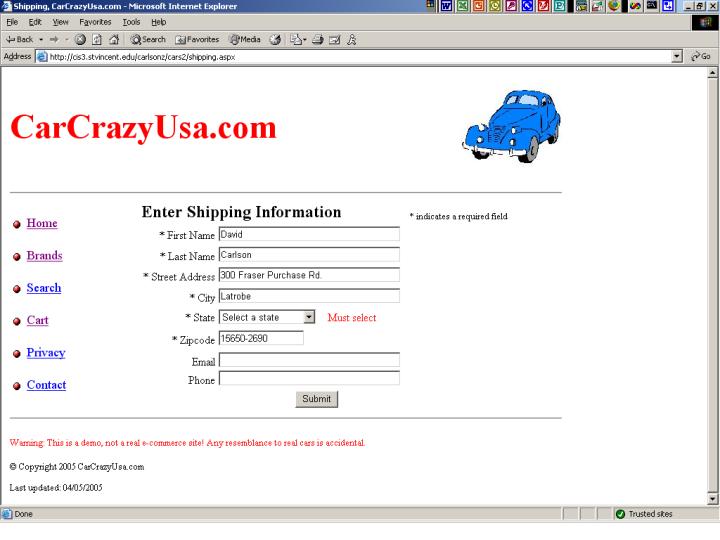
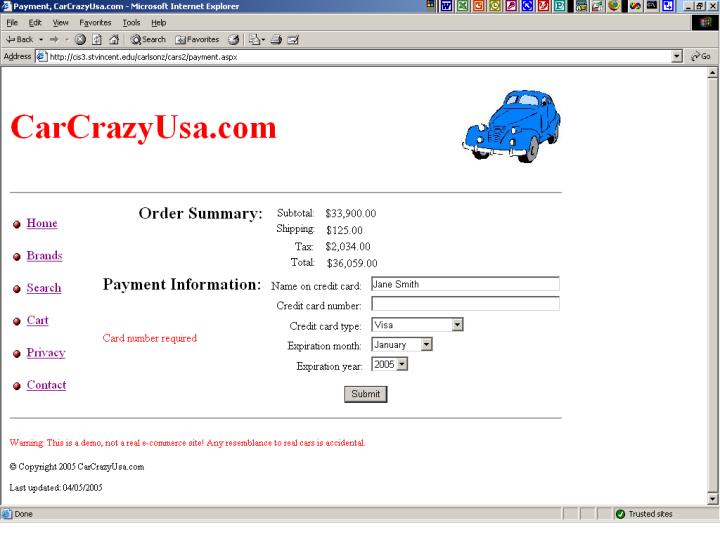
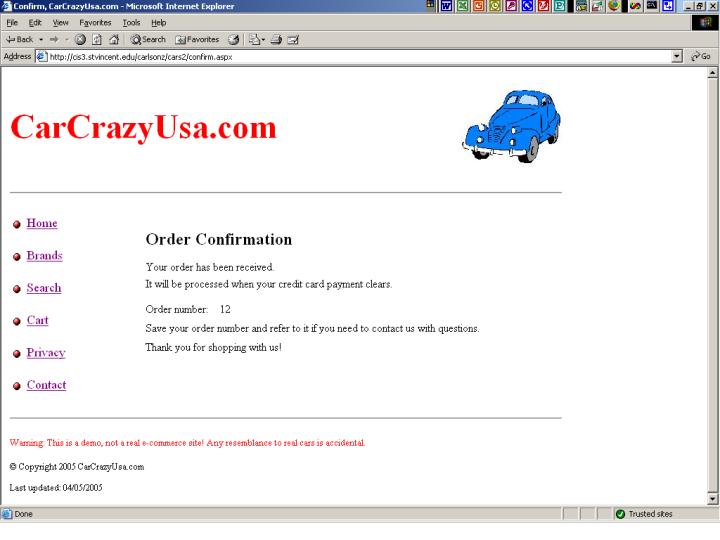
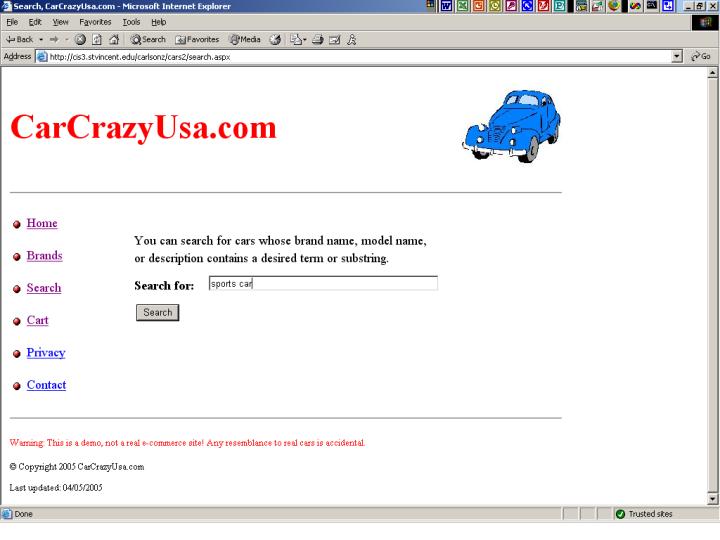
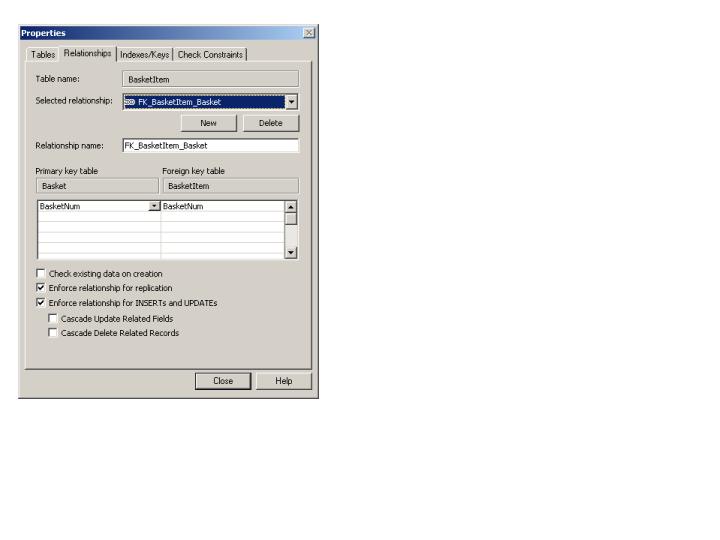
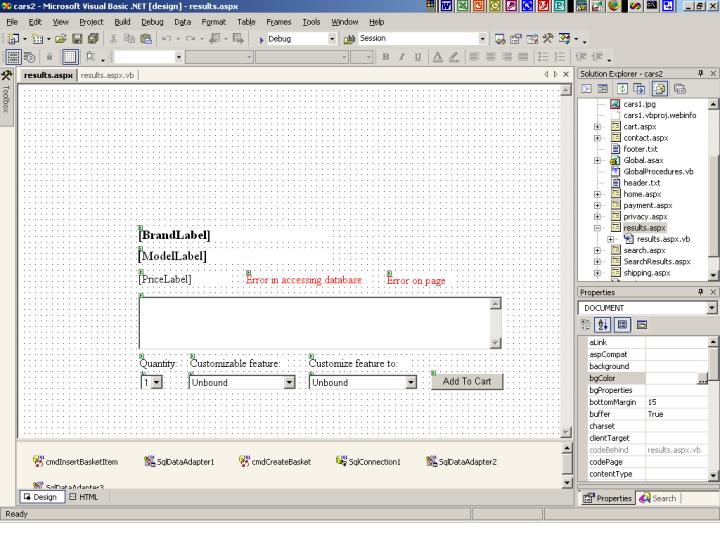
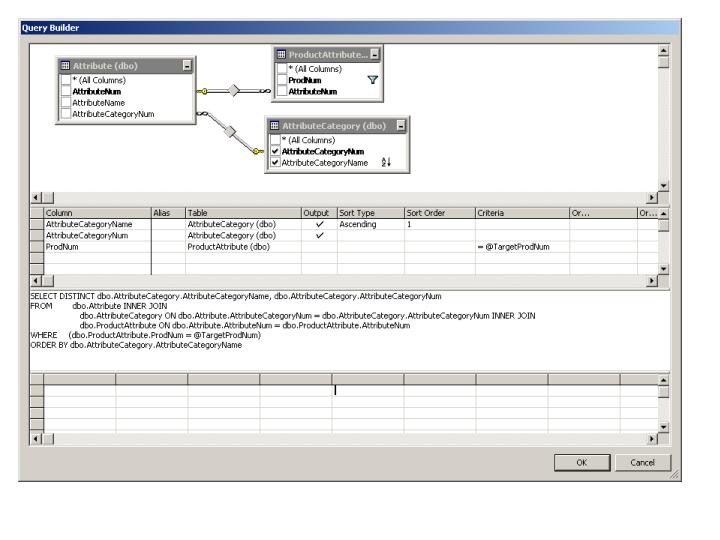
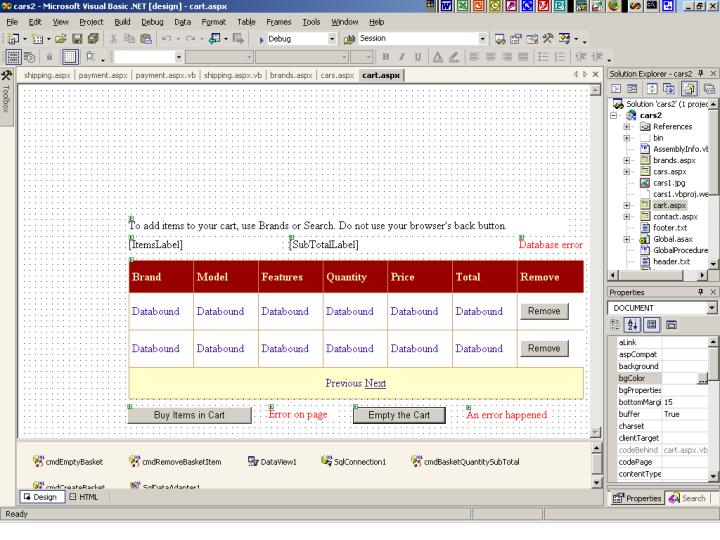
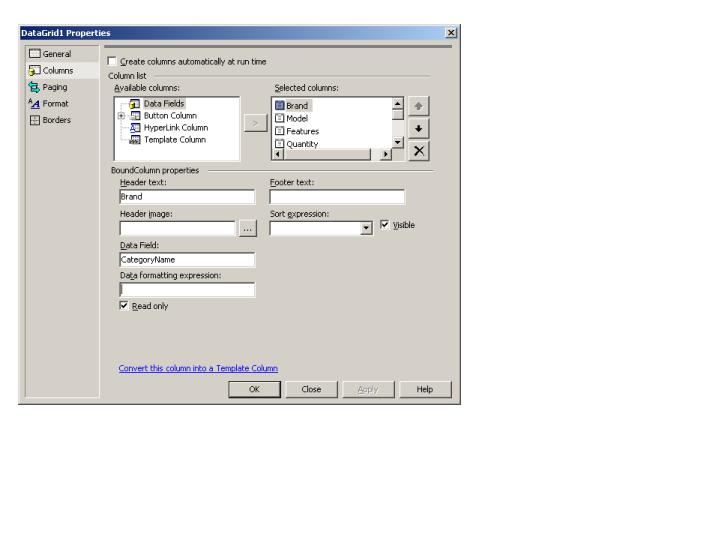
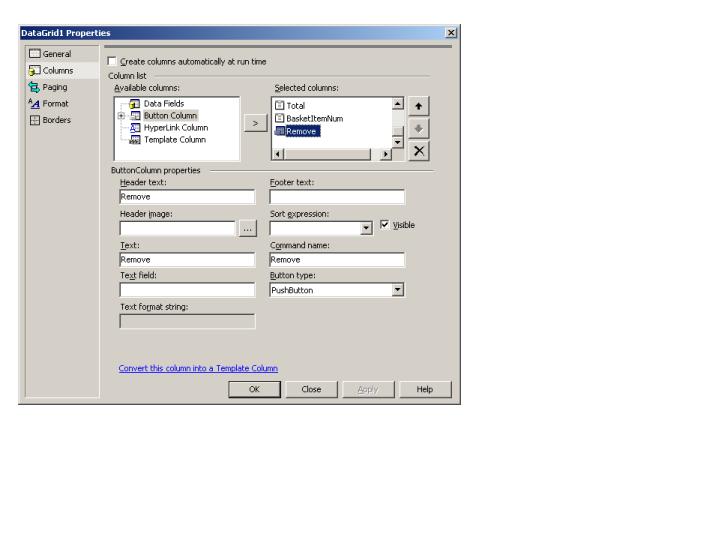
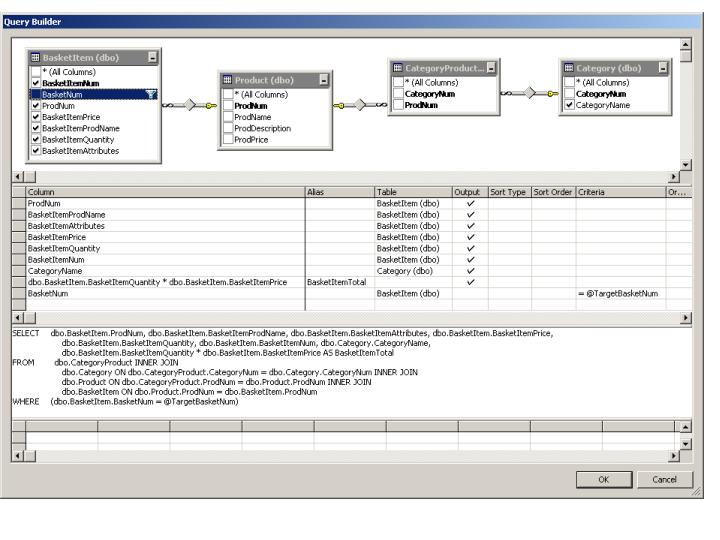
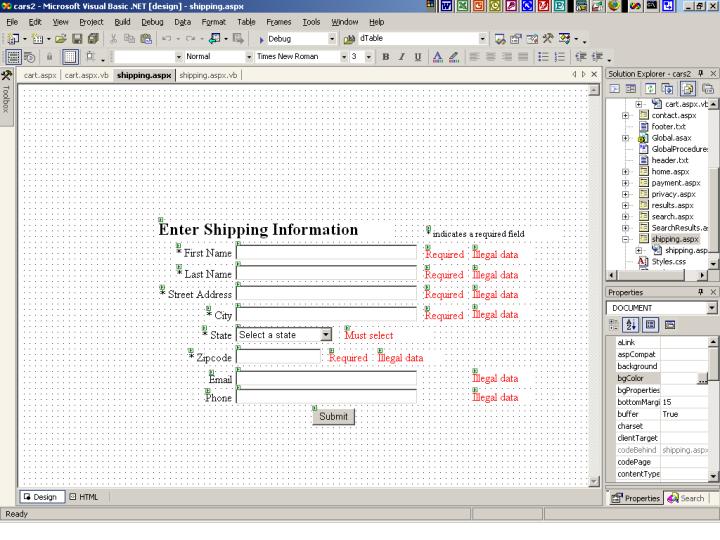
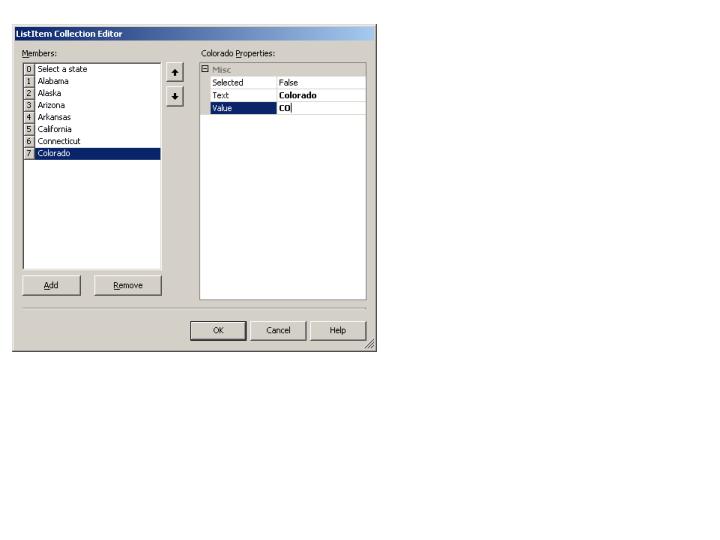
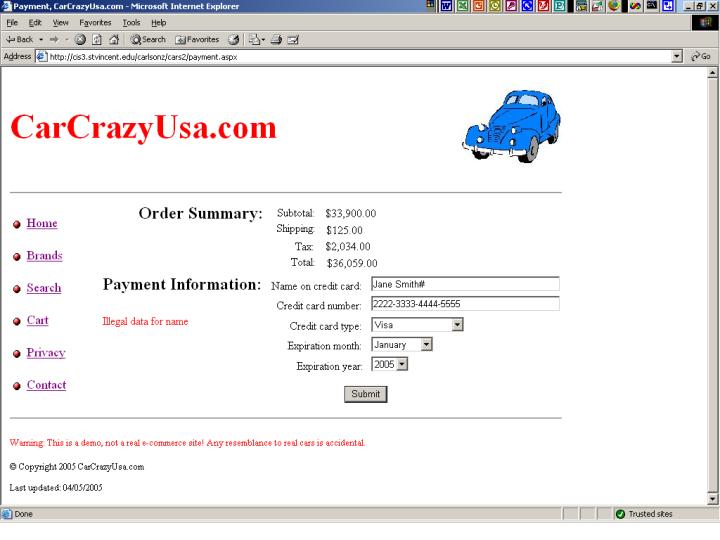
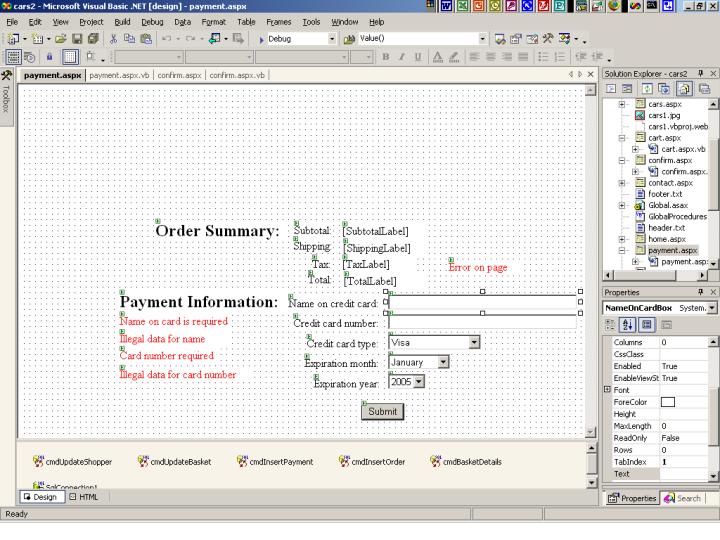
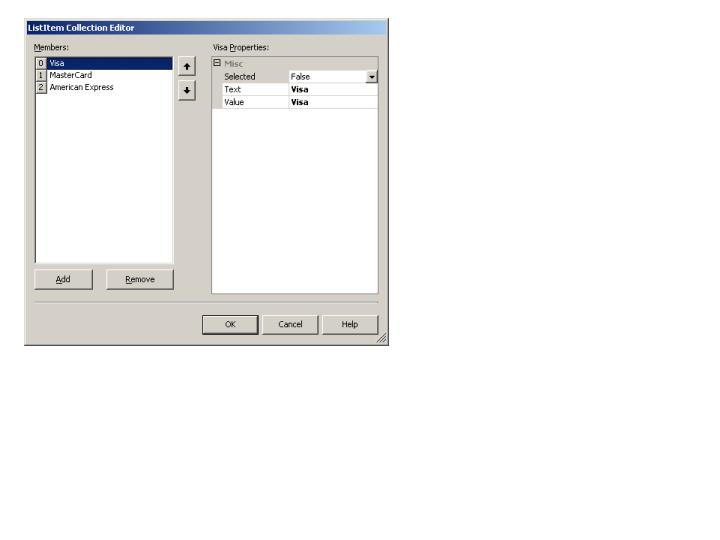
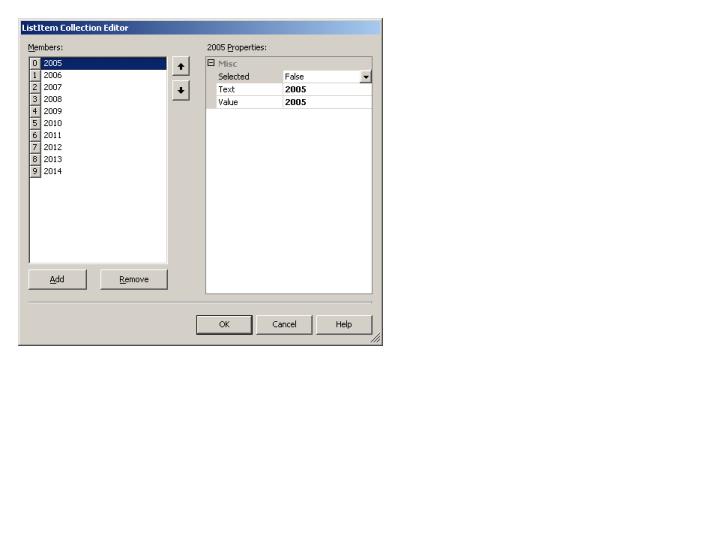