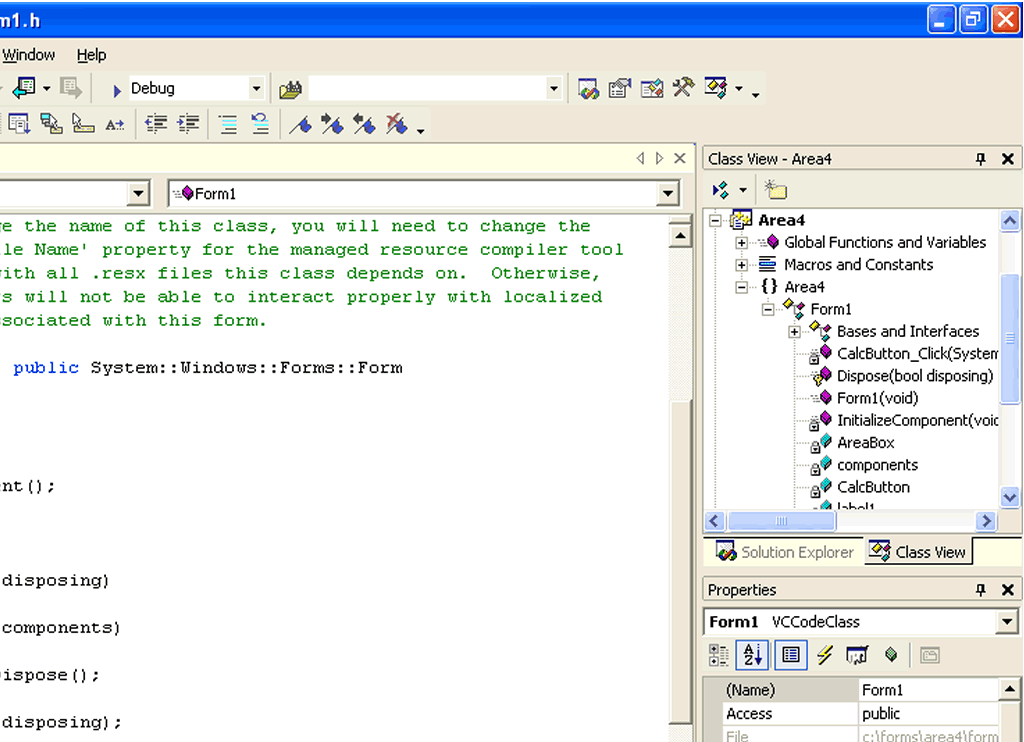
Software Design Using C++Third Intermediate Windows Forms ExampleNote that this functionality is no longer available. Our GoalIn this example we simply make a small change to the previous example. Specifically, we package up the code for computing the area into a small helping function and then call this function from the click handler. Since computing the area of a rectangle only requires one line of code, it is really not worth it to package up this one line in a function. We do this only to illustrate how this can be done. More worthwhile cases will be encountered later. If you are using C# instead of C++, see this page of directions for C#. Copying from the Second ExampleCreate a new C++ Windows Forms App project in the same solution as the Second Example. Name this project Area3 (or similar). We then wish to copy items from the second project to our new project. As we did in copying from the first to the second project, copy both the controls and the code to the appropriate spots in the new project. The controls are on Form1.h in design view and the code that we wrote is found in both Form1.h (in code view) and Form1.cpp (or whatever you named this file). Save all of your files. Also right click on the new project in Solution Explorer and set this project to be the startup project. You might even want to build and run the project to be sure that nothing went wrong thus far. Class ViewWe could manually type in everything we need for our new function, but let's instead use Class View to assist us. You may have a tab for Class View already present, perhaps somewhere near Solution Explorer. If so, click on that tab so that you can see the window for Class View. If not, simply use View, Class View. You can see Class View on the right side in this picture of Visual Studio, above the Properties window.
Let's look a bit at Class View before we use it to add our new function. If you expand the box for
your project, you will see that there are entries for "Global Functions and Variables"
and one for the namespace for the project (and having the same name as the project).
Expand the latter item. Within this you should see an entry for the Form1 class. Expand it if need be
so that you can see what is inside it. Essentially you should see the functions and variables (fields)
belong to the Form1 class. Right click on the item in Class View
for the Adding a FunctionTo add the prototype for our new function, right click in Class View on the Form1 class.
Select Add, Add Function. This should bring up the Add Member Function Wizard.
Fill in ComputeArea as the name of the function and double as the return type (the type for the
answer). We will need two parameters: one for the length and one for the width. To create these, fill in
double as the "Parameter type" and Len as the "Parameter name" and click Add.
Leaving double as the "Parameter type", now fill in Wid as the "Parameter name"
and click Add. Select private as the Access
type desired. Fill in form1.cpp (or whatever filename you used) as the .cpp file to use.
Click on Finish. If you look in Form1.h you will see the new function prototype:
Also, in Form1.cpp you will find the outline where you will place the code for your new function:
Note that the namespace identifier, What you need to do for the code is pretty obvious. Change the code in Form1.cpp so it looks like the following. Also add the comments so that you remember what your function is supposed to do.
Of course, we now need to call our new function in order to put it to use. Change the code in the click handler function in Form1.cpp so that it now looks like this.
Note that the click handler function now calls our helper function to find the area and does not itself
do the calculation. As we said at the start, this Try It OutSave all of your files, then build your new project. If there are syntax errors, fix them and build again. Then run your program by using Debug, Start Without Debugging. Make sure that it works correctly. Practice ProblemFor practice, you might try this problem: Make a Windows Forms App that converts a numeric grade (anything from 0 to 100) to a letter grade. Your form with need a text box in which the user places the numeric grade, a "Convert" button to click on, and another text box in which to display the letter grade answer. Thus, this program would convert 86 to B, 55 to F, etc. Other than the click handler function, add a function to do the actual conversion. The conversion function would be given the numeric grade as a parameter and would return the desired letter grade (as a char). You can use the code in the console app grade1.cpp as a guide in how to efficiently test the numeric value in order to figure out the corresponding letter grade. Back to the main page for Software Design Using C++ |
Computing & Information Systems |
|

 Search CIS Site
Tutorials
Search CIS Site
Tutorials
|