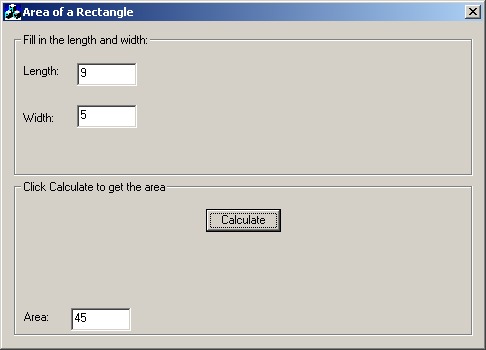
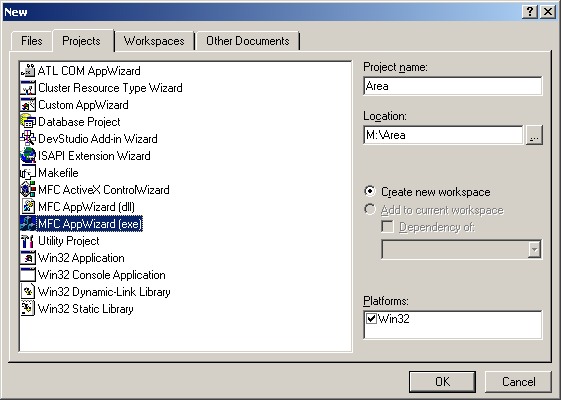
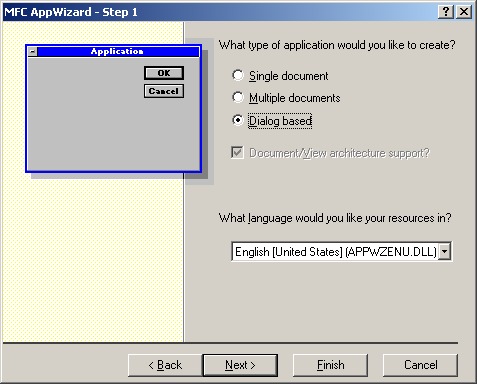
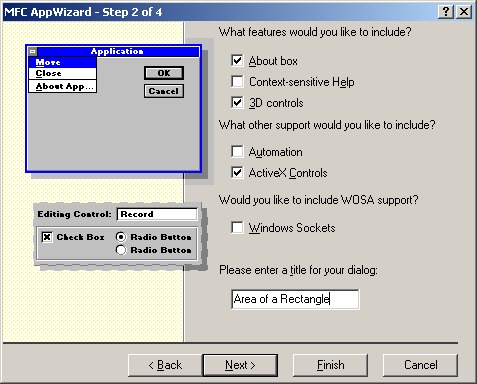
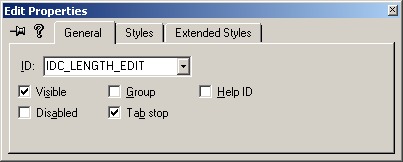
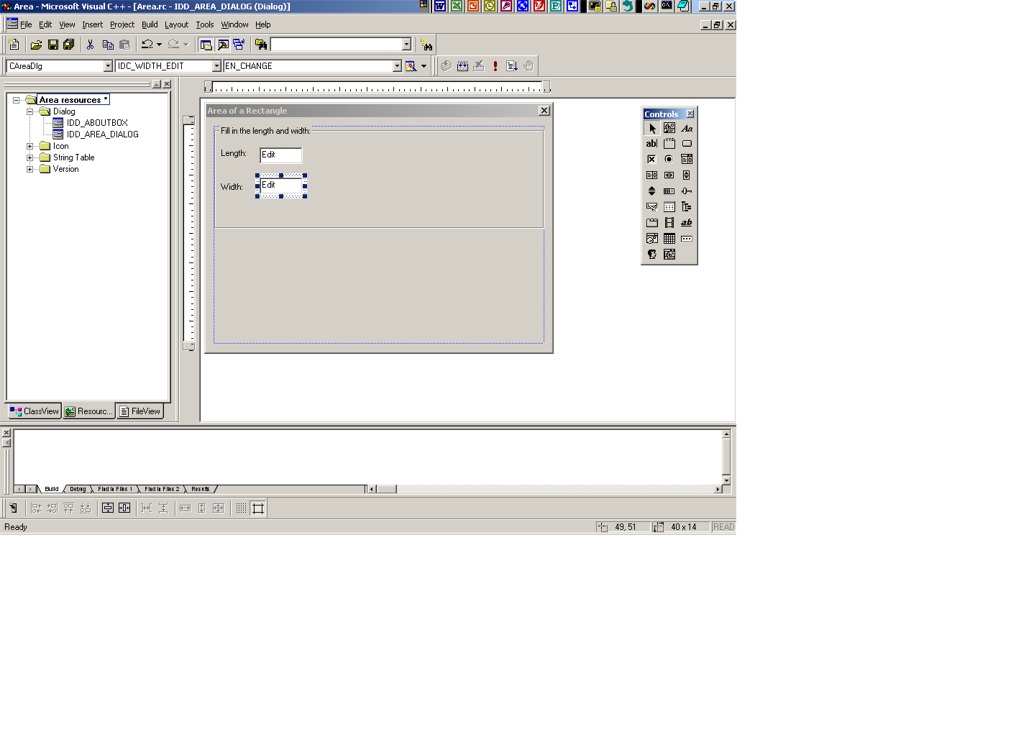
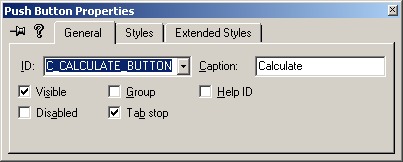
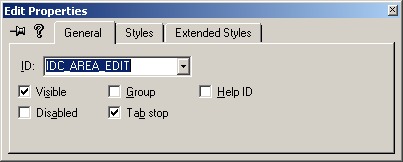
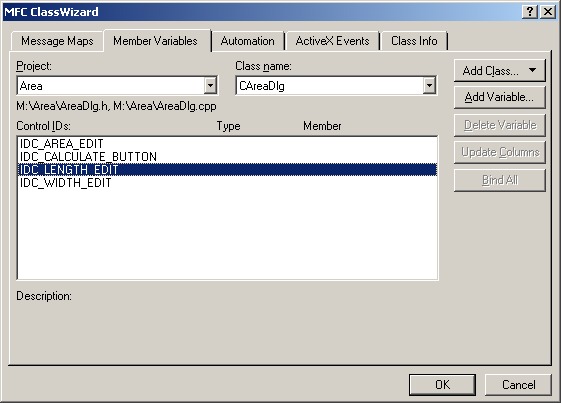
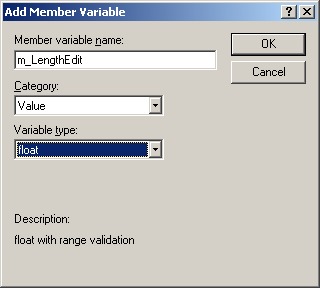
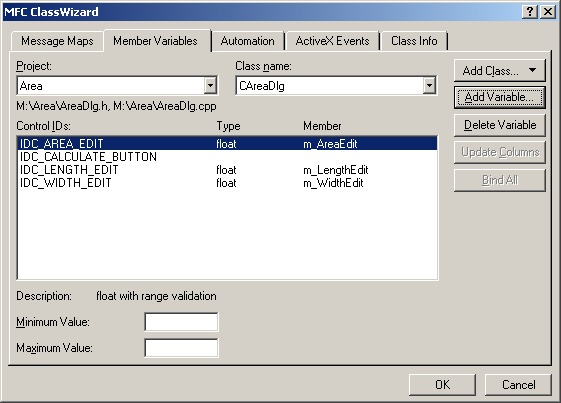
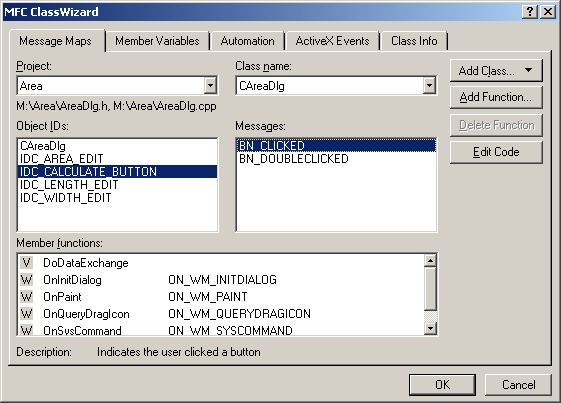
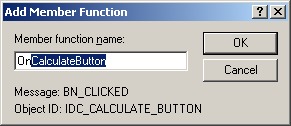
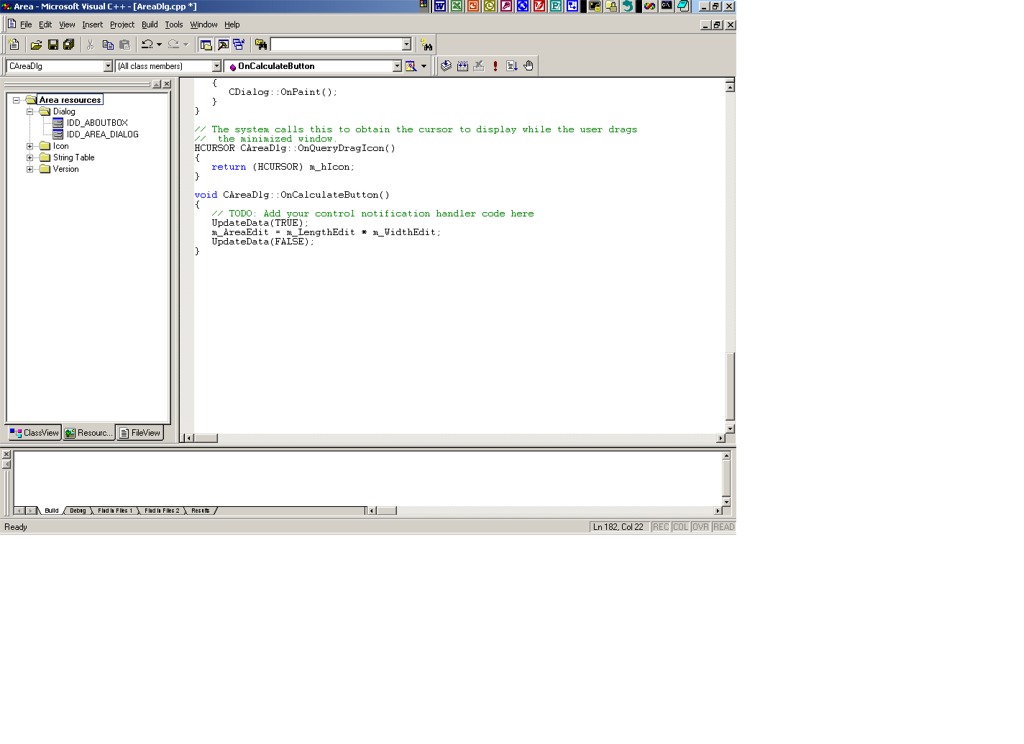
Software Design Using C++Dialog-Based Interface with Visual C++ 6.0A Simple Example1) OverviewIn this example you will use AppWizard in Visual C++ 6.0 to create a Windows application that finds the area of a rectangle. The user will fill in the length and width in two boxes, click on a Calculate button, and the resulting area will then appear in a box labeled area. Examine this picture of the user interface to see what we are aiming to produce. 2) Starting AppWizardUse this screen shot as a guide for the items in this paragraph. (Note that many of the later screen shots will be provided as links within the text. Click on these if it helps you to see what is being discussed here in words.) In Visual C++ 6.0, select File, New, Projects. Click on MFC AppWizard (exe). Fill in area as the project name. You can click on the appropriate radio button to add this project to your existing workspace (if any) or you can create a new workspace. (It is often useful, for example, to place all of your projects for a given course into the same workspace. This keeps them grouped together.) Finally, click on OK. The AppWizard now asks you a series of questions. In the first screen select Dialog-based. Then click the Next button. In the new screen the only thing to fill in is the title at the bottom. Type "Area of a Rectangle" as the title, then click the Next button. On the next screen "Yes" and "Shared DLL" should be selected, then click on Next. In the next screen click on Finish. Finally, click on OK. AppWizard now generates the code needed for the application as outlined thus far. Note that the Statically Linked option for using MFC (Microsoft Foundation Class) library is sometimes useful instead of the Shared DLL option. This is especially true when you want to use your .exe file under more than one version of Windows. Since you cannot be sure which DLL files will be available, it is safest just to statically link in whatever code is needed. That way your program is not dependent on these DLL files. It will make your .exe file larger but more portable. 3) Adding Controls to the User InterfaceMake sure that the left pane is visible, the one showing File View, Info View, and Resource View. (If not, click on the "Workspace" button on the toolbar.) Click on the Resource view tab. If need be, click on the + in front of "area resources" and then on the + in front of "Dialog". This expands what you see under these items. Double click IDD_AREA_DIALOG under the expanded Dialog folder. This will bring up a window where you build your dialog-based user interface visually. It will automatically contain an OK button, a Cancel button, and a TODO string. Delete these items by clicking on each and pressing the Delete key in each case. If the toolbar labeled Controls is not visible, click on Tools, Customize, Toolbars, and check the box for the Controls toolbar. This toolbar has icons representing various controls that you can put into your application's interface. To see what an icon represents just place the mouse pointer on the icon for a second or two and a brief description will appear. Click on View, Full Screen. This allows you to see your application's window better while building the interface. (You can get out of Full Screen at any time by pressing the ESC key.) Drag the lower right corner of your application's window to make your application's window about 5 inches wide and 4 inches high. Click on the group box control on the Controls toolbar, then click in the upper left of your application window. Move the group box around so that it fits nicely in this corner. You do this by moving the mouse until you get a 4-headed arrow pointer. You can then drag the control. Also drag the edge of the group box (get the mouse pointer on the edge so that it changes to a 2-headed arrow) so that the group box essentially fills the top half of your application window. Right click the group box and click on Properties. Change the caption to "Fill in the length and width:" and then close the Properties box. Click on the Static Text control in the Controls toolbar. Then click in the left quarter of the group box. Move this text control so that it fits reasonably. Right click it and select Properties. In Properties change the caption to "Length:" and then close the Properties box. Drag the edges of the text control as needed so that the caption shows. Click on the "Edit Box" control on the Controls toolbar, then click to the right of the text control labeled "Length:". Move the edit box so that it lines up with this text control, but make sure that the 2 controls do not overlap. (Click on each in turn and watch where their edges are.) Then right click the edit box and select Properties. Change the name (ID) to "IDC_LENGTH_EDIT" and then close Properties. Note that an edit box is a place where the user can type in data and where the application can display data. In a similar way, place a Static Text control in the left half of the group box (below the previous static text control) and change its caption to "Width:". Just to the right of it place an Edit Box and change its name to "IDC_WIDTH_EDIT". Be sure that none of the 4 controls overlaps with another one. Much like before, place another group box control onto your application's window, but this time move and resize it to fill the bottom half of the window. Change the caption of this group box to "Click Calculate button to get the area:". Click on the "Button" control on the Controls toolbar and then click in the top middle of this new group box. This will place a button at this position. Right click this button, select Properties, and change the name (ID) to IDC_CALCULATE_BUTTON and the caption to "Calculate:". Place a Static Text control on the bottom left of this group box. Change its caption to "Area:". Place an Edit Box control just to the right of this text, just under the Calculate button. Change the name (ID) of this edit box to "IDC_AREA_EDIT". Press ESC to get out of Full Screen viewing mode. Use File, Save All (or the appropriate button on the toolbar) to save the work that you have done so far. We are now done with visually designing the user interface. The primary remaining steps are these: to associate some variables with the edit boxes and to attach some code to the Calculate button. 4) Adding Variables Associated with the ControlsVariables are used to contain data that the user places in the edit boxes. Variables can also be used to hold data that we wish to place into an edit box (or other control). Click on View, ClassWizard, Member Variables. This brings up the section of the ClassWizard that allows you to add variables associated with the controls on the user interface. Make sure that the project name and class name are correct. (The class name should be CAreaDlg for this example.) Click on IDC_LENGTH_EDIT to select the length edit box. Click Add Variable. Then in the Add Member Variable window fill in m_LengthEdit as the variable name. The category box should say Value, and the variable type should be set to float. Change these if need be to get Value and float. Then click on OK. In the same way, select IDC_WIDTH_EDIT and associate with it a float variable named m_WidthEdit. Then select IDC_AREA_EDIT and associate with it a float variable named m_AreaEdit. Do not associate a variable with the Calculate button. Finally, click on OK at the ClassWizard screen, then click on File, Save All. 5) Attaching Code to the ButtonSelect View, ClassWizard, Message Maps. This will show you the Messsage Maps section of the ClassWizard. Make sure that the class name shown is correct (CAreaDlg in this case). Click on IDC_CALCULATE_BUTTON to select it. Under Messages click on BN_CLICKED. Click on Add Function and then on OK to accept the suggested function name. This function is to contain the code that will be executed when the user clicks on the Calculate button. Next click on Edit Code. This will bring up the appropriate code file with an outline of the above function. Type the following code between the braces for this function:
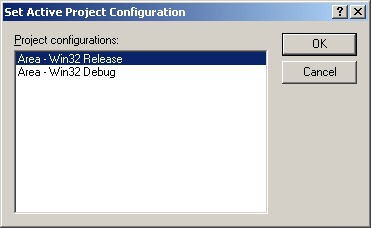
Then use File, Save All to save your work. Note that the UpdateData function is used to copy data between your variables and the on-screen controls. UpdateData(TRUE) copies the data from the controls (edit boxes in this case) to the variables. UpdateData(FALSE) copies data in the reverse direction, from the variables to the controls. In this case, since the second line has put a new value into m_AreaEdit, it is this value which gets copied into the area edit box. (The length and width values are also copied into their boxes, but this doesn't change anything.) 6) Compiling and Running Your ApplicationSelect Build, Build area.exe. Watch at the bottom for any error messages. If there are errors, fix them. If not, you can run your application by clicking on the ! button on the toolbar. Just fill in a length and width, click on the Calculate button, and you should have an area shown in the user interface. Of course you can do this as many times as desired. When ready to quit, click on the x close button in the upper right corner of the application. Once your program is running correctly, you can switch from the Debug version to the Release version. Select Build, Set Active Configuration. Select Area - Win32 Release (as opposed to Win32 Debug). Then click on OK. Rebuild your project by using Build, Build area.exe. The compiled program (the area.exe file) will probably be smaller in size and run faster as it does not include the code needed for running the debugger. The .exe file for the Release version is located in the Release directory, while the one for the Debug version is in the Debug directory -- both located inside the project directory. 7) For Further Practice (Optional)If you like you can add a Clear button to the above application. Clicking on it should place zeros into the 3 edit boxes. Another possibility would be to design a calculator application. It could be designed with an accumulator box and a value box (where the user could place a new number). There could be buttons for add, subtract, multiply, and divide. Subtract, for example, would subtract the number in the value box from the value in the accumulator and place the answer back into the accumulator. The other arithmetic operations would work in a similar manner. A different calculator design would follow the stack algorithm for evaluating a postfix expression. Here you could have an edit box showing the top of stack item and a value box for entering a new number. You could have a button to click on to push the new number onto the stack as well as buttons for +, -, *, and /. For example, the + button should cause 2 items to be popped from the stack, the sum computed, and the result pushed onto the stack. A somewhat better design for a postfix calculator would have an edit box where you could place the entire postfix expression all at once. Another edit box would be needed to show the value of the expression. A third edit box could be used to display any error message. You would need a Calculate button and might like to have a Clear button for clearing out the edit boxes. You could also create a calculator that would accept an ordinary infix expression, such as (4 + 12) / 3, and display its value. This would involve first converting the infix expression to postfix, and then using the above stack algorithm to find the value of the postfix expression. Since the sample conversion code uses the STL (standard template library) for creating a stack, you would probably want to use an STL-based stack for the evaluation algorithm as well. Related ItemDialog-Based Interface with Visual C++ .NET Back to the main page for Software Design Using C++ |
Computing & Information Systems |
|

 Search CIS Site
Tutorials
Search CIS Site
Tutorials
|