Using Cookies
Introduction
Cookies can be used to maintain information about a user's browser session either while the session
is in operation or on a somewhat more permanent basis. In the first case the cookie is simply kept in RAM.
In the latter the cookie is stored on disk. A cookie is often sent by the server to the user's PC and
used to store on disk the user's preferences for that particular web site. Whenever the user browses
to this server, the previously stored cookie is sent to the server in the header
of the web request. Thus the web application
on the server can read the user's preferences or whatever was stored in that cookie. Note that
it is possible for users to tamper with cookies, which implies that cookies are not the method of
choice if security is an issue. Also, note that some users do not allow the use of cookies by
their browsers. You can, of course, warn the user at the start of a browsing session that they
must turn on the use of cookies. Still, if all you need is to maintain state information during the
active session, the HttpSessionState approach would seem to be the better choice.
The Goals for this Example
The main goal is to become familiar with the use of cookies for preserving state information.
As an example, we will modify our previous web app, the one
that used HttpSessionState to keep track of session information, so that a session cookie (one
stored only in RAM) is used instead. We will also learn how to set up a cookie on disk with
a specific expiration date.
Making the Modified Web App
What the App Should Do
- Like the previous web app, this one will display auto parts data
that fits the price range that the user inputs.
- The user should not see any difference between the new app and the previous one.
- As before, the user begins with a page in which to enter the desired price range.
- When the "List Matches" button is clicked, the web app shows the
selected auto parts data on a new page.
|
Copying the Previous Web App
- It is simplest just to have Visual Studio produce a copy of the
previous web app, though you can instead build a new
one from the start in a different folder. We assume here that you choose to copy.
- Have the previous web app open in Visual Studio.
- Then use Project, Copy Project to create a new copy of your project.
Be sure to tell it to copy all files belonging to your project.
Use an appropriate URL as the place to which to copy, such as one of these:
- https://cis3.stvincent.edu/studentc/StoreCookie
- http://cis2.stvincent.edu/studentc/StoreCookie
- Use File, Close Solution to close the old project.
- Then use File, Open, Project From Web.
- Pick the URL that you want to go to in finding the new project. It will be something
like one of the following:
- https://cis3.stvincent.edu/studentc
- http://cis2.stvincent.edu/studentc
- Find and open your new project.
- In Solution Explorer, right click on the project. Change the name of the project
to StoreCookie. (This step is optional, but might help you to keep track of the
several versions of the same application.)
- Save your work so far by using File, Save All.
|
The Code for home.aspx.vb
- We are going to experiment a bit with cookies before we reach the final version
of the code for this and for results.aspx.vb.
- In Solution Explorer double click on home.aspx.vb, the "code-behind" file for your web form,
to bring it up in the editor.
- Start out with the following code in the Page_Load procedure:
|
Private Sub Page_Load(ByVal sender As System.Object, ByVal e As System.EventArgs) _
    Handles MyBase.Load

    'Put user code to initialize the page here
    Dim Min, Max As String
    Dim Cookie1, Cookie2 As HttpCookie

    If IsPostBack Then
        Page.Validate()
        If Page.IsValid Then
            Min = MinTextBox.Text.ToString()
            Max = MaxTextBox.Text.ToString()
            Cookie1 = New HttpCookie("MinCookie")
            Cookie2 = New HttpCookie("MaxCookie")
            Cookie1.Value = Min
            Cookie2.Value = Max
            Response.Cookies.Add(Cookie1)
            Response.Cookies.Add(Cookie2)
            Response.Redirect("Results.aspx")
        End If
    End If
End Sub
|
- Our code uses 2 cookies, one to contain the minimum price and one for the maximum.
Later we will improve this by putting both values into one cookie, but the 2 cookie
method is easier to code, so we start with it.
- The
Cookie1 = New HttpCookie("MinCookie") line creates a new cookie with
the name given by the string "MinCookie".
- This cookie is then given an associated value using
Cookie1.Value = Min.
- Note that both the name and value in a cookie are always strings.
- Then we use
Response.Cookies.Add(Cookie1) to add this cookie to the response
from the server to the user's browser session.
- To be more precise, the
Response.Redirect("Results.aspx") sends a response to
the user's browser telling it to request the Results.aspx page. This response contains the
2 cookies. When the browser then requests the Results.aspx page, the 2 cookies are sent
back to the server with this request. Thanks to these cookies, the Results.aspx.vb code
will have access to the maximum and minimum prices.
- These cookies are stored in RAM at the user's PC throughout this session.
- Note clearly that the minimum and maximum prices are kept, if only briefly, on the user's
PC, not the server. They simply get sent to the server along with each request from the
user's browser to that server.
|
The Code for Results.aspx.vb
- Since part of our goal is to learn how cookies work, let's temporarily add a label
to the Results.aspx form. Name it DebugLabel and set its text field to "Debug".
We will use this label to display cookie information.
- In Solution Explorer double click on Results.aspx.vb, to get it into the editor.
- As before, this is where we get the desired data from the database and display it. Note that
we only need to do this the first time we go to this web page.
- Make your Page_Load procedure match the following:
|
Private Sub Page_Load(ByVal sender As System.Object, ByVal e As System.EventArgs) _
    Handles MyBase.Load
    'Put user code to initialize the page here
    Dim Min, Max As String

    NoDataLabel.Visible = False
    DataGrid1.Visible = True

    If Not IsPostBack Then
        Dim Cookies As HttpCookieCollection
        Dim k As Integer

        Cookies = Request.Cookies

        If (Cookies Is Nothing) Then
            NoDataLabel.Visible = True
            DataGrid1.Visible = False
        Else
            Try
                Dim DebugMsg As String
                DebugMsg = "Debug "
                DebugMsg = DebugMsg & Cookies.Count.ToString
                For k = 1 To Cookies.Count - 1
                    If (Cookies(k).Name = "MinCookie") Then
                        Min = Cookies(k).Value
                        DebugMsg = DebugMsg & " " & Min
                    ElseIf (Cookies(k).Name = "MaxCookie") Then
                        Max = Cookies(k).Value
                        DebugMsg = DebugMsg & " " & Max
                    End If
                Next
                DebugLabel.Text = DebugMsg
                SqlConnection1.Open()
                SqlDataAdapter1.SelectCommand.Parameters("@Min").Value = Min
                SqlDataAdapter1.SelectCommand.Parameters("@Max").Value = Max
                SqlDataAdapter1.Fill(dTable)
                If dTable.Rows.Count = 0 Then
                    NoDataLabel.Visible = True
                    DataGrid1.Visible = False
                Else
                    DataView1 = New DataView(dTable)
                    DataGrid1.DataBind()
                End If
            Catch exception As System.Data.SqlClient.SqlException
                ErrorLabel.Visible = True
            Catch exception As Exception
                ErrorLabel.Visible = True
            Finally
                SqlConnection1.Close()
            End Try
        End If
    End If
End Sub
|
- We use
Request.Cookies to get a collection of all cookies associated with this
user accessing this domain (which specifies the server, as with the example domain
cis2.stvincent.edu).
- Note how we build up a message string containing information about the cookie.
This includes Cookies.Count, the count of the number of cookies in the collection.
- Recall here that & is used to append 2 strings.
- We then loop through the cookies in the collection, copying the cookie value into Min when
we find a cookie with name "MinCookie" and copying the cookie value into Max when we find a cookie
with name "MaxCookie".
- We also append Min and Max to our DebugMsg string.
- We then display this string of information by copying it into the Text field of our DebugLabel.
- The code to do the database query is the same as before.
|
Try the Test App
- Save all of your files in Visual Studio.
- Then use Build, Build StoreCookie (or whatever you named your application).
- Fix any problems until you get the build to succeed.
- Try your test app in a browser by giving a range of prices such as 5 through 35.
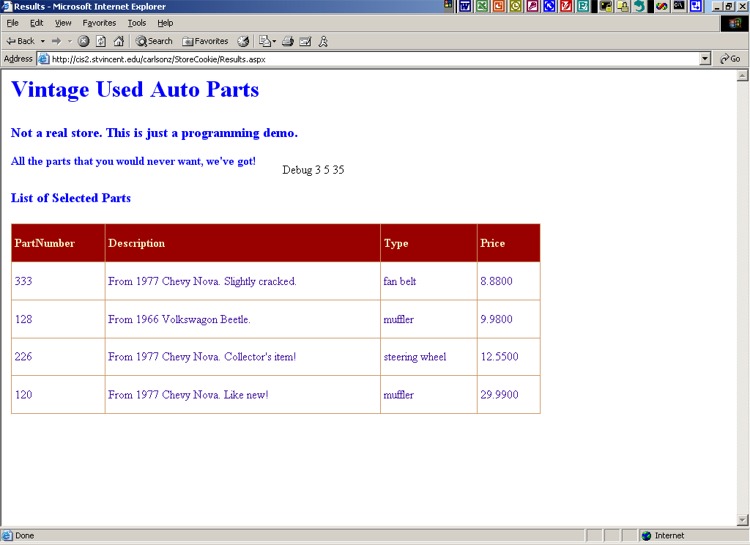
- Besides seeing the matching data on the Results.aspx form,
you should notice "Debug 3 5 35" appearing in the position of the DebugLabel.
- This means that 3 cookies were in the collection, that the minimum price was 5, and the
maximum price was 35.
- You might wonder why 3 cookies were found. This is because there is always a cookie with the
name ASP.NET_SessionId. The other 2 cookies are the ones that we explicitly created.
|
Improving the Use of Cookies
- We have already mentioned that we should be able to keep both the min and max in one cookie.
Let's see how to do that.
- Change your Page_Load procedure in home.aspx.vb to match the following:
|
Private Sub Page_Load(ByVal sender As System.Object, ByVal e As System.EventArgs) _
    Handles MyBase.Load

    'Put user code to initialize the page here
    Dim Min, Max As String
    Dim Cookie As HttpCookie

    If IsPostBack Then
        Page.Validate()
        If Page.IsValid Then
            Min = MinTextBox.Text.ToString()
            Max = MaxTextBox.Text.ToString()
            Cookie = New HttpCookie("StoreCookie")
            Cookie.Values("MinValue") = Min
            Cookie.Values("MaxValue") = Max
            Response.Cookies.Add(Cookie)
            Response.Redirect("Results.aspx")
        End If
    End If
End Sub
|
- We use the name "StoreCookie" for our cookie.
- The code
Cookie.Values("MinValue") = Min places a pair of items into the cookie.
Specifically, the pair associates the key "MinValue" with the value given by the Min variable.
- Next, change the Page_Load procedure for Results.aspx.vb to the following:
|
Private Sub Page_Load(ByVal sender As System.Object, ByVal e As System.EventArgs) _
    Handles MyBase.Load

    'Put user code to initialize the page here
    Dim Min, Max As String

    If Not IsPostBack Then
        Dim Cookies As HttpCookieCollection
        Dim k, n As Integer
        Dim Values As System.Collections.Specialized.NameValueCollection

        Cookies = Request.Cookies

        If (Cookies Is Nothing) Or (Cookies.Count = 1) Then
            NoDataLabel.Visible = True
            DataGrid1.Visible = False
        Else
            NoDataLabel.Visible = False
            DataGrid1.Visible = True

            Try
                For k = 1 To Cookies.Count - 1
                    If (Cookies(k).Name = "StoreCookie") Then
                        Values = Cookies(k).Values
                        Min = Values.GetValues("MinValue")(0)
                        Max = Values.GetValues("MaxValue")(0)
                    End If
                Next
                SqlConnection1.Open()
                SqlDataAdapter1.SelectCommand.Parameters("@Min").Value = Min
                SqlDataAdapter1.SelectCommand.Parameters("@Max").Value = Max
                SqlDataAdapter1.Fill(dTable)
                If dTable.Rows.Count = 0 Then
                    NoDataLabel.Visible = True
                    DataGrid1.Visible = False
                Else
                    DataView1 = New DataView(dTable)
                    DataGrid1.DataBind()
                End If
            Catch exception As System.Data.SqlClient.SqlException
                ErrorLabel.Visible = True
            Catch exception As Exception
                ErrorLabel.Visible = True
            Finally
                SqlConnection1.Close()
            End Try
        End If
    End If
End Sub
|
- We begin by requesting the cookies as before.
- This time we improve our testing. If the number of cookies is 1, then we know that
all that is present is that one automatic cookie named ASP.NET_SessionId. If this is the
case then we display an error message.
- Otherwise, we loop through the cookies looking for one named "StoreCookie", the one we
created in the other page. If we find it, we copy its data into Values, which has type
NameValueCollection.
- You might want to look up NameValueCollection under Help, Search.
- The GetValues function can be used to return an array of string values that are associated
with a given key. Our first use of this finds the values associated with the "MinValue" key.
- Although we only have 1 associated value, since the above gives an array, we must use index 0
to find our Min value in the array.
- We handle Max in the same kind of way.
- We could improve our error handling by checking to see if GetValues returns Nothing. If so,
we could then display an error message instead of trying to do a database lookup.
Also, if no cookie named "StoreCookie" is found, we could display an error message.
To keep our example short, we skip this detailed error checking.
- On the Results.aspx form, remove the DebugLabel as we no longer need it.
|
Try the New App
- Save everything and build your new app.
- Try it out in your browser. It should work just the same as the earlier version.
- If you try this version of the app (or the earlier version that used 2 cookies), you
might notice the following:
- Open a second browser window (use File, New in most browsers).
- Do a lookup in the first browser window of all parts between 0 and 50 in price.
- Then do a lookup in the second browser window of all parts between 60 and 600 in price.
- Then return to the first browser window. Press the back button and then the forward
button of the browser.
- This time you see the results from the second browser's database lookup.
- The reason for this is that your PC keeps only the latest cookie for this user accessing
the given domain (server).
- Our previous app that used HttpSessionState behaves the same way,
though without the use of cookies, of course.
|
Experimenting Further with Cookies
- Although the above is our good version of the cookie-based web application, let's do a little
experimenting with cookies that are saved to disk.
- Change the code in home.aspx.vb to the following:
|
Private Sub Page_Load(ByVal sender As System.Object, ByVal e As System.EventArgs) _
    Handles MyBase.Load

    'Put user code to initialize the page here
    Dim Min, Max As String
    Dim Cookie As HttpCookie

    If IsPostBack Then
        Page.Validate()
        If Page.IsValid Then
            Min = MinTextBox.Text.ToString()
            Max = MaxTextBox.Text.ToString()
            Cookie = New HttpCookie("StoreCookie")
            Cookie.Values("MinValue") = Min
            Cookie.Values("MaxValue") = Max
            Dim dt As DateTime = DateTime.Now()
            Dim ts As New TimeSpan(0, 0, 10, 0)
            Cookie.Expires = dt.Add(ts)
            Response.Cookies.Add(Cookie)
            Response.Redirect("Results.aspx")
        End If
    End If
End Sub
|
- This code uses the Now function to look up the current time on the server.
- We then set the Expires field of our cookie to be this current time with 10 minutes added to it.
This means that our cookie will be kept on the user's PC until about 10 minutes from when the cookie
was created on the server.
- Note that a TimeSpan object represents a time interval and that the 4 parameters used in the
above constructor are days, hours, minutes, and seconds.
- By default, cookies are "session cookies", ones that are kept only in RAM. However, if you
set the Expires field to any value other than the default value (known as DateTime.MinValue),
you get a cookie that is stored on disk at the user's PC.
- Thus our 3 new lines of code change our application from using a session cookie to using a cookie
that is stored on disk.
- If you are using Internet Explorer on your PC, look for the cookie in a location similar to:
C:\Documents and Settings\studentc\Cookies\studentc@cis3.stvincent[1].txt
- Open this cookie with WordPad. You should see something like the following as the contents:
|
StoreCookie
MinValue=2&MaxValue=55
cis2.stvincent.edu/
1024
1494840704
29617626
4087775296
29617624
*
|
- Note that the name of the cookie (StoreCookie), the values (here the minimum price of 2 and the maximum
price of 55), and the domain (cis2.stvincent.edu) are all present.
- If you are using Mozilla FireFox as your browser, you will find all of your cookies in one file.
The location is something like this, with xyz replaced by other characters:
|
C:\Documents and Settings\studentc\Application Data\Mozilla\Firefox\Profiles\xyz.default
|
- The data in this cookies file might look like the following, though probably with many more
lines of data for other cookies:
|
# HTTP Cookie File
# http://www.netscape.com/newsref/std/cookie_spec.html
# This is a generated file!  Do not edit.
# To delete cookies, use the Cookie Manager.

cis3.stvincent.edu   FALSE   /   FALSE   1106878557   StoreCookie   MinValue=12&MaxValue=600
|
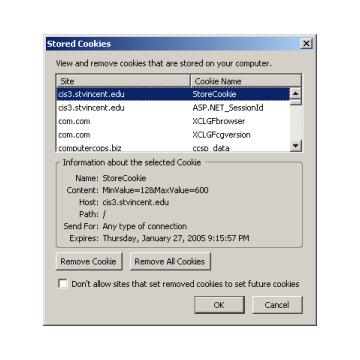
- You can also view this cookie with FireFox itself. To do so, use Tools, Options,
Privacy, Cookies, View Cookies. Then click on the cookie for your site (such as
cis3.stvincent.edu). You can then see some of the information on
this cookie, but you do not see the MinValue and MaxValue.
- If you try to use this version of the app in two separate browser sessions you will see that
it has the same behavior as before. One browser window may display the results from the other.
This is again because only one cookie is kept for the given user and domain. You can, in fact,
see this if you watch the list of cookies by pointing MyComputer at the directory containing
your cookies. As soon as you do a new database lookup, the new cookie replaces the old one.
- Note that your browser will normally only send a cookie back to the server that created it. However,
attackers can sometimes read cookies that they should not be able to access, so don't use
a cookie as a place to keep sensitive information (though you could encrypt your information
if you really needed to store it in this type of cookie).
|
Cleanup
- Take out the 3 lines that we added to home.aspx.vb in order to have our cookie saved to disk.
- Save everything and rebuild your application.
- Check that it still works. This is our final version of the cookie-based app.
|
|

 Search CIS Site
Tutorials
Search CIS Site
Tutorials